

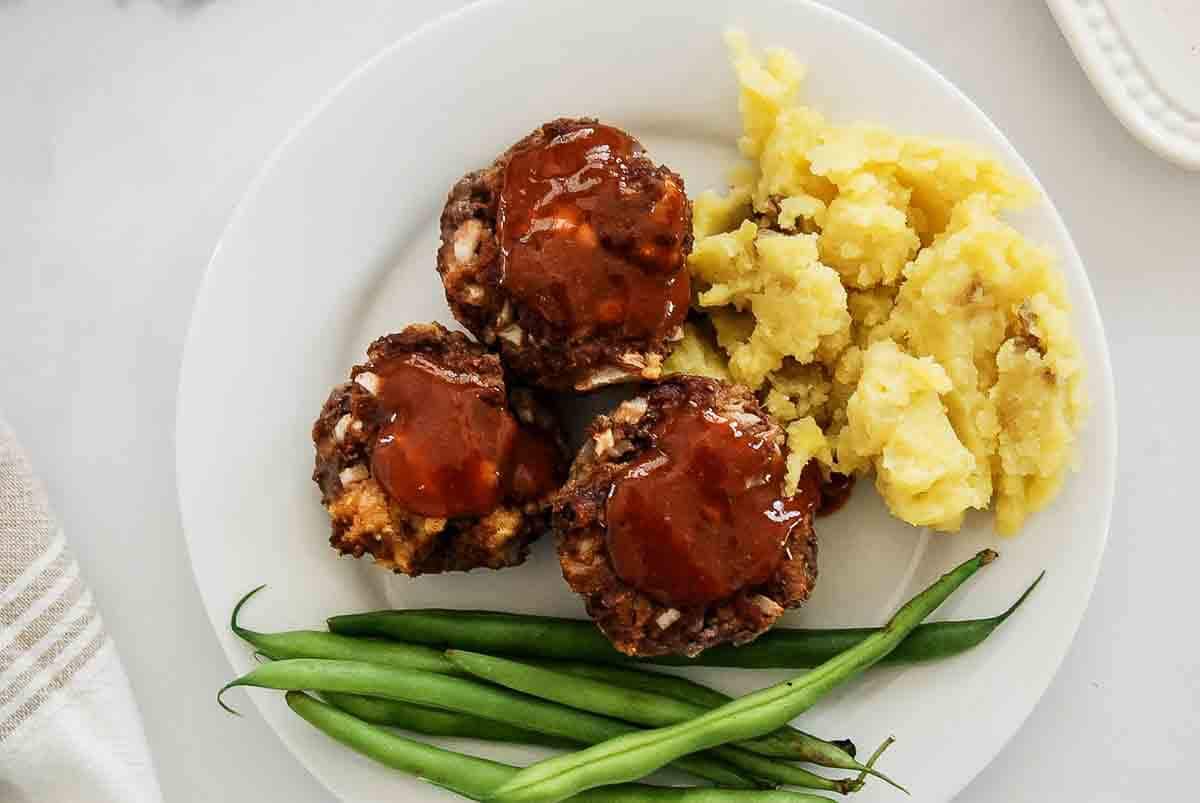
This easy Mini Meatloaf bakes in a muffin tin in just 25 minutes with crispy edges, a caramelized brown sugar glaze, and the same classic flavor you love. Perfect for meal prep and great for freezing.
A Quick Look at the Recipe
👩🏻🍳 Recipe Name: Mini Meatloaf Recipe
⏱️ Ready In: 35 minutes
🧑🧑🧒 Makes: 18 mini muffins
🍴Calories: ~141 (estimated)
🥣 Main Ingredients: Ground Beef, breadcrumbs, seasoning
🍲 Flavor Profile: Savory and filling. The perfect comfort food!
🎯 Difficulty: Easy
We are a meatloaf family. I don't know what it is, but it feels like meatloaf night always makes everything feel a little more okay - no matter what kind of day we've had, no matter how stressful or long or just plain hard, when we all sit down together to a plate of meatloaf and mashed potatoes, everything settles. It's our comfort meal. The one I know my kids will remember long after they've grown up and moved out of my house.
My Lipton Onion Soup Meatloaf and my Traditional Meatloaf Recipe are the classics we come back to again and again. But a full-size meatloaf takes the better part of an hour and a half from start to finish, and let's be honest, some nights (the very nights you need comfort food the most!) that kind of time just isn't there.
Enter the muffin tin.
These mini meatloaves bake in 25 minutes, give everyone their own perfectly portioned piece, and are one of my favorite things to make ahead and freeze. On a chaotic Tuesday, pulling a few of these out of the freezer while a pot of mashed potatoes comes together on the stove feels like a lifesaver. Same comfort, same flavor, a fraction of the time.
In This Post
- A Quick Look at the Recipe
- Why You'll Love This Mini Meatloaf Recipe
- Key Ingredients
- How To Make Mini Meatloaf
- Tips For The Best Mini Meatloaf
- Variations Worth Trying
- What to Serve With Mini Meatloaf
- Make Ahead, Storage And Freezing
- Frequently Asked Questions
- More Delicious Comfort Meals To Try
- Recipe
- Comments
Why You'll Love This Mini Meatloaf Recipe
- Cooks in 25 minutes. A regular meatloaf runs 60-75 minutes. These babies are done in a fraction of the time, which on a weeknight makes a real difference.
- Built for the freezer. Bake a batch, wrap them individually, and you've got grab-and-go dinners ready for weeks. Already portioned, no guesswork, no thawing out more than you need.
- Crispy edges on every single one. The muffin tin gives you more surface area, which means more caramelization and a glaze that actually sticks - not just on the end pieces.
- Works great for sandwiches too! These mini meatloaves are great sliced lengthwise and piled onto a Meatloaf Sandwich. Delish!
Key Ingredients
You can find the full list of ingredients below in the recipe card, but here are some standouts worth mentioning:
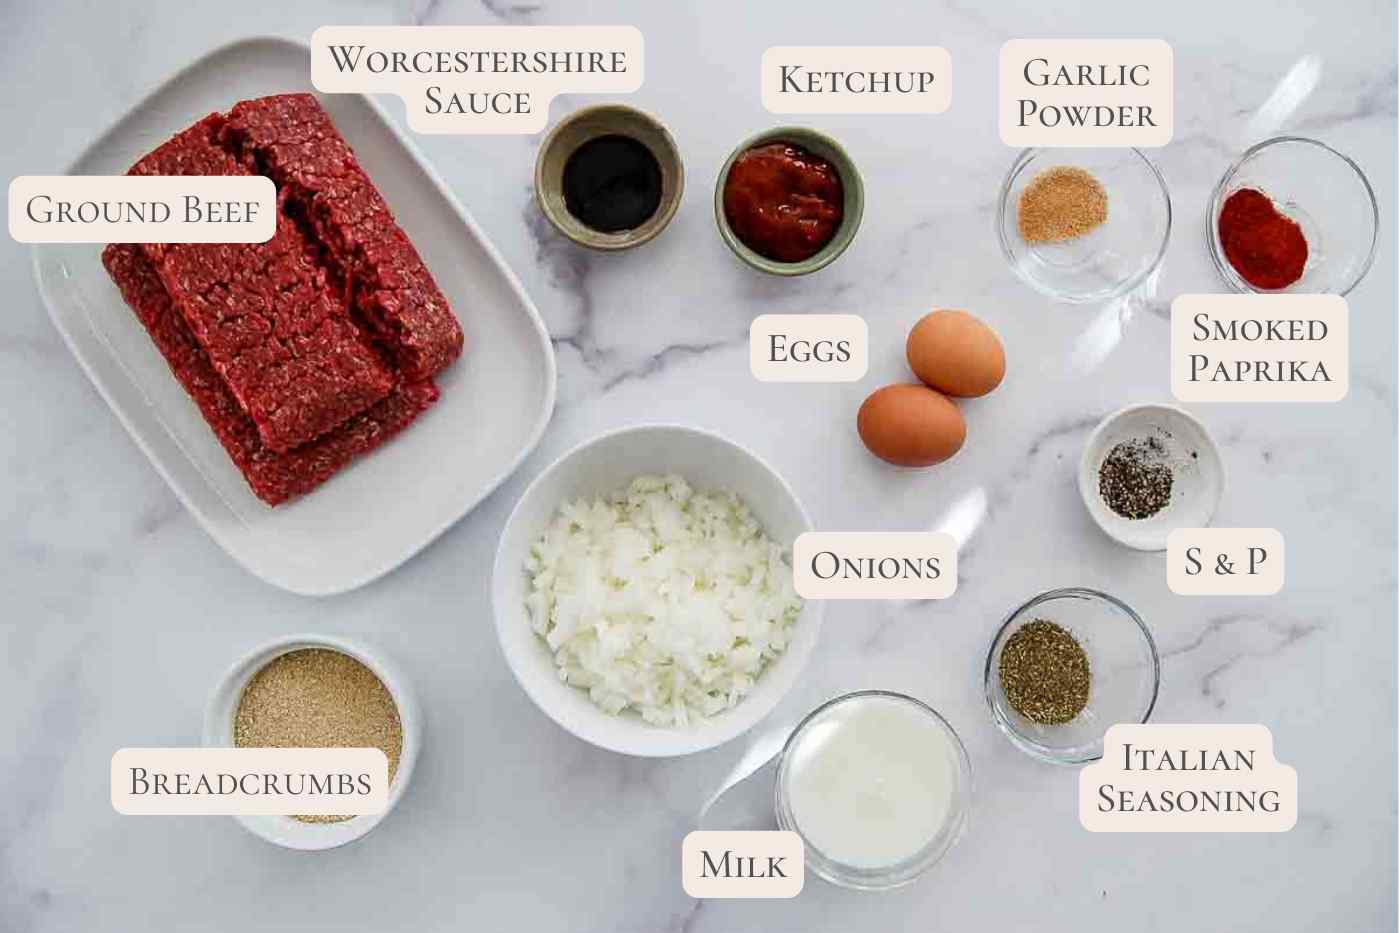
- Ground beef. 90/10 is the sweet spot here. I'd typically recommend a higher fat content (85/15) for a normal-sized meatloaf, but when making these mini ones in muffin tins, you want less fat because it will all drain to the bottom of the tin and can create a soggy meatloaf bottom. If you want, you can also mix in some ground pork - I'm a huge fan of half beef, half pork in meatloaf. It adds a layer of richness and a slightly sweeter flavor that's hard to beat.
- Breadcrumbs. Regular breadcrumbs, not Panko - and I know that feels like a small thing, but it genuinely matters here. Panko is coarser and drier so it doesn't absorb liquid the same way. Regular breadcrumbs soak up the milk and eggs to form what's called a panade, which keeps the meat tender and holds everything together so the mini meatloaves don't crumble when you lift them out of the tin. It's a simple swap that makes a real difference in the final texture when making the meatloaf in muffin tins. If you don't have breadcrumbs, subbing them out with oatmeal is another solid option.
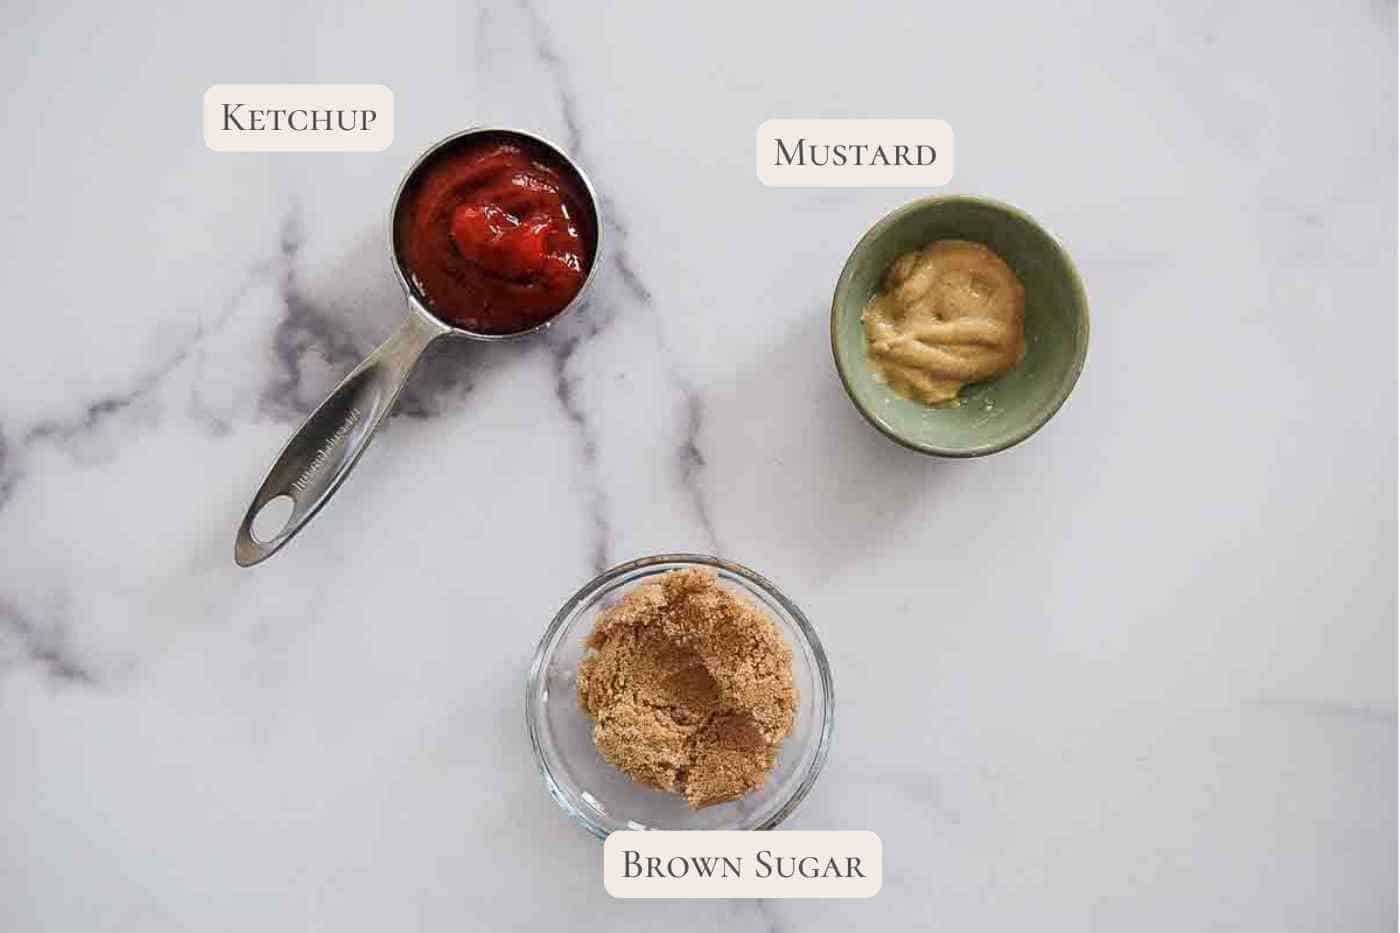
- The glaze. I'm using a simple ketchup, brown sugar, and Dijon glaze here since these little muffins are meant to be easy. It's a classic combo and caramelizes beautifully. If you want something a touch more involved, my standard meatloaf glaze is a step up and absolutely worth it.
- Seasonings. Make a big batch of meatloaf seasoning to use in this and other meatloaf recipes.
How To Make Mini Meatloaf

Step 1: Prep and make the panade. Set your oven to 375°F and grease a 12-cup muffin tin well with cooking spray, including the sides. (This is not the time to be stingy with the spray - you want your meatloaf to easily spring out of the tins.) In a small bowl, combine the breadcrumbs, milk and eggs. Stir until the breadcrumbs are fully soaked, then let the mixture sit for 5 minutes. Don't rush this step - the rest time is what lets the breadcrumbs fully hydrate so you don't end up with dry pockets in the finished meatloaf. (You can see the panade in the bowl above with the rest of the meatloaf ingredients.)
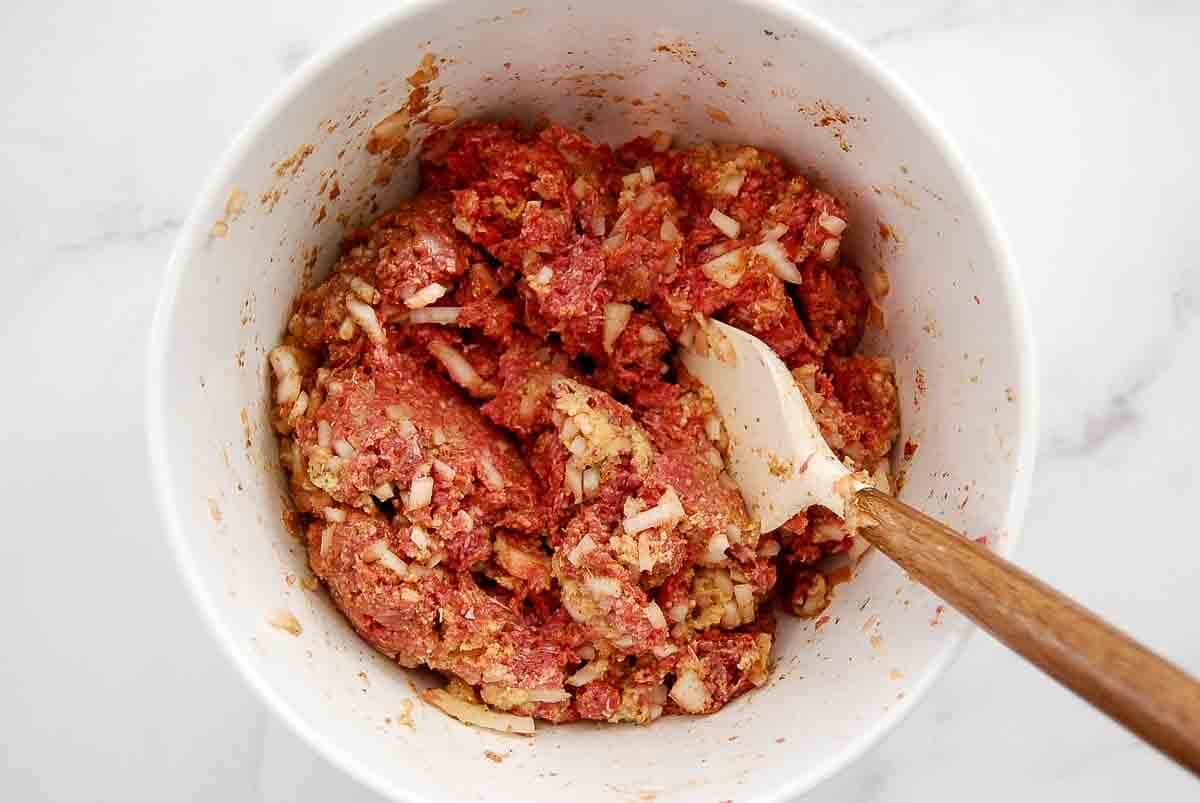
Step 2: Mix the meatloaf. Add the ground beef, panade, minced onion, ketchup, Worcestershire sauce, garlic powder, smoked paprika, Italian seasoning, salt, and pepper to a large bowl. Mix gently until just combined (feel free to use your hands - it's easier!). The moment you don't see any more dry streaks, stop. Overmixing makes the meat dense and tough.
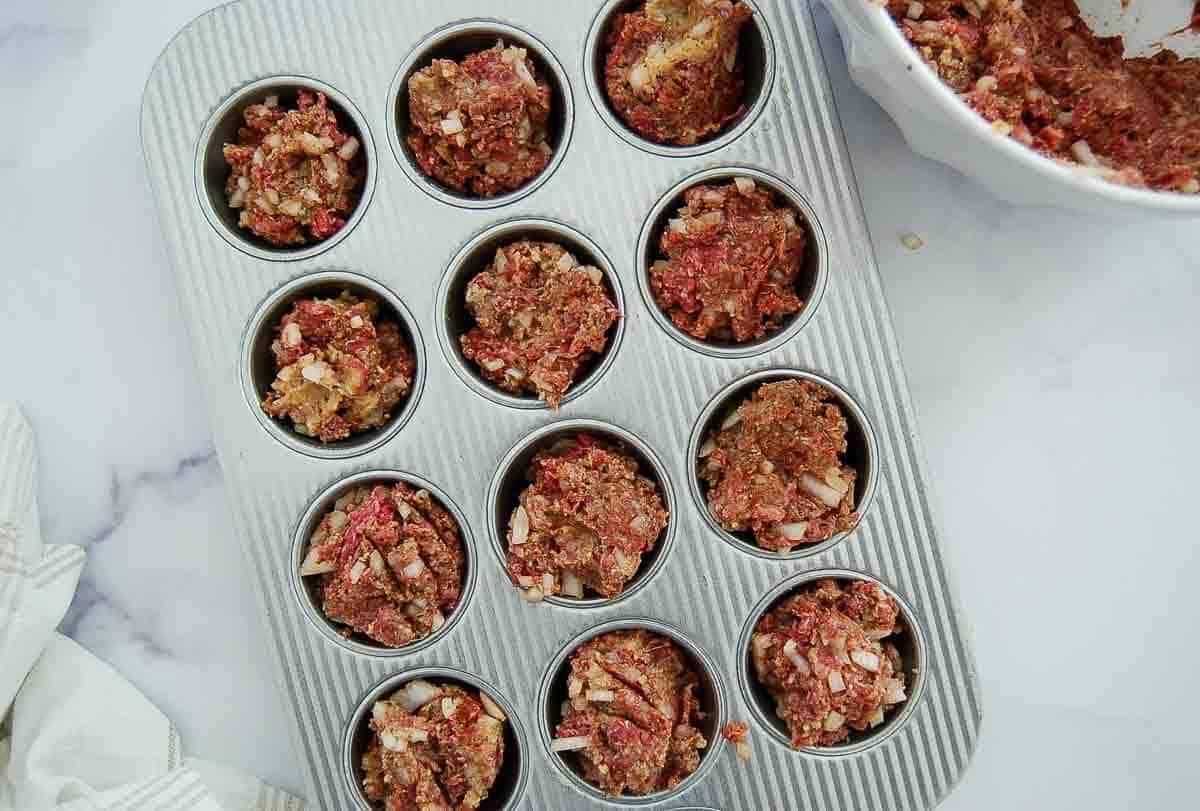
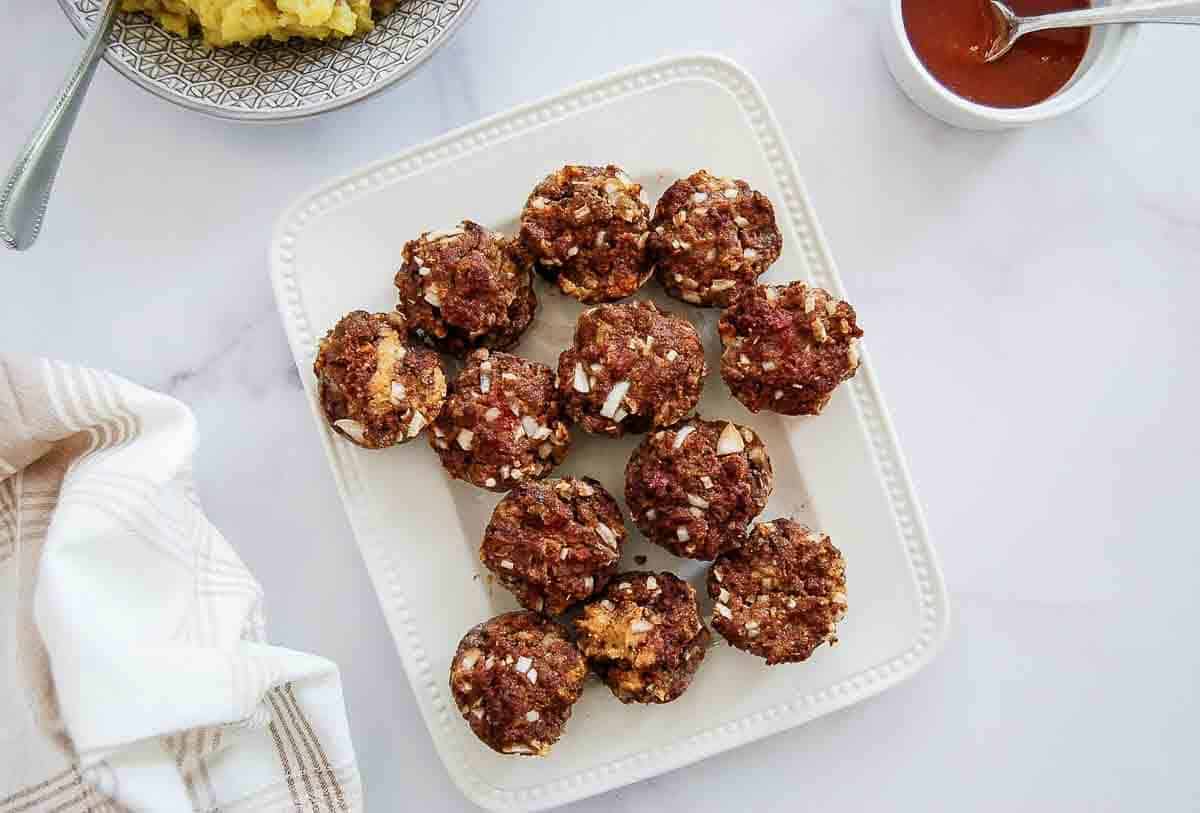
Step 3: Fill the muffin tin. Divide the meat mixture evenly among the 12 cups. Drop the portions in gently and don't press them into the corners - you want a little space around the sides so steam can escape during baking. This helps to keep the bottoms from getting too soft.
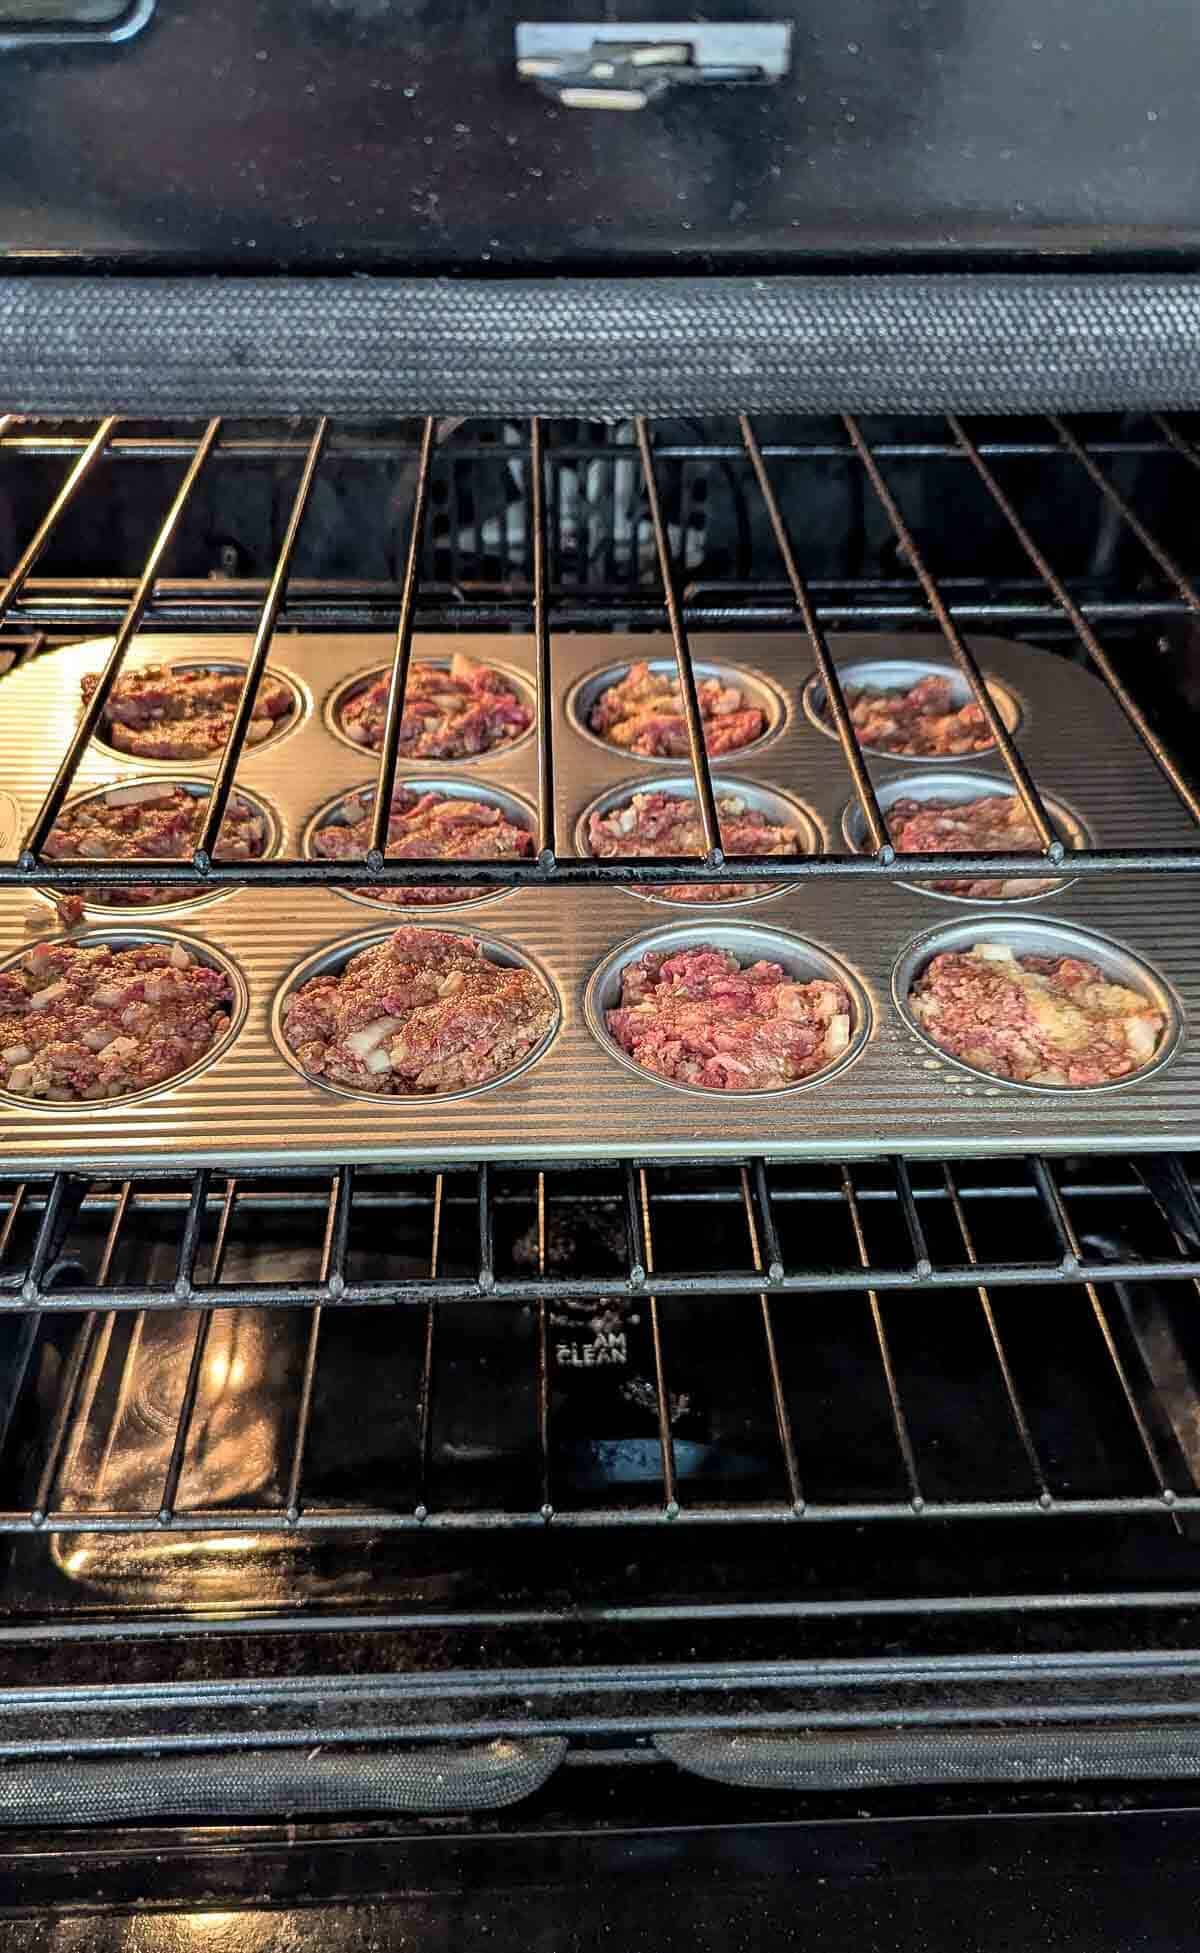
Step 4: Bake. Bake for 25-30 minutes, or until a meat thermometer inserted into the center reads 160°F.
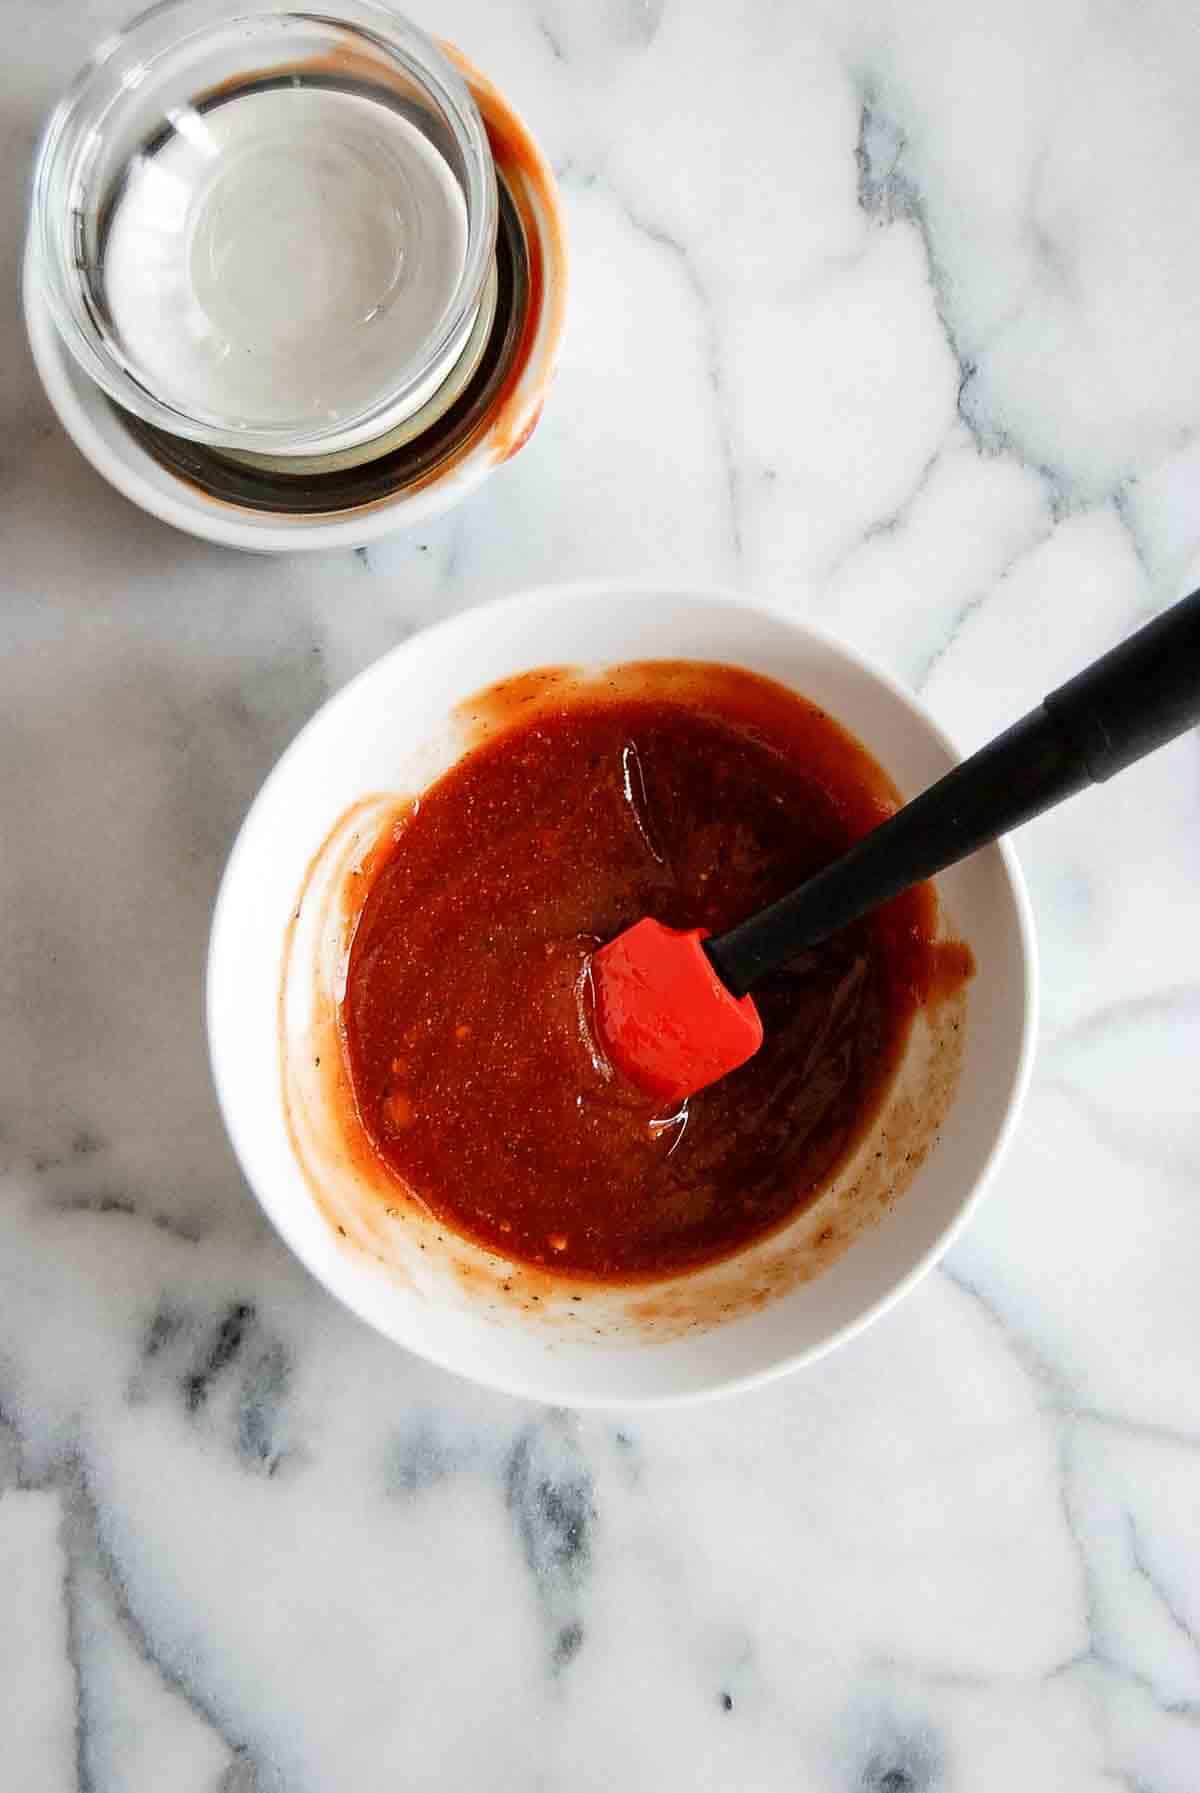
Step 5: Make the glaze. While the mini meatloaf is baking, stir together the ketchup, brown sugar, and Dijon in a small bowl until smooth.
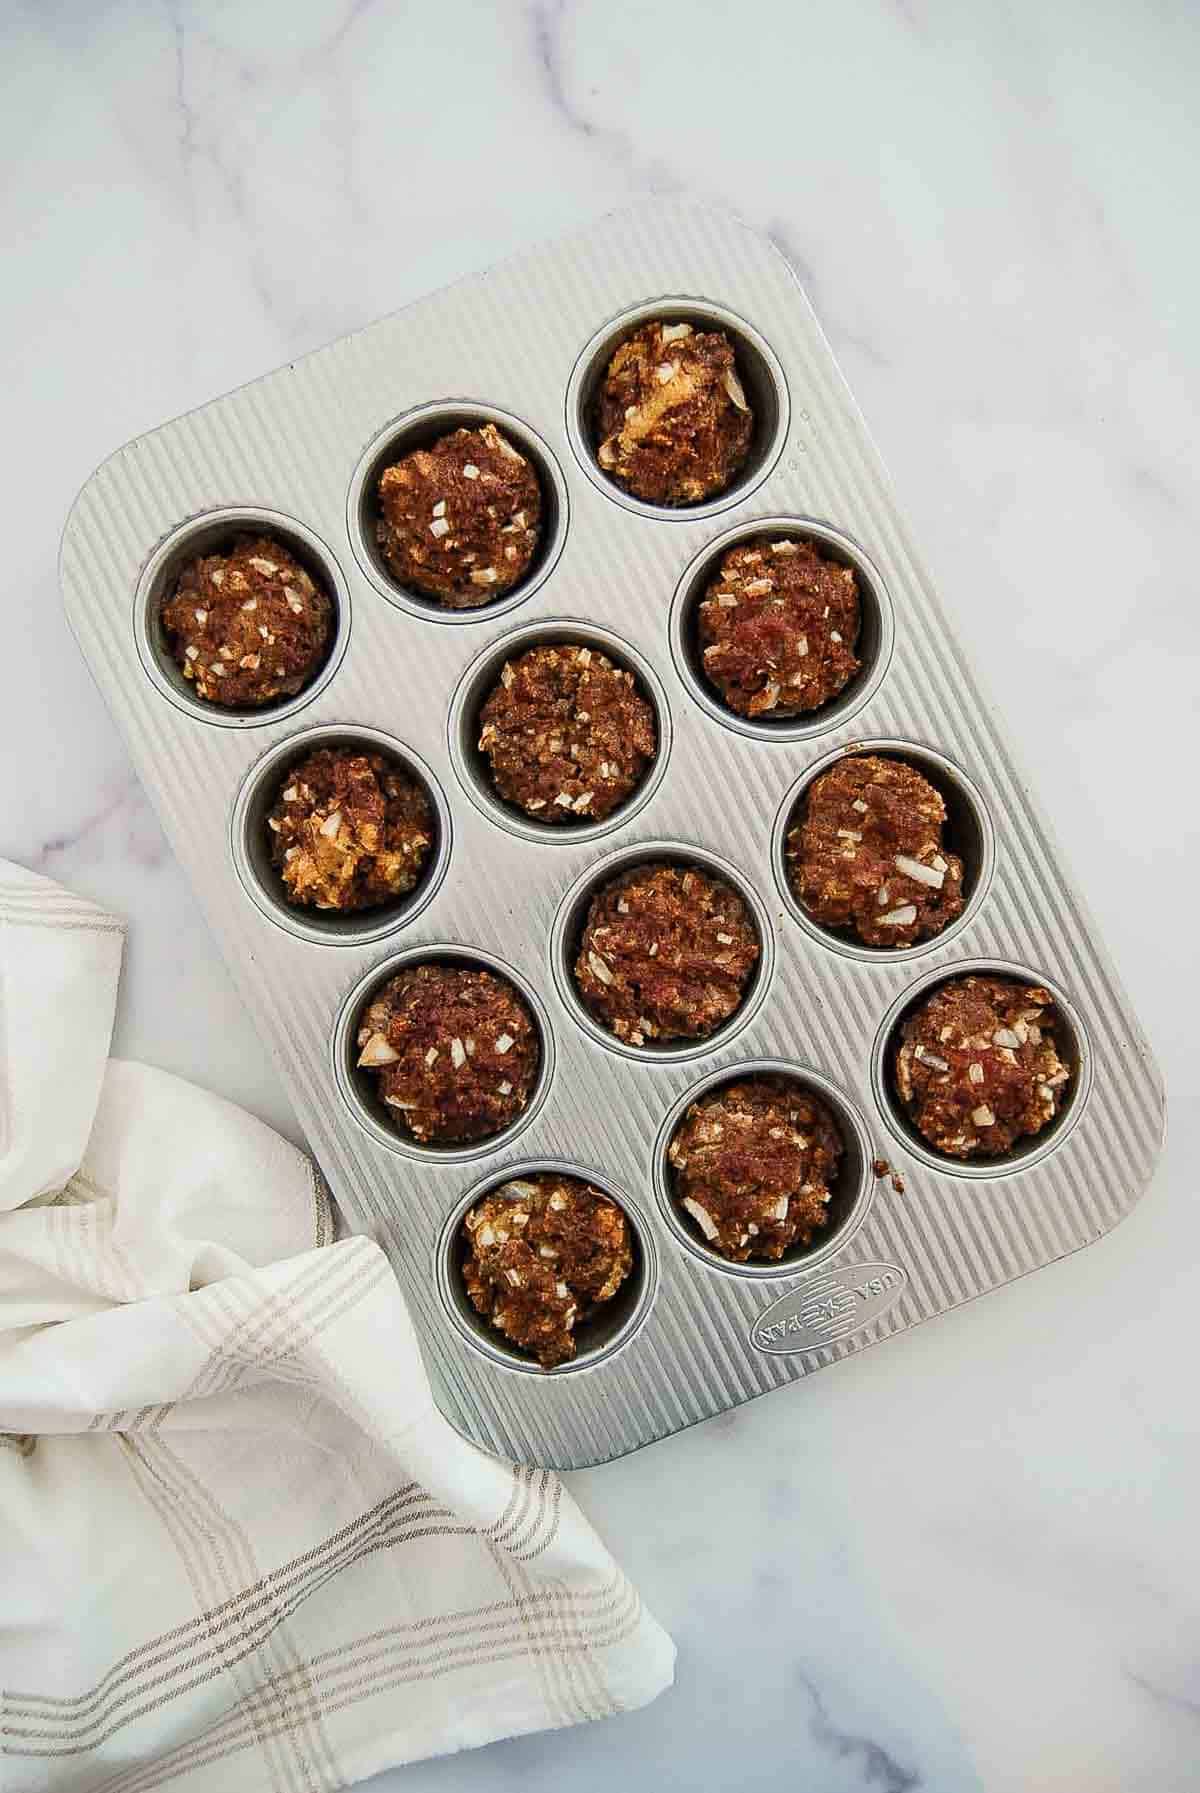
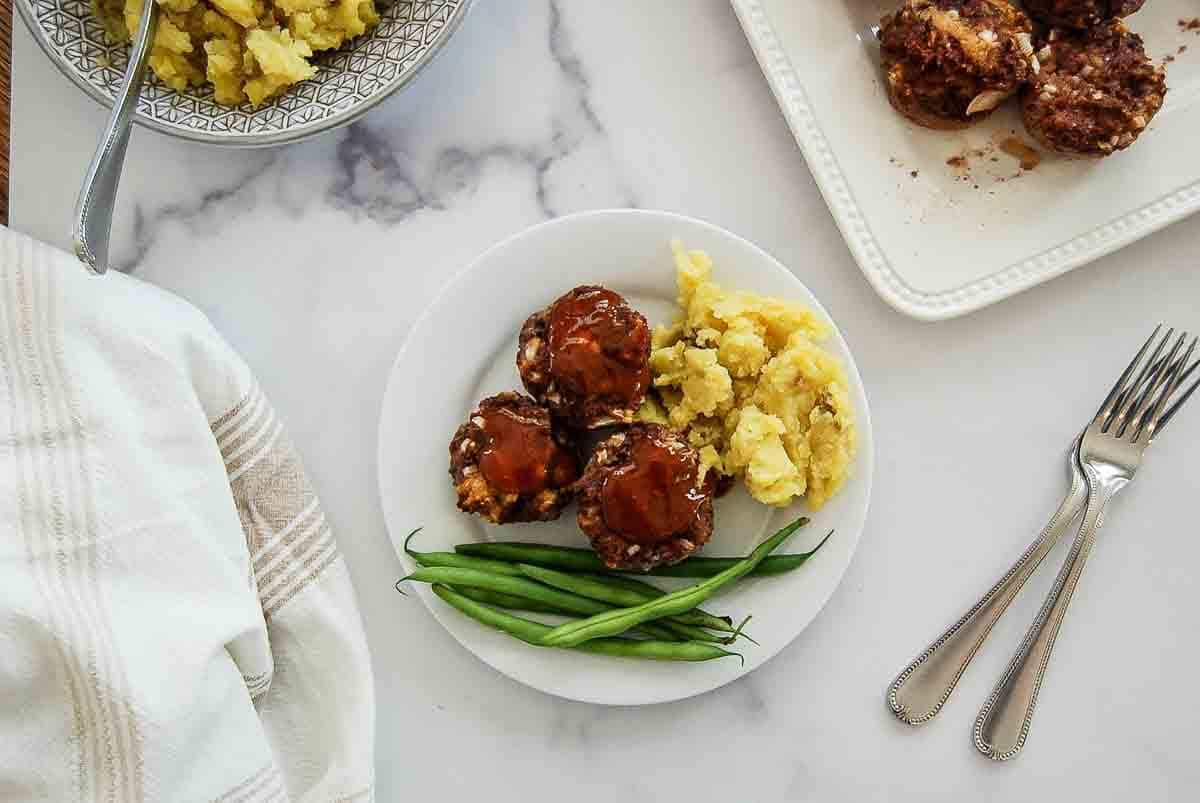
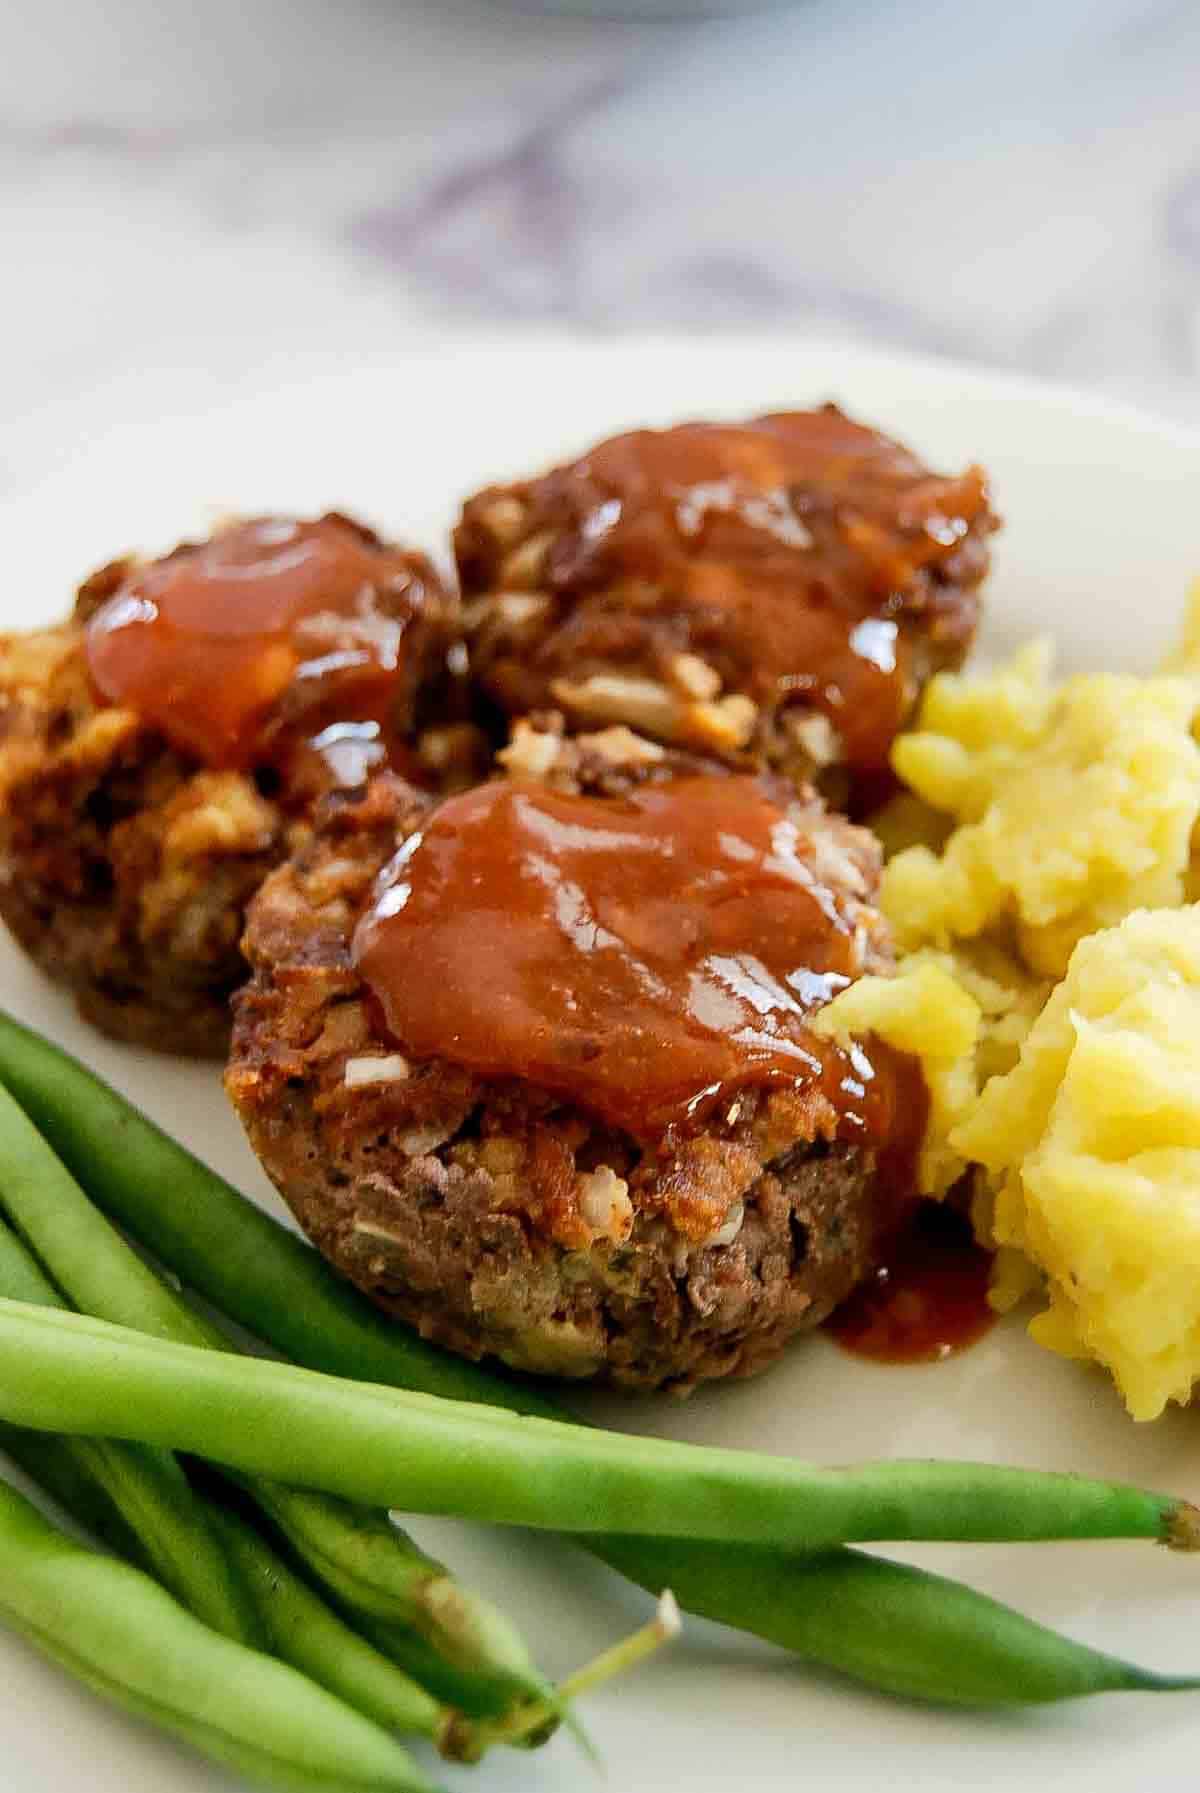
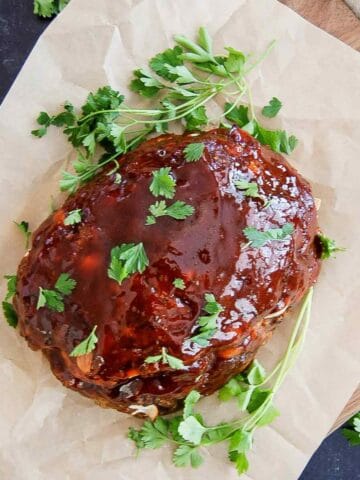
Step 6: Glaze. When the meatloaf hits 160°F, you have 2 options. If you're freezing the muffins, remove them from the oven and skip to step 7. If you're serving right away, spoon a thin layer of the glaze over each one. For a caramelized, slightly sticky top, switch the oven to broil and run them under the broiler for 2-3 minutes. Watch closely - the brown sugar can go from perfect to burnt fast. (Note - you can also serve the glaze on the side, or just add it straight to the mini meatloaves when you plate them.)
Step 7: Rest, then remove. Let the meatloaves sit in the tin for about 5 minutes after glazing. Then, use a small spatula to gently loosen the edges and lift each one out onto a wire rack or plate. Let them rest for another 5 minutes before serving. Both rests matter - the first one helps them firm up in the tin, making them a bit easier to remove (they'll still be delicate, so be careful). The second rest lets the juices redistribute so they don't all run out when you take a bite.
Tips For The Best Mini Meatloaf
- Don't skip the panade rest. Five minutes feels like nothing, but it's the difference between a tender meatloaf and a dense one. Let the breadcrumbs fully absorb the milk and egg before you add the meat. I know it feels like an unnecessary step - it's not. And really, this can be happening as you gather your other ingredients.
- Mix with a light hand. Fold the ingredients together just until combined and stop. The less you handle the meat, the more tender it stays. This is one of those things that seems fussy until you taste the difference.
- Don't compress the meatloaf too much. Don't pack the meat too tightly or fill it all the way to the rim. A little room around the sides lets steam escape during baking, which helps to avoid soggy bottoms.
- Rest before you remove. Please follow this one! Let them sit in the tin for a few minutes after glazing, then remove them and let them rest again on a wire rack. The bottoms need time to firm up (I learned this the hard way) and pulling them out too soon means they fall apart.
- Use a meat thermometer. It's the only way to know for sure that they're done. You're looking for 160°F in the center of one of the middle cups, which cook slightly slower than the ones around the edges.
Variations Worth Trying
- Cheese-stuffed. Press a small cube of cheddar or pepper jack into the center of each cup before baking. It melts into a gooey pocket that oozes when you cut into it. Worth every bit of the mess - seriously so so good.
- BBQ glaze. Swap the ketchup-brown sugar glaze for your favorite barbecue sauce. Brush it on in the last few minutes of baking so it caramelizes without burning.
- Turkey or chicken. Substitute ground turkey or ground chicken for the beef. Add an extra tablespoon of milk to compensate for the lower fat content, otherwise they may dry out. This is essentially what I do for my Mediterranean Turkey Meatloaf. Same technique, leaner protein.
- Bacon-wrapped. Wrap each mini meatloaf with a half-slice of bacon before filling the tin. The bacon crisps up around the outside and adds a smoky crust that makes these feel a little more special.
- Add some vegetables. Fold in ½ cup of finely grated zucchini or carrot (squeeze out the excess moisture first), or a handful of finely chopped bell pepper or mushrooms. It adds some moisture and sneaks in some extra nutrition.
What to Serve With Mini Meatloaf
So many things! Here are my top picks.
- Mashed potatoes. Mashed potatoes are always my first answer. My Boursin mashed potatoes, specifically. Deliciously cheesy and a classic choice alongside meatloaf.
- Roasted potatoes. My crispy roasted baby potatoes are another great option if you want something a little lighter. (Bonus - you can make these in the air fryer, so they can easily be made while the meatloaf is baking in the oven. )
- Vegetables. For veggies, garlic green beans, or maple bacon Brussels sprouts both work really well alongside the sweet-savory glaze.
- Salad. A salad always works. My simple 4-ingredient pasta salad, or a chopped Mediterranean cucumber salad, are both easy enough to throw together while the mini meatloaf bakes.
- More side dish ideas! Check out my post on the 25 BEST sides to serve with meatloaf for more ideas!
Make Ahead, Storage And Freezing
- Make ahead. As with most meatloaf, this mini version is actually better the next day. The meatloaf has time to set overnight, which means it holds together more cleanly when you reheat it.
- Leftovers. Store leftovers in an airtight container for 4-5 days. Reheat in the microwave for about a minute or in a 350°F oven for 10 minutes.
- Freezer. This is where mini meatloaf really earns its keep. Let the meatloaves cool completely, then wrap each one individually in plastic wrap and store them all in a freezer-safe zip-top bag, arranged in a single layer. They'll keep for up to 3 months. Thaw overnight in the fridge and reheat as instructed above.
Frequently Asked Questions
At 375°F in a standard 12-cup muffin tin, mini meatloaf takes about 25 minutes. The most reliable way to check is with a meat thermometer - you're looking for an internal temperature of 160°F in the center of one of the middle cups.
Not at all. I love the tins because they make it easy to bake and portion, but if you don't have one, you can hand-form individual portions on a parchment-lined baking sheet - same size, same cook time. You'll get the same flavor.
Yes, and I'd strongly encourage it if you're a meal-planner. Cool completely, wrap individually in plastic wrap, and store in a freezer-safe bag for up to 3 months. Thaw overnight in the fridge, then heat in a 350°F oven for about 10-15 minutes.
Three things: First, use a leaner (90/10) meat to prevent too much fat/grease from pooling in the bottoms of the tins. Second, don't pack the meat too tightly into the cups (leave a little room around the sides for steam to escape). Finally, let the meatloaf rest in the tins for several minutes before removing them. Rushing the removal is the most common reason they fall apart.
Also, let them sit on a cutting board. orplate for a few minutes after removing them from the tins to allow them to set a bit more. If you're really nervous about the meatloaf turning out soggy, sub the breadcrumbs with oats, which can absorb a bit more moisture.

If you try this mini meatloaf recipe, please let me know what you think by leaving a star rating and a comment below! I'd love to hear how it turns out!
Recipe

Mini Meatloaf Recipe
Ingredients
- cooking spray
- 1 ½ lb ground beef (90/10)
- ¾ cup breadcrumbs
- ½ cup milk
- 1 small yellow onion minced
- 2 large eggs
- 2 tablespoon ketchup
- 1 tablespoon Worcestershire sauce
- 1 teaspoon garlic powder
- 1 teaspoon smoked paprika
- 1 tsp Italian seasoning
- ¾ tsp salt
- ½ tsp black pepper
Simple brown sugar glaze
- ⅓ cup ketchup
- 2 tbsp brown sugar
- 1 tbsp Dijon mustard
Instructions
- Preheat oven to 375℉. Grease a 12-cup muffin tin with cooking spray.
- In a small bowl, combine breadcrumbs, milk, and eggs. Let sit for 5 minutes to allow the breadcrumbs to soak up the moisture and form a panade.
- In a large bowl, combine the ground beef, breadcrumb mixture, onion, Italian seasoning, salt, and pepper. Mix gently until just combined.
- Divide the mixture evenly among muffin cups. Do not pack too tightly.
- Bake for 25 - 30 minutes, or until the internal temperature reaches 160℉.
- Stir together the brown sugar glaze ingredients. Spoon over each meatloaf. Broil for 2-3 minutes until caramelized. (See note if planning to freeze.)
- Allow the mini meatloaves to rest in the tin for 3-5 minutes, then carefully remove them with a spatula to a wire rack. (They will be delicate.) Rest 5 more minutes before serving.
Notes
- Use regular breadcrumbs, not Panko, for the best texture.
- For freezing: bake without the glaze, cool completely, wrap individually in plastic wrap (no glaze) , and freeze for up to 3 months. Make the glaze and serve on the side when ready to serve. (Or, spoon it over the top of the mini meatloaves.)
- Make ahead: fill the tin, cover, and refrigerate up to 24 hours before baking. These taste even better the next day, once the meatloaf has had a chance to fully set.
Explore More with AI


Sarah Jenkins says
Meatloaf is my favorite! Homey, cozy recipe and these mini meatloaves are so great for busier nights or making ahead. Love these!