
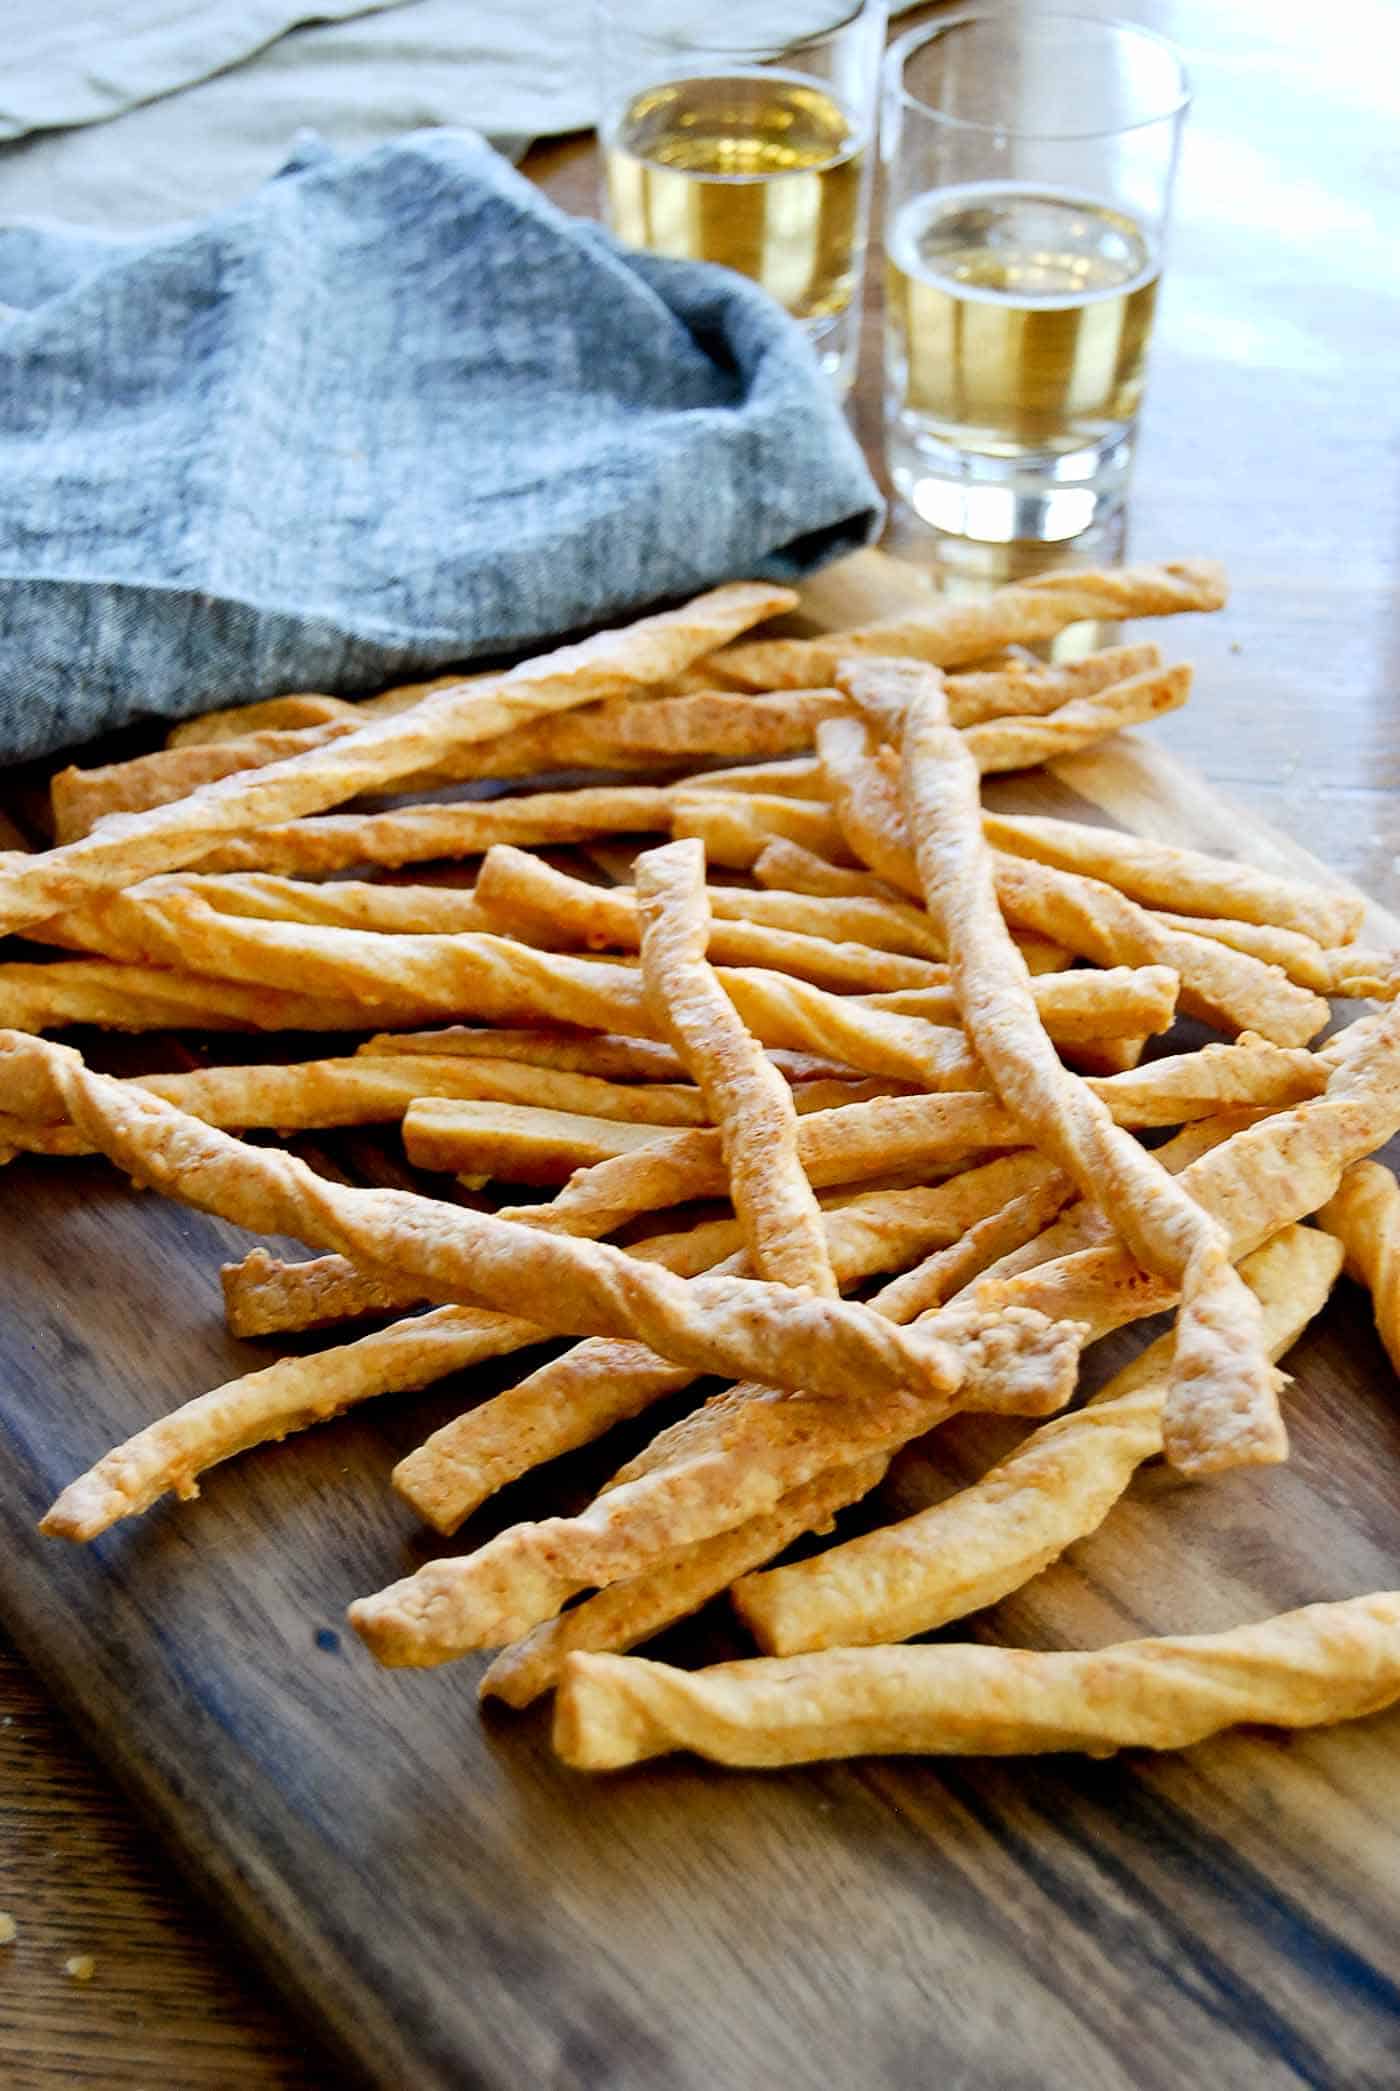
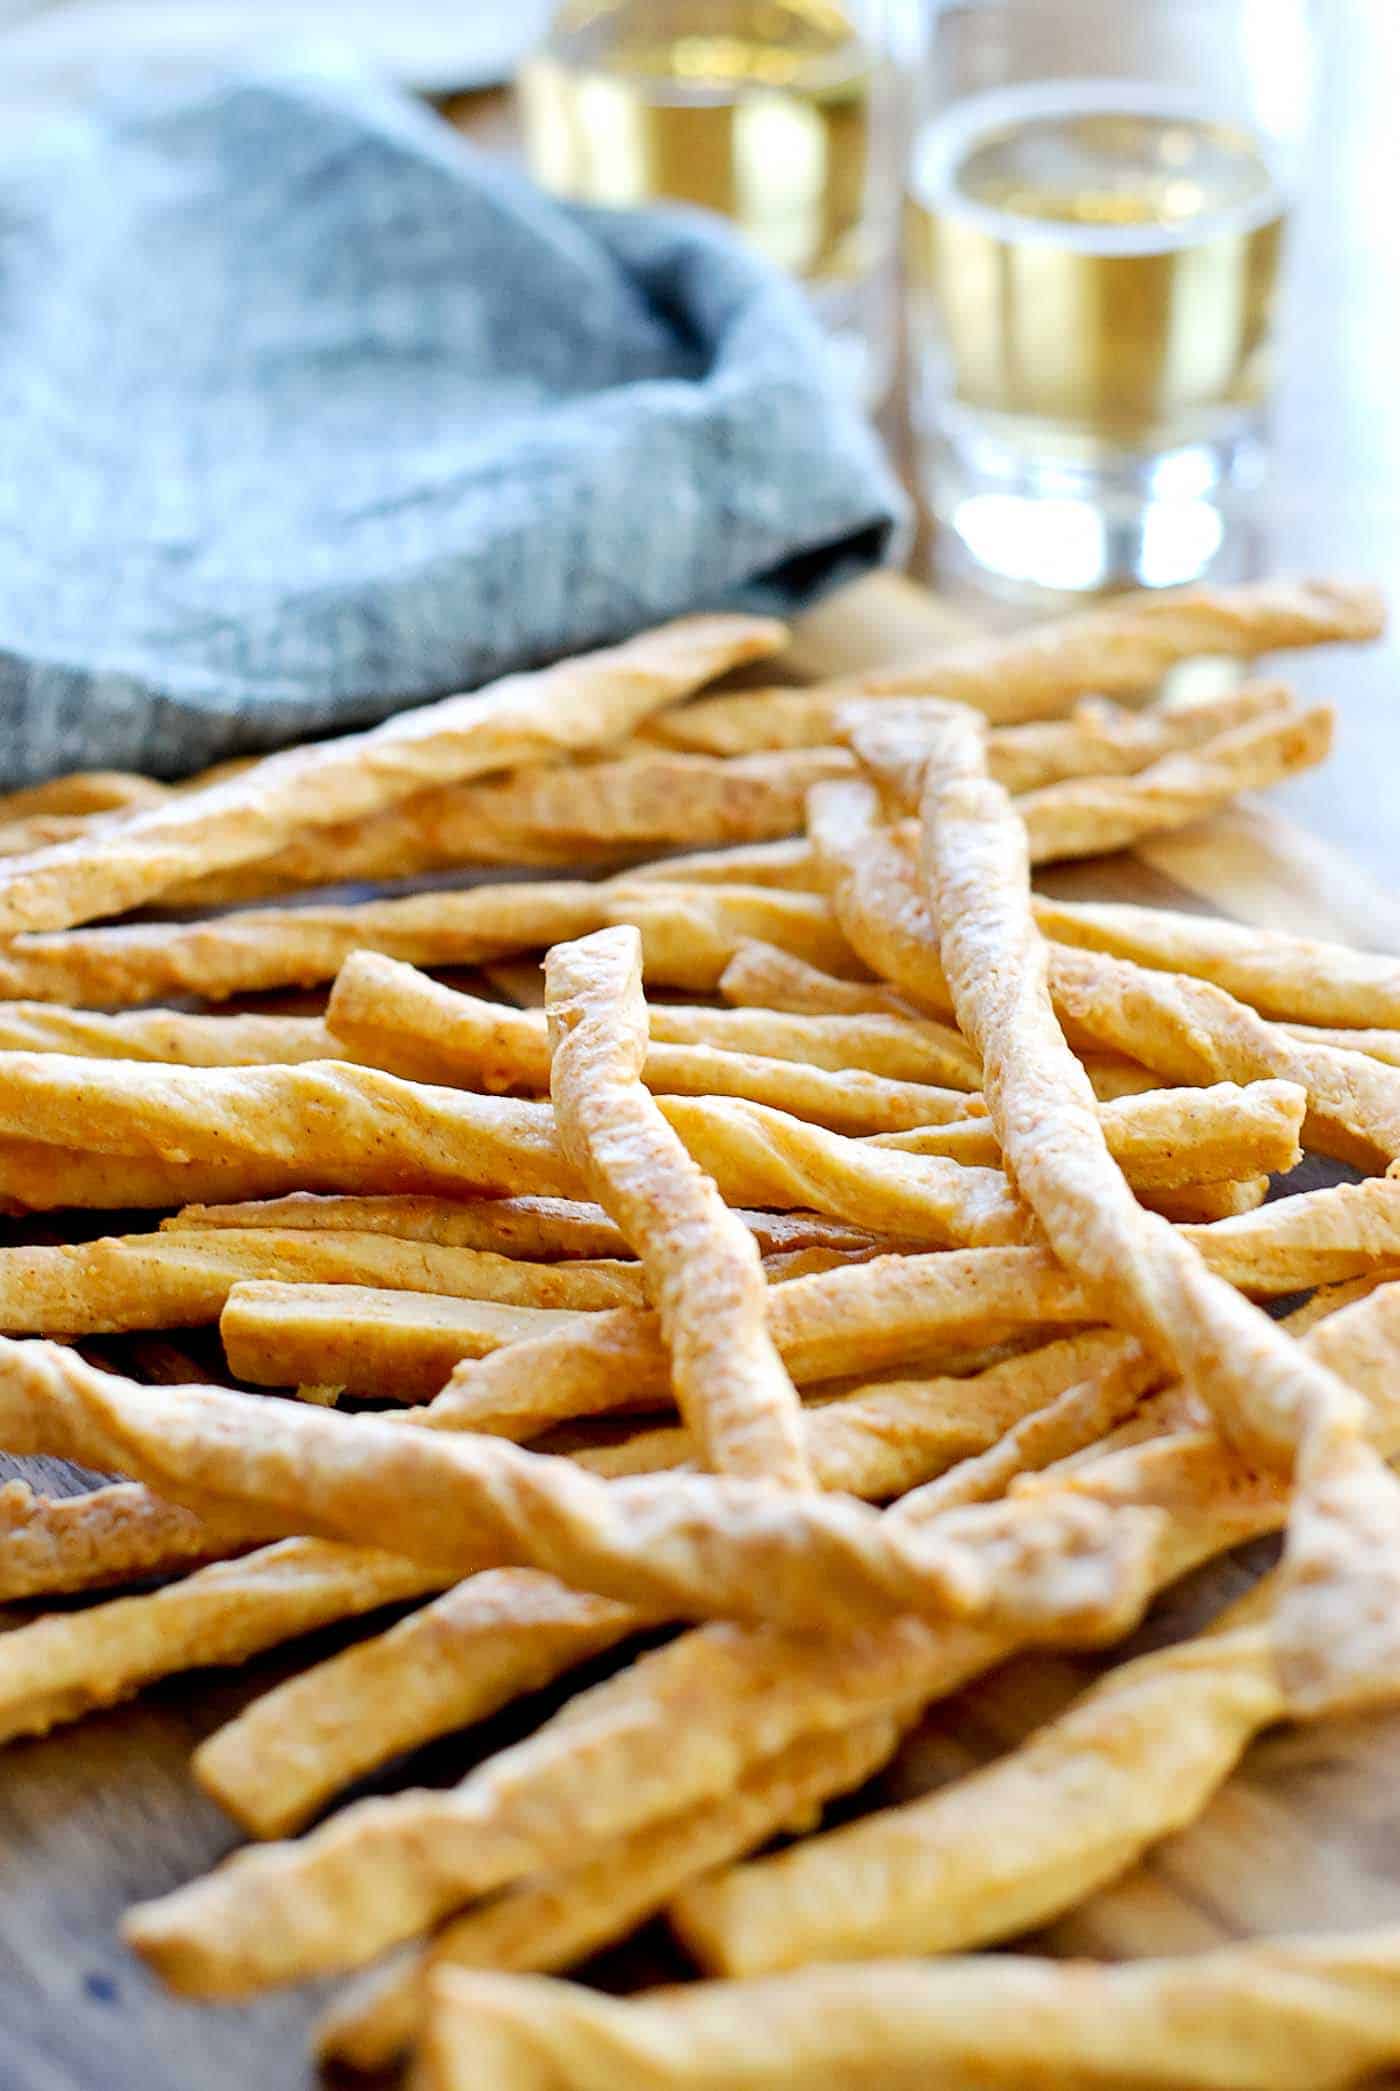
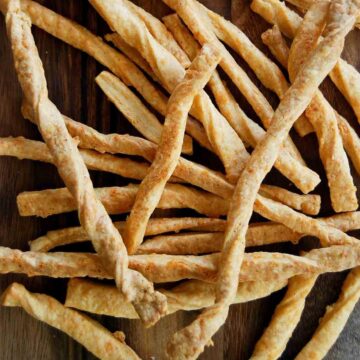
This Cheddar Cheese Straws Recipe is a crispy, savory, easy-to-make party snack. It has a great, sharp cheddar flavor, and a pinch of cayenne pepper and paprika gives it just a hint of spice. These are totally addictive!
Let Me Tell You About This Easy Cheddar Cheese Straws Recipe
What is a cheese straw, you may be asking? It's basically like a homemade cheese cracker, but better than any Goldfish crackers or Cheez-Its you've had. They're made with a cheesy dough mixture that, when cut into cheese sticks or cheese twists, and then baked, turns into a deliciously cheesy, crispy, and flaky cracker-like snack. Here's what's so great about them:
- You need only a few ingredients to make these cheese straws. Flour, butter, cheese, plus a few spices are all you need to pull together this simple appetizer.
- So delicious and addictive - your kids will want to replace their Cheez-Its and Goldfish crackers with these!
- This is a great portable appetizer - these travel amazingly well. Just pop them in a container or ziplock and off you go.
- Great for a crowd. These cheese twists are the perfect easy hors d'oeuvre for a fancy gathering or just a great party snack for your next casual hang or tailgate! They're totally addicting - I never have leftovers!
- Amazing cheddar flavor with a hint of spice from the paprika and cayenne pepper gives these cheese twists a southern flair.
Key Ingredients
You only need a handful of ingredients to make this easy hors d'oeuvre:
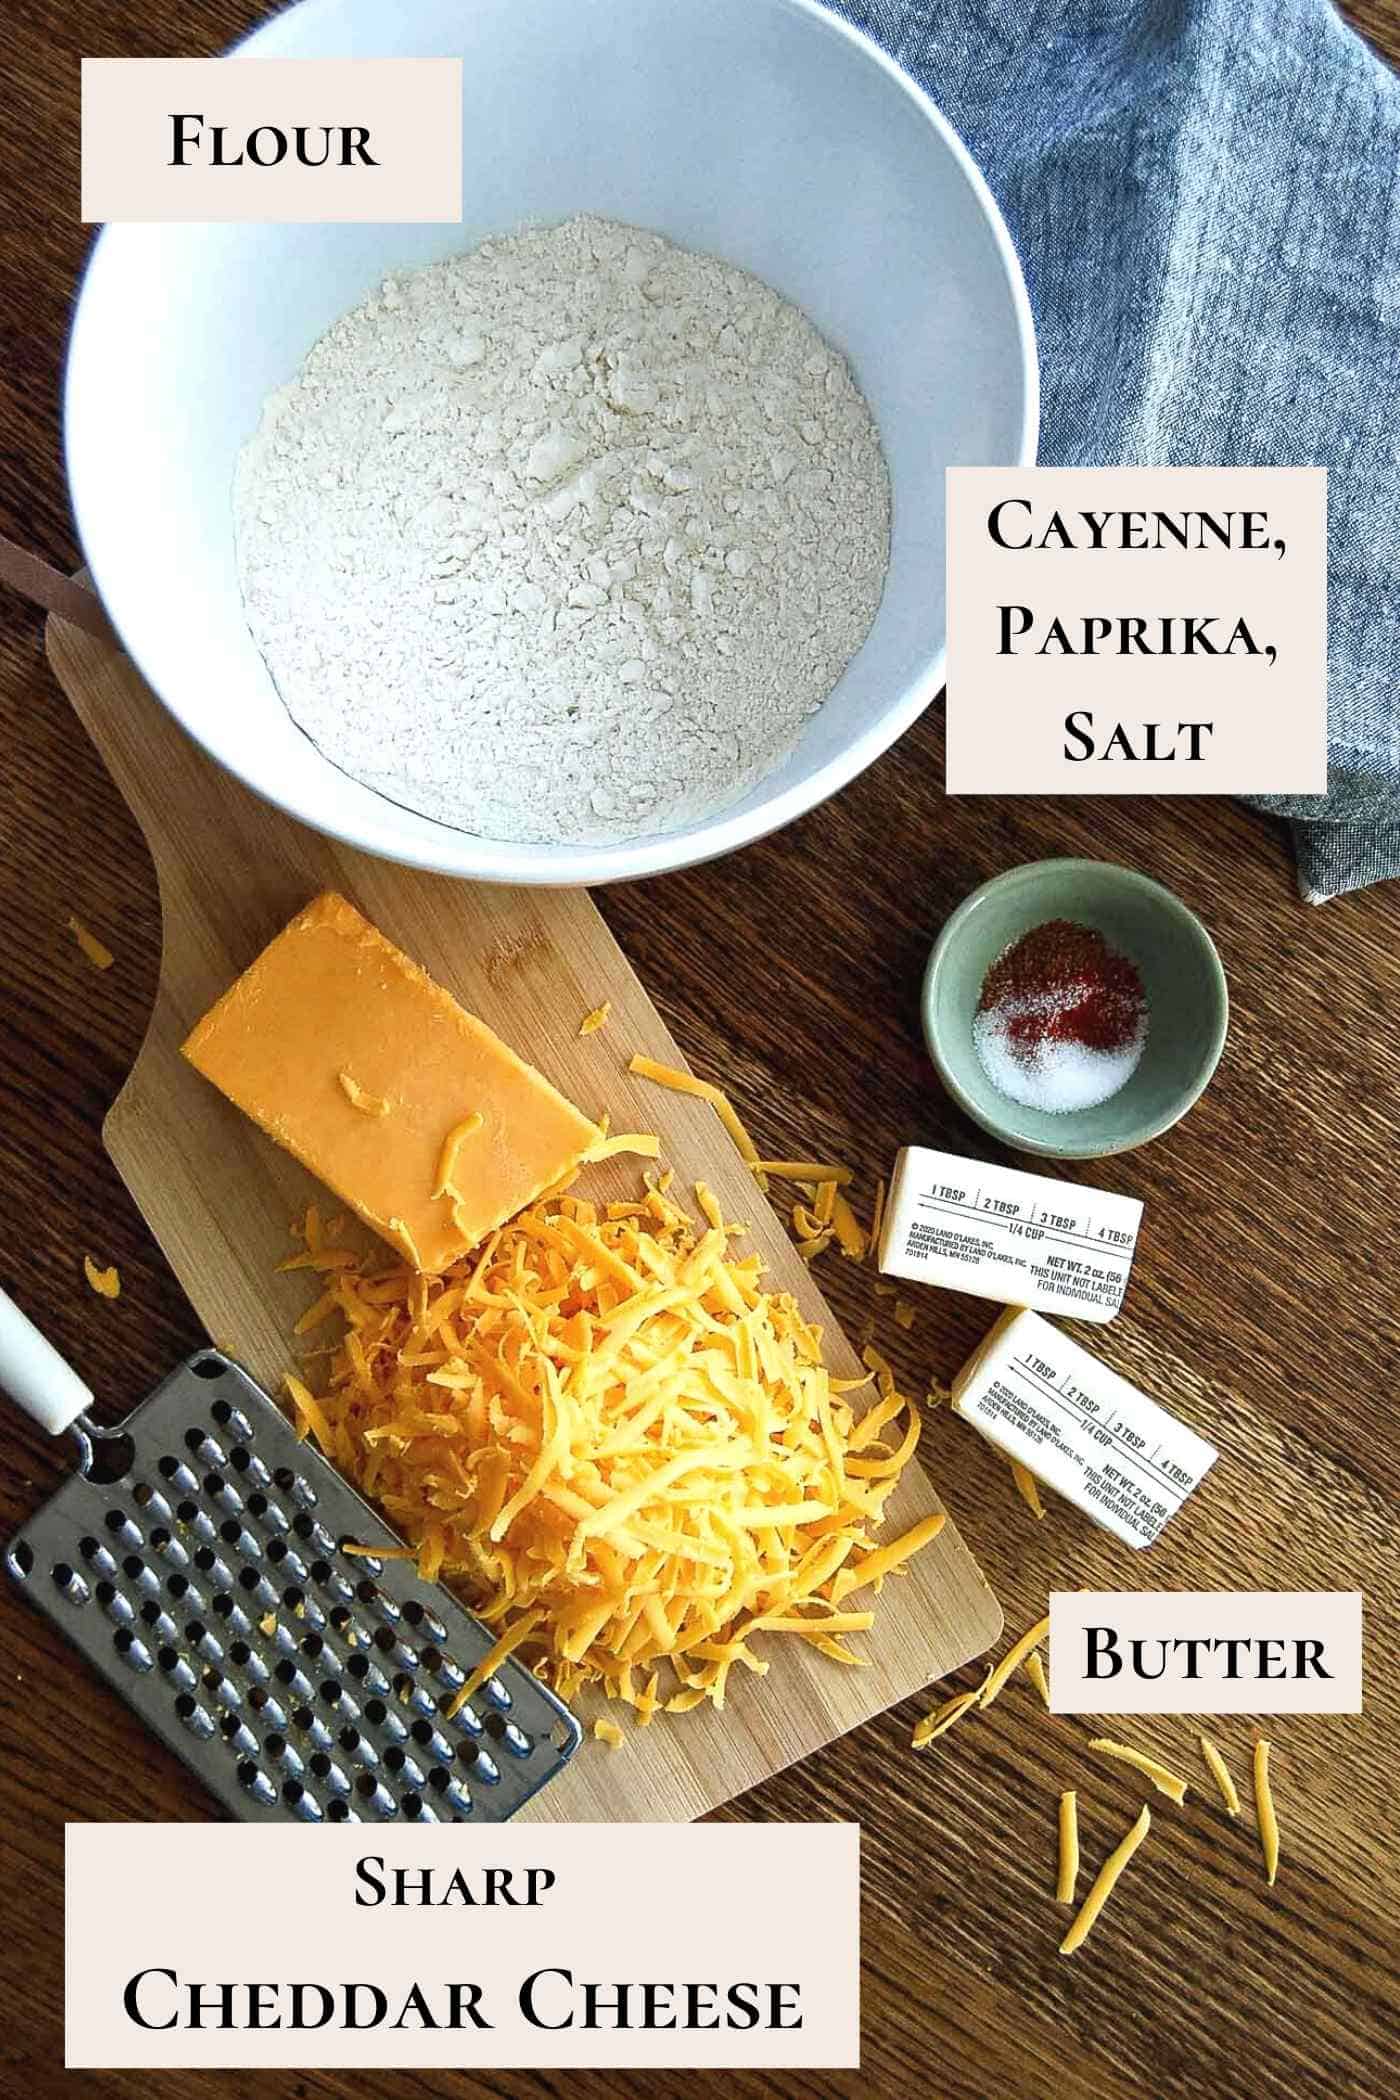
- Butter, flour, and salt. These are basically your standard pie crust ingredients. A key difference between the dough for these cheese straws and a pie crust dough is that for these, you want your butter to be at room temperature so that it mixes evenly into the dough. This is unlike most recipes for pie crust, where the butter should be as cold as can be.
- Sharp cheddar cheese. I like to save time, so I just use pre-shredded cheese, which works great. But if you want to step it up a bit, you can put in a tiny bit more work and buy a whole cheese block and grate it a bit finer. This just helps to incorporate the cheese a bit better into the dough.
- Cayenne and paprika. If we're making this cheddar cheese straws recipe, these two ingredients are a must in our family. They don't make these "spicy" per se, but they do add a kick to each bite that really amps up the flavor. Feel free to dial the spice up or down by adding more or less cayenne and paprika.
How To Make This Cheddar Cheese Straws Recipe
This cheese straw recipe really couldn't be any easier and takes no time at all to whip up.

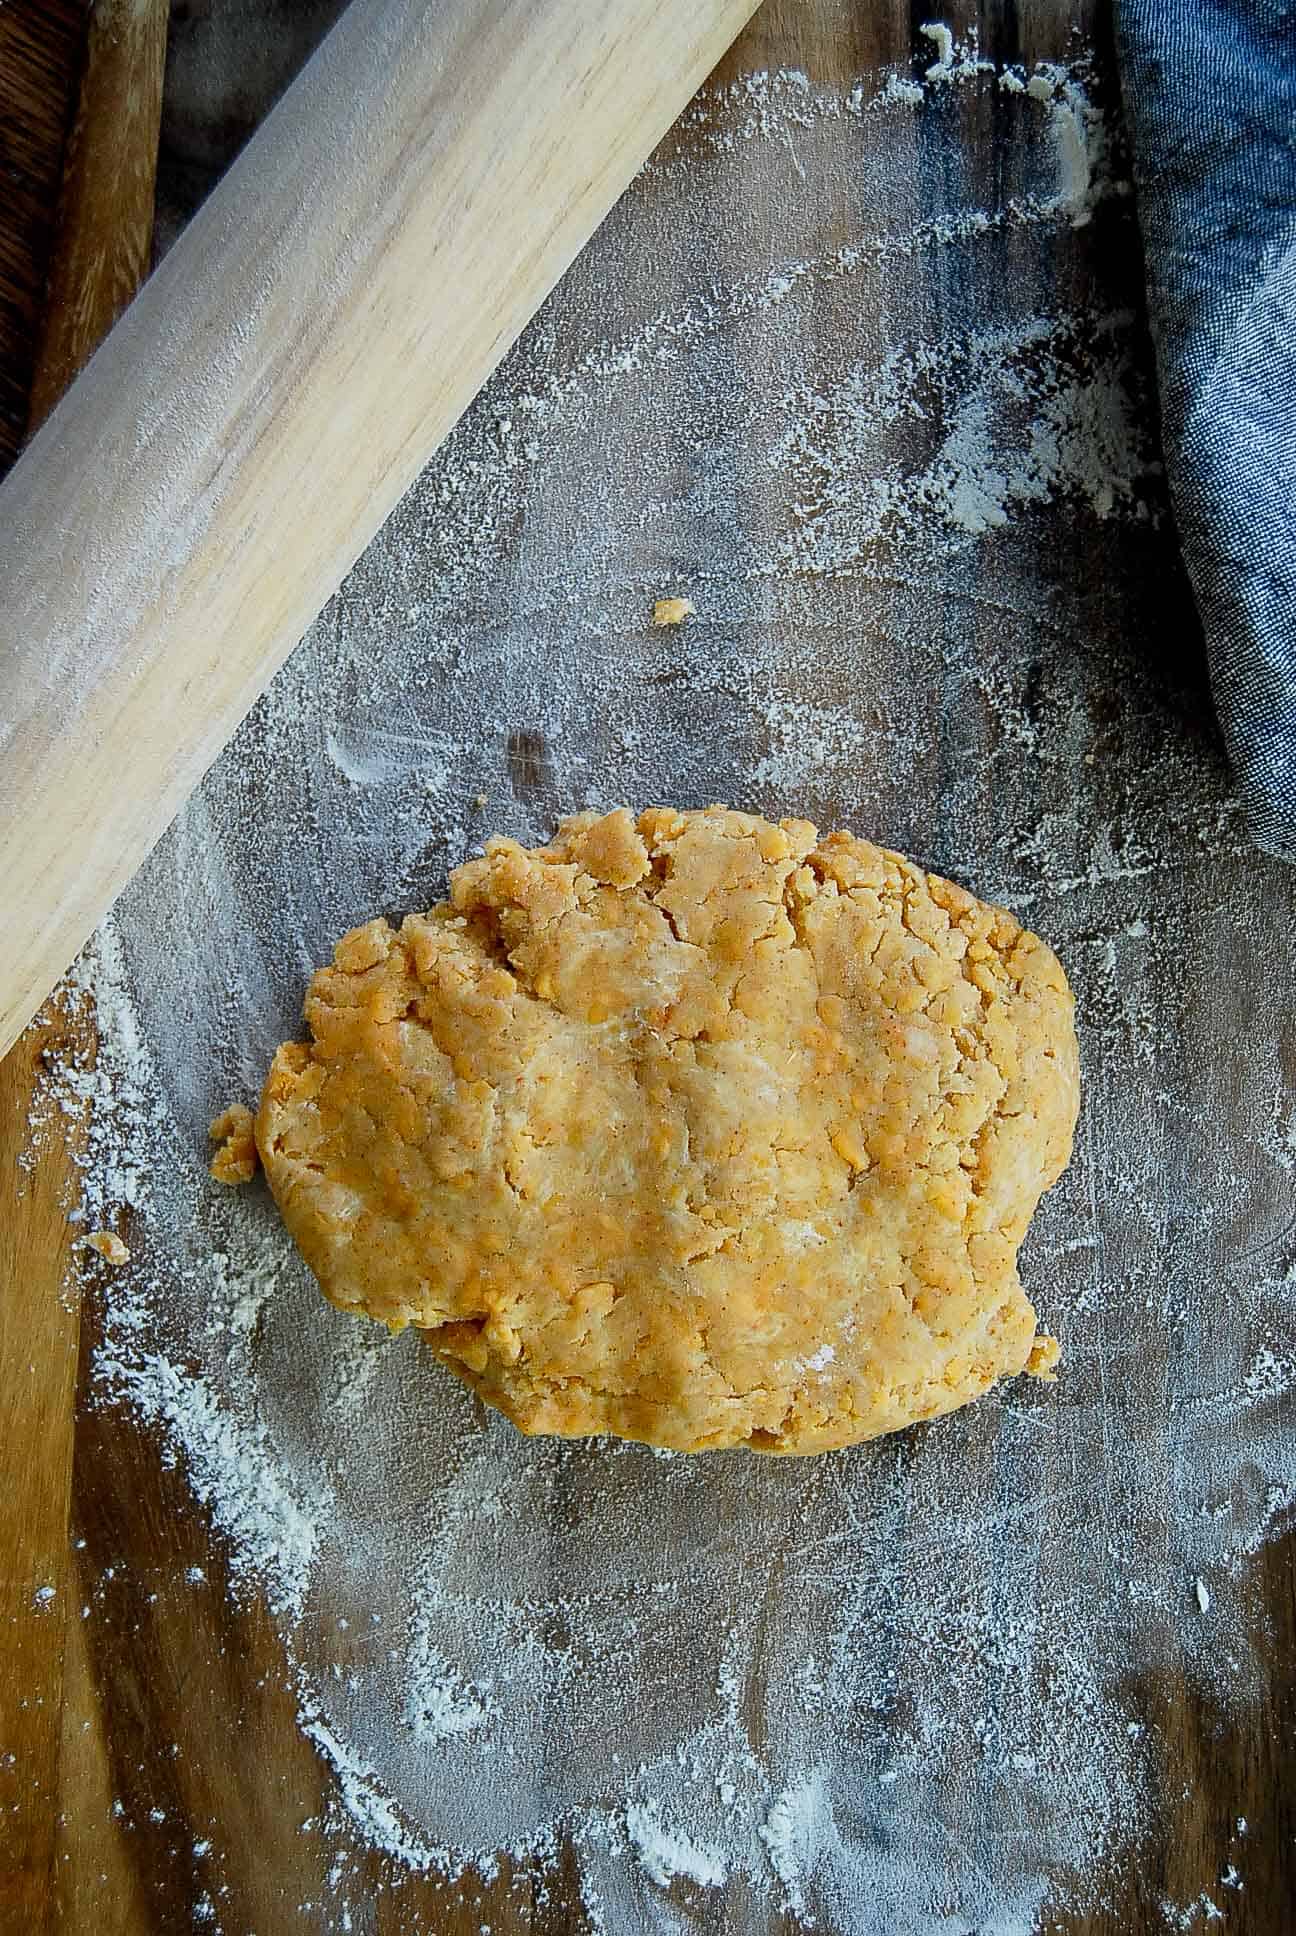
- Start by mixing everything except the flour in a large bowl until well combined. This should be fairly easy if your butter is already at room temperature. Next, slowly add your flour and mix well to combine. You can do this with a stand mixer using the dough hook, or just mix it by hand using a wooden spoon or rubber spatula.
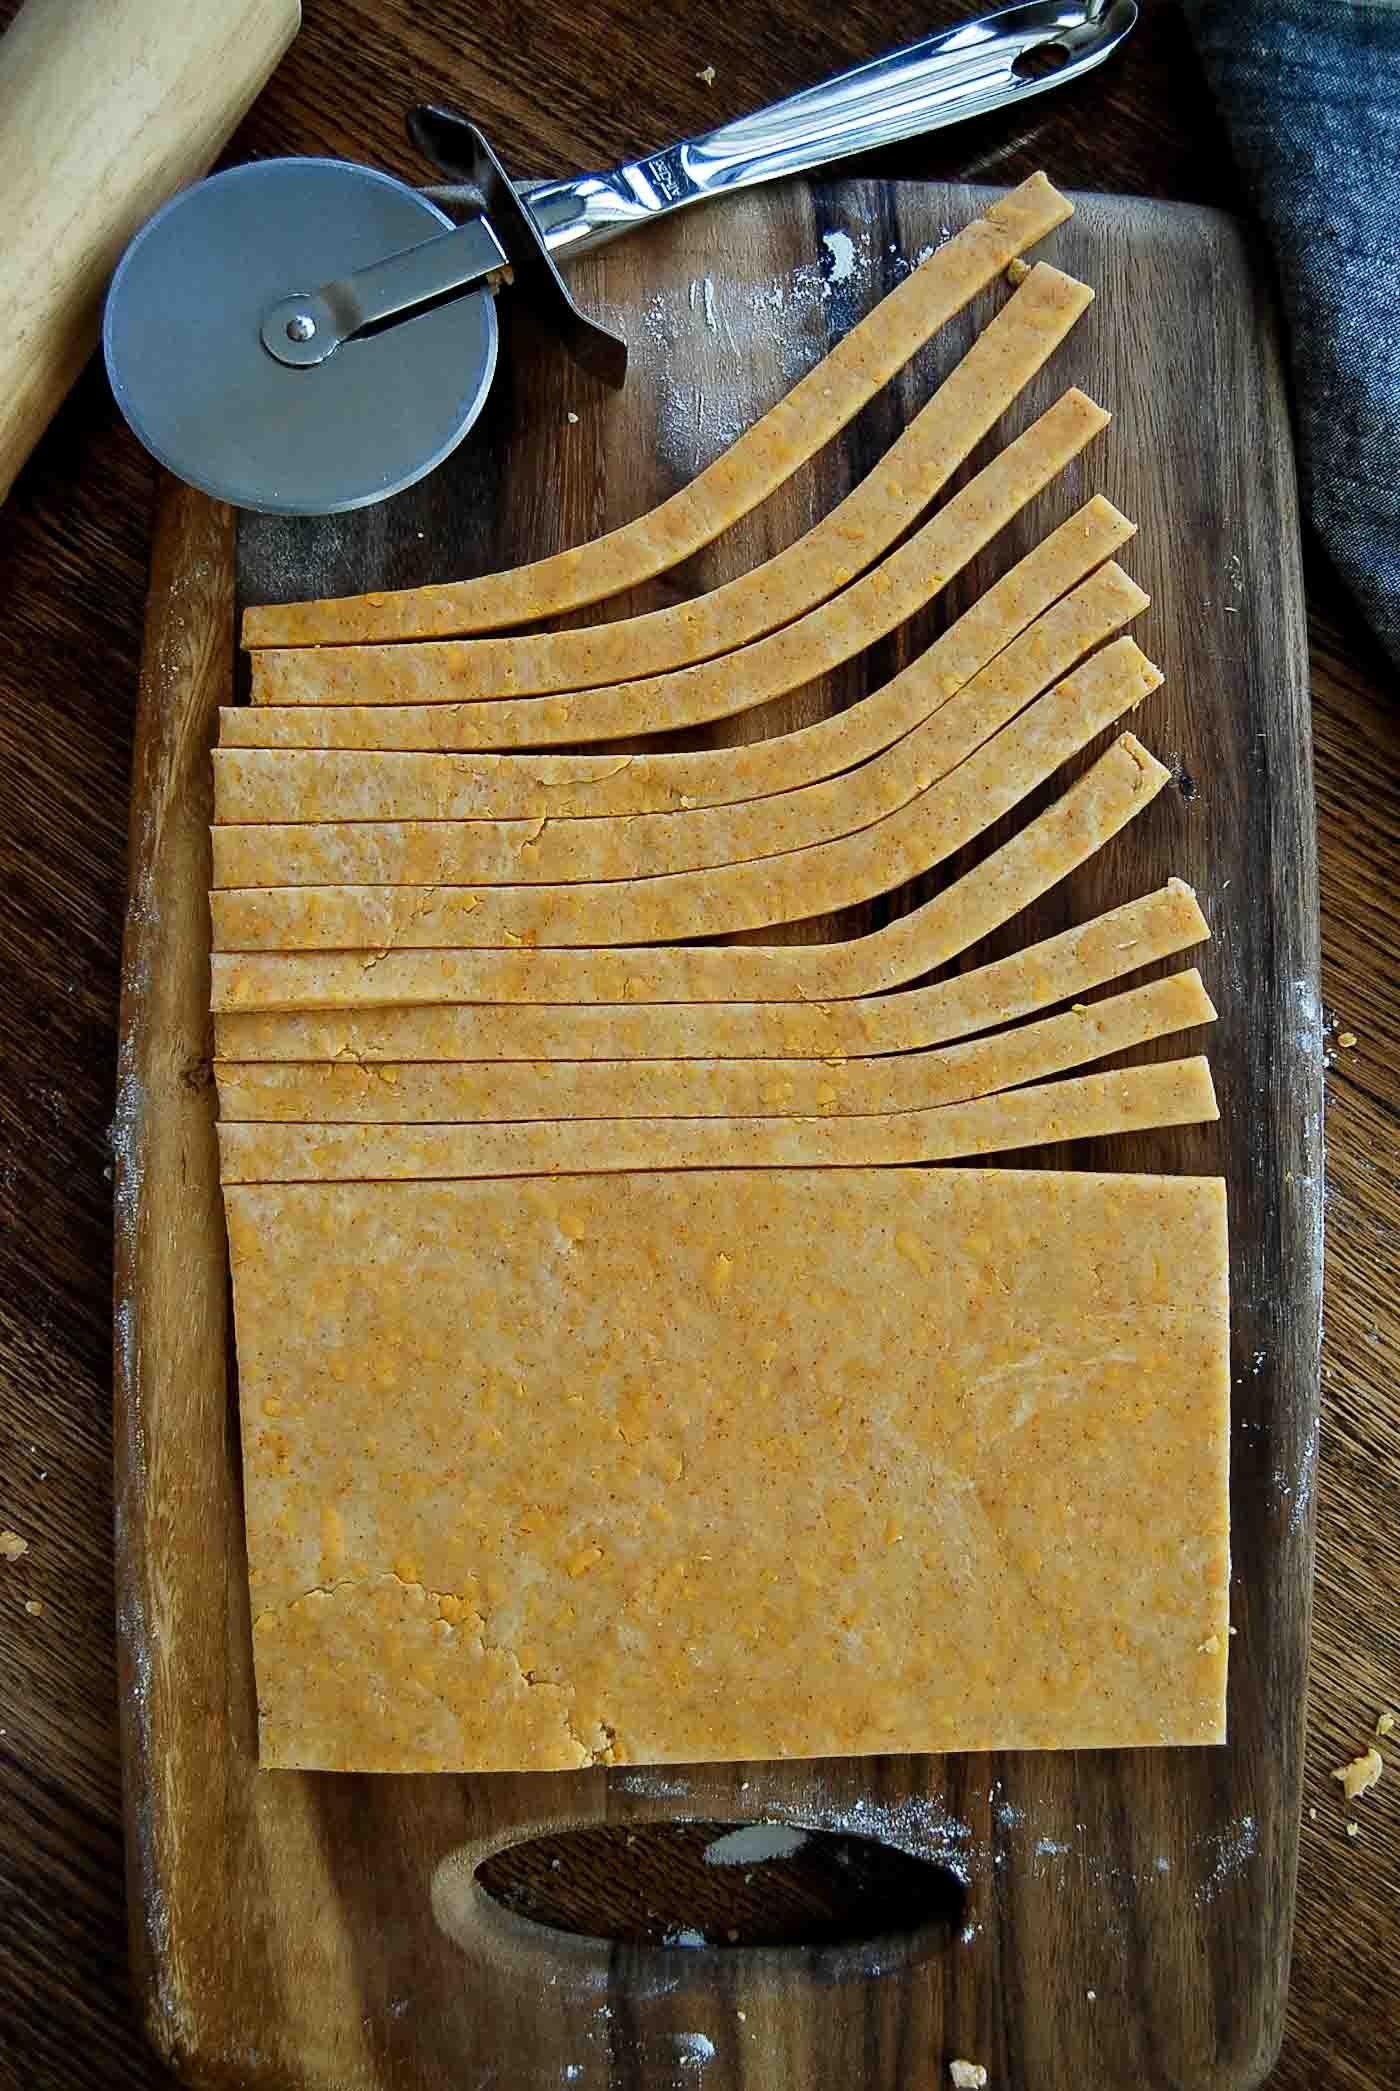
- Once your dough is well-formed and kneaded, roll it out on a well-floured surface in the shape of a rectangle. You'll want to roll the dough thin, about ⅛ of an inch. This dough will puff up while baking, so try to get it on the thin side.
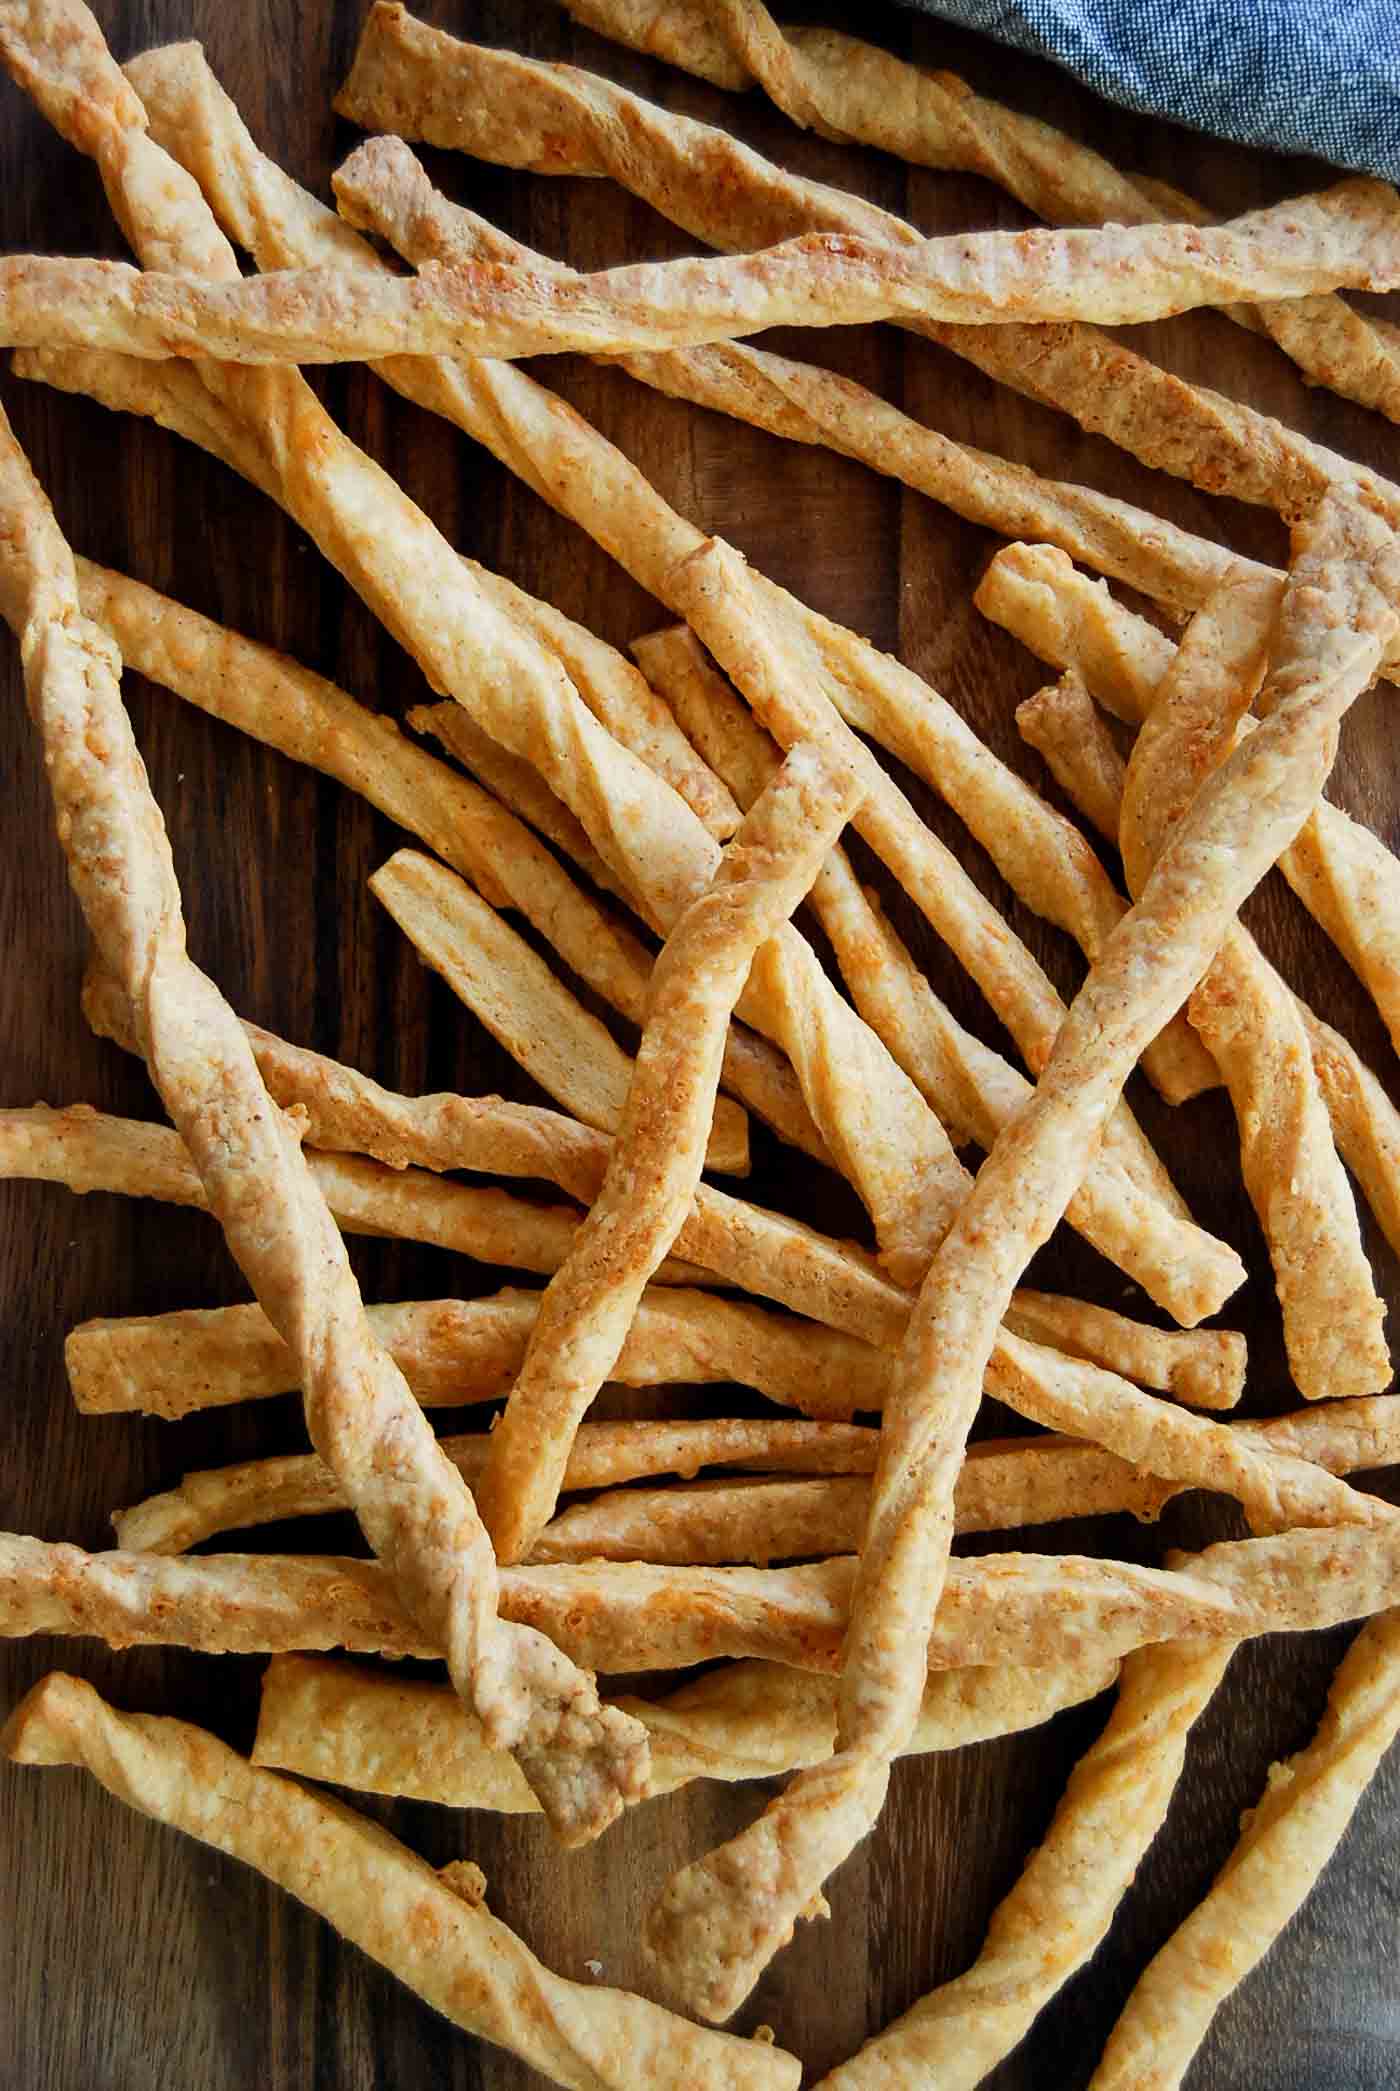
- Now time to make your cheese strips! I like to use a pizza cutter for these, but you can also use a sharp knife. Carefully cut the dough into long, thin strips, about ¼ inch wide.
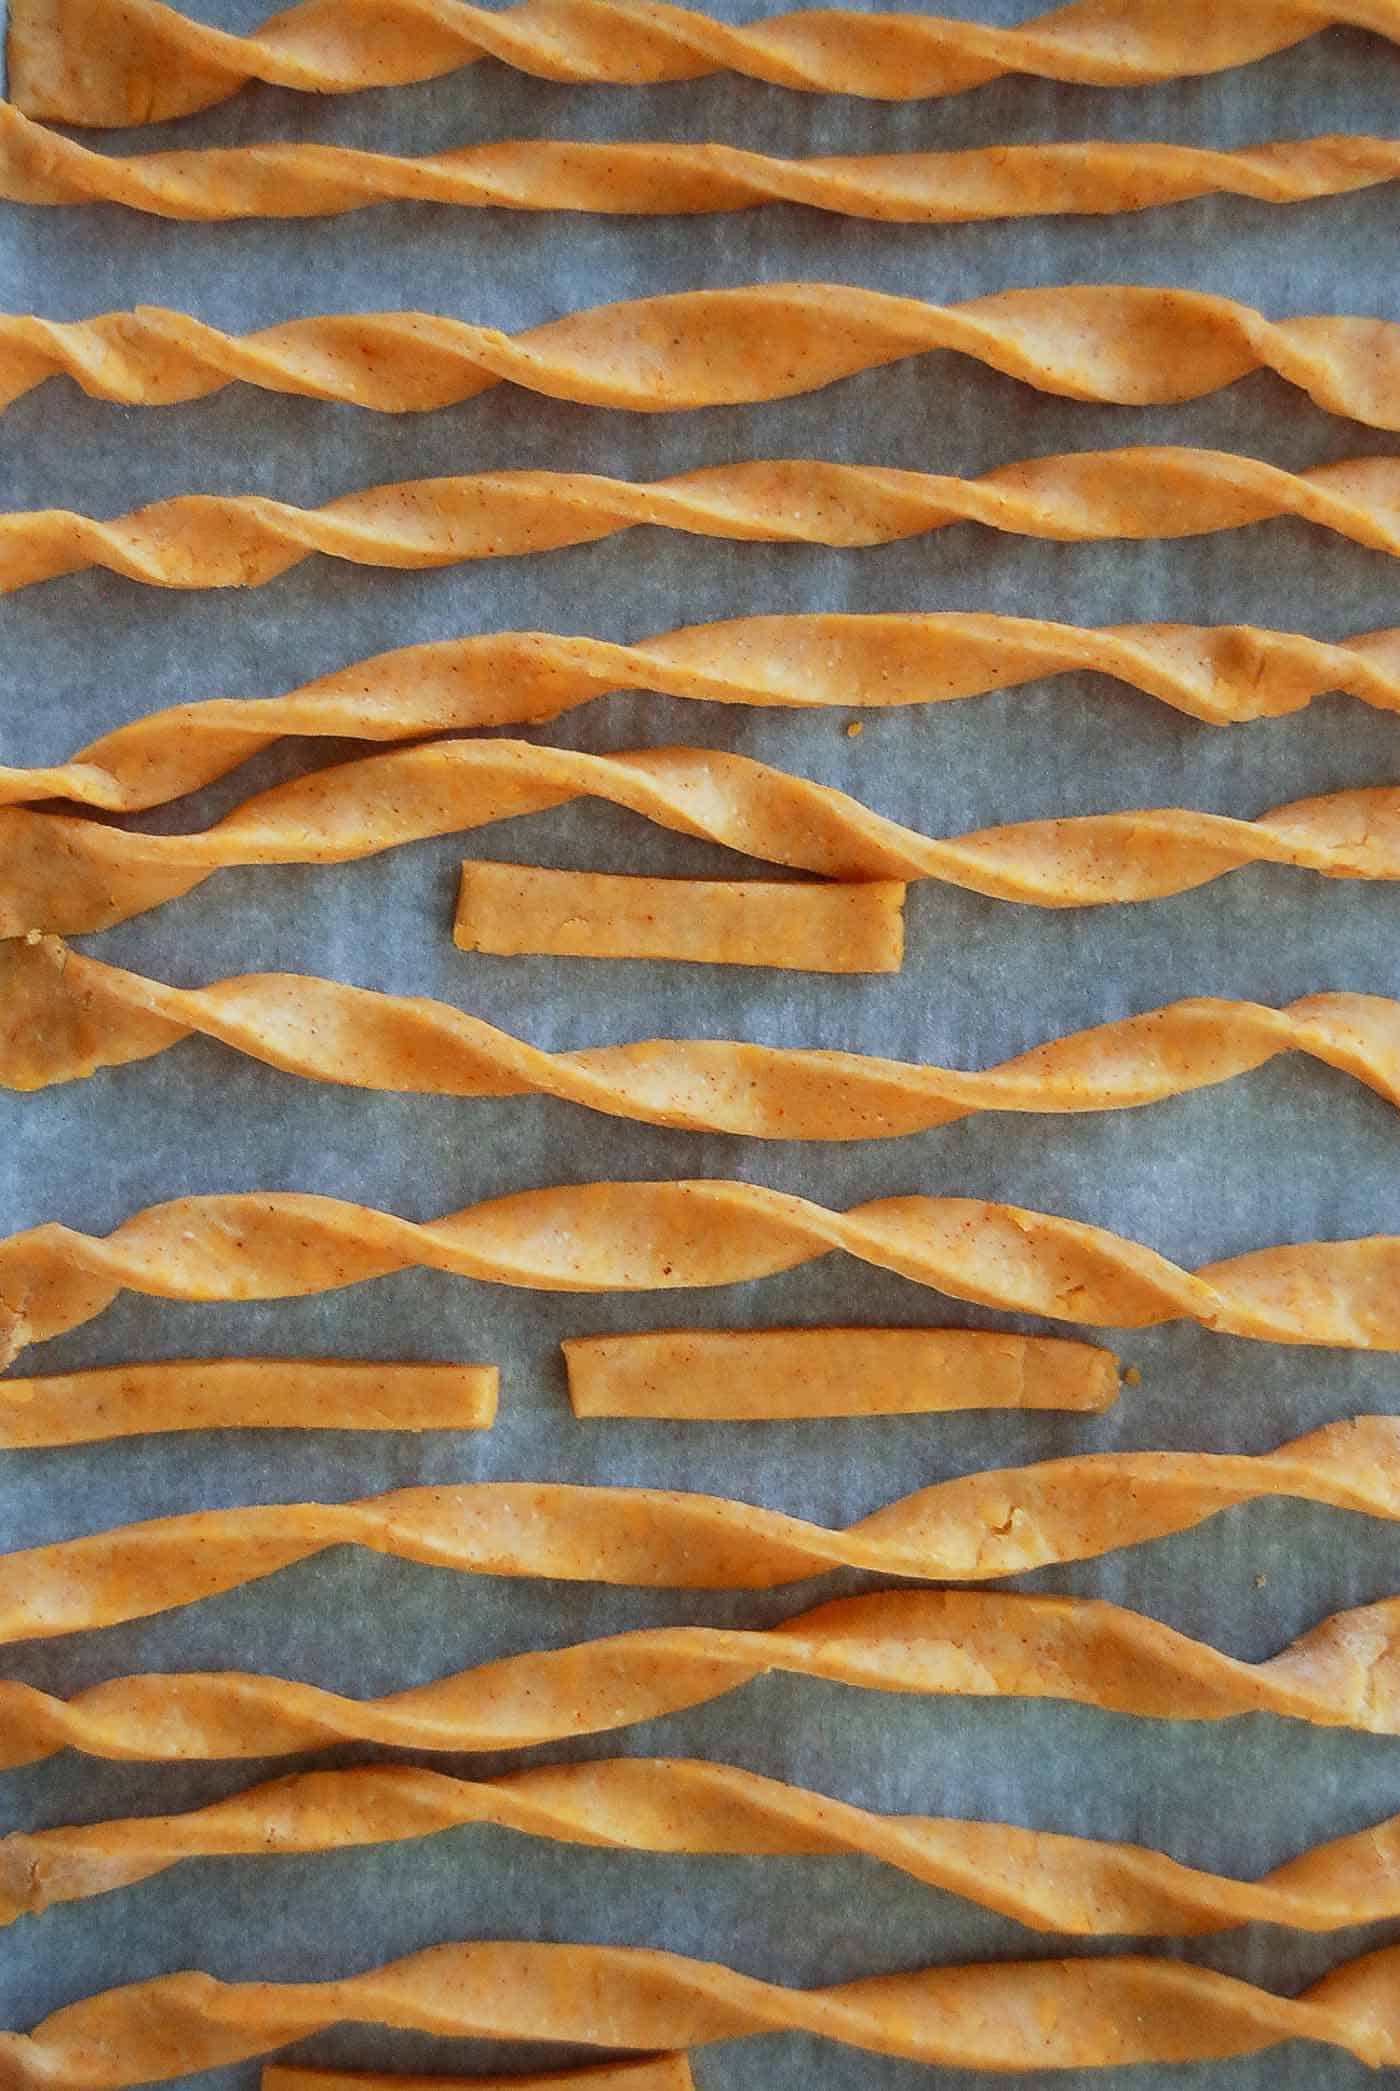
- Line two baking sheets with parchment paper and place the strips on the baking sheet about ½ inch apart. If desired, twist each cheese straw to make a long curling piece of dough. It may be a bit difficult to get the strips to stay in the twisted position. To help with this, press down the ends of each strip onto the parchment paper to help them stay in position.
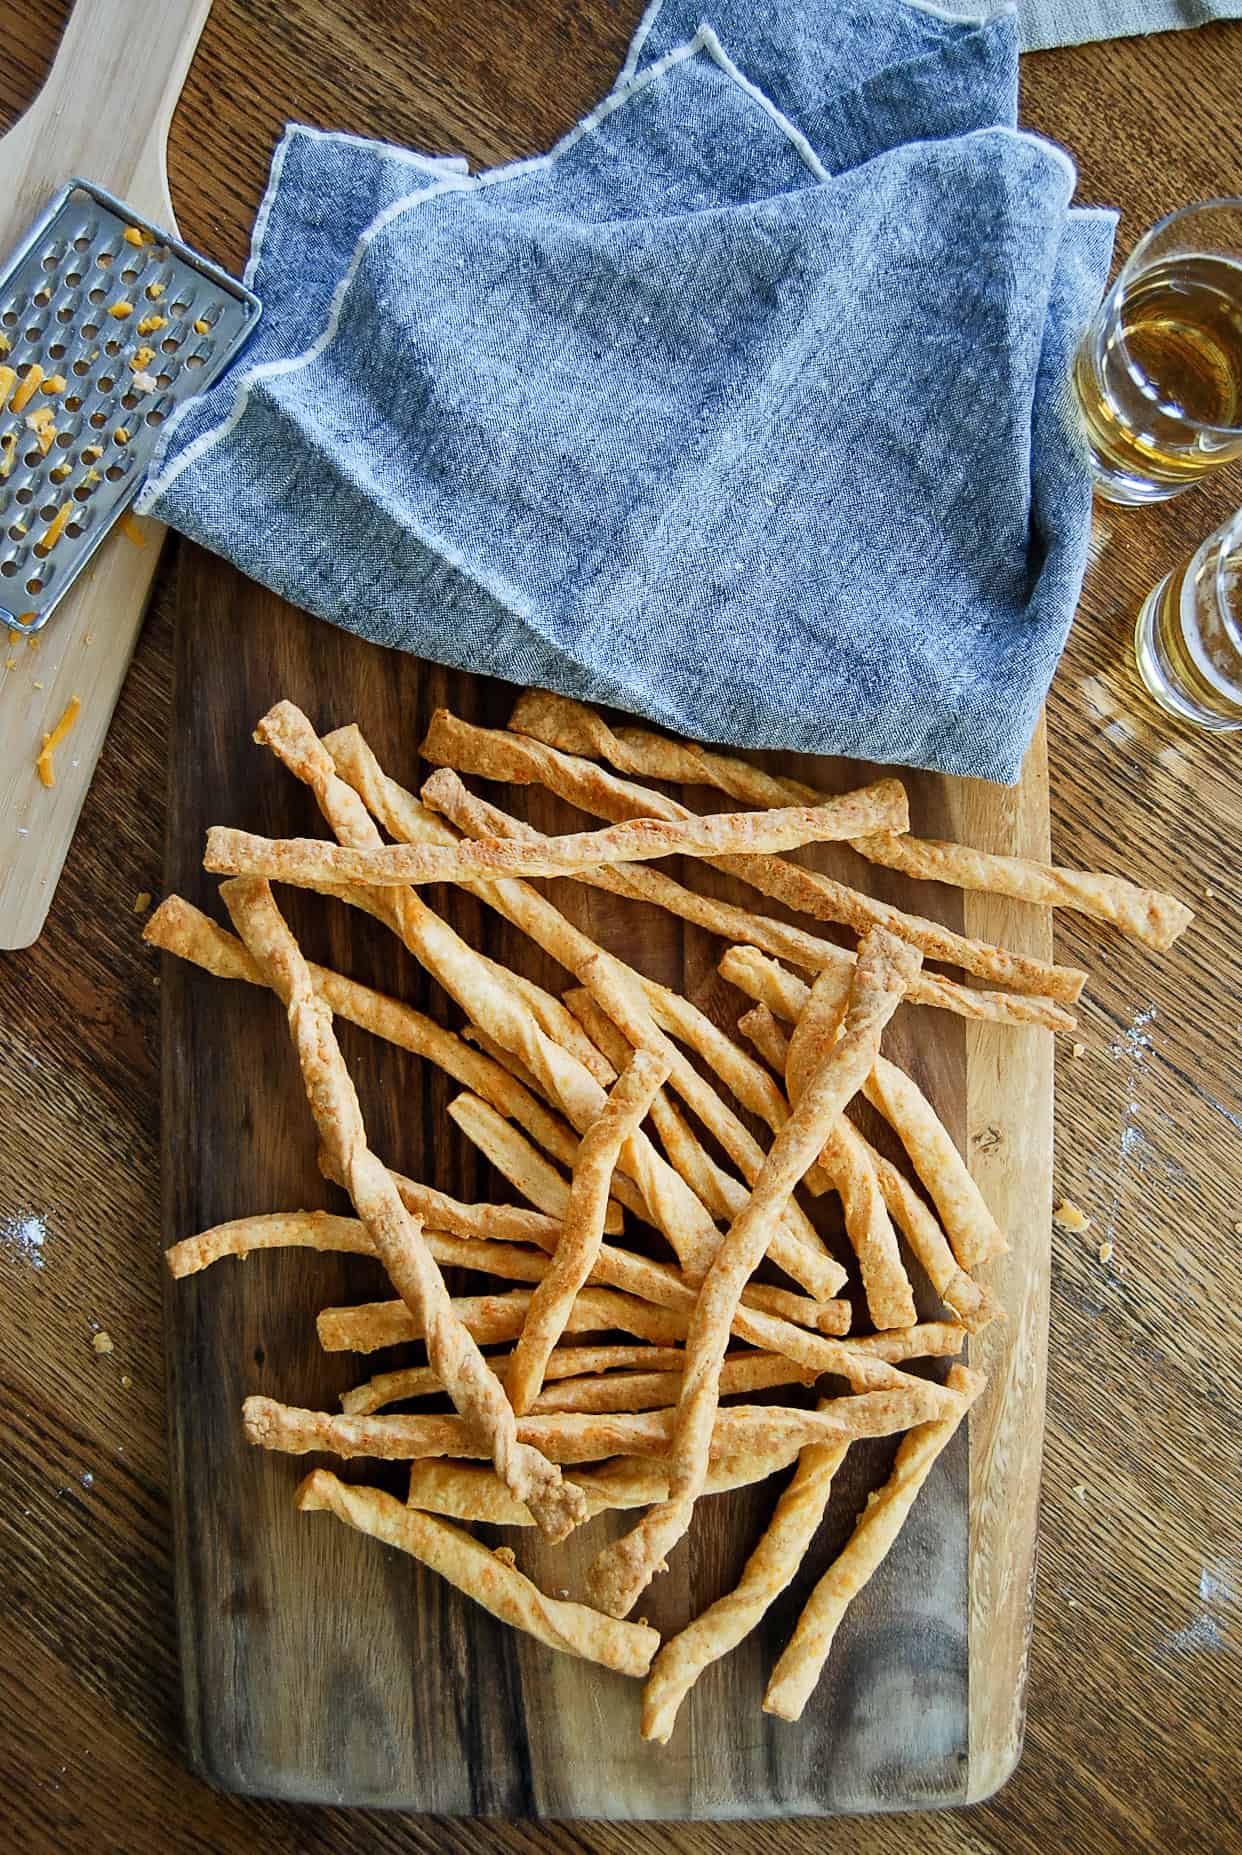
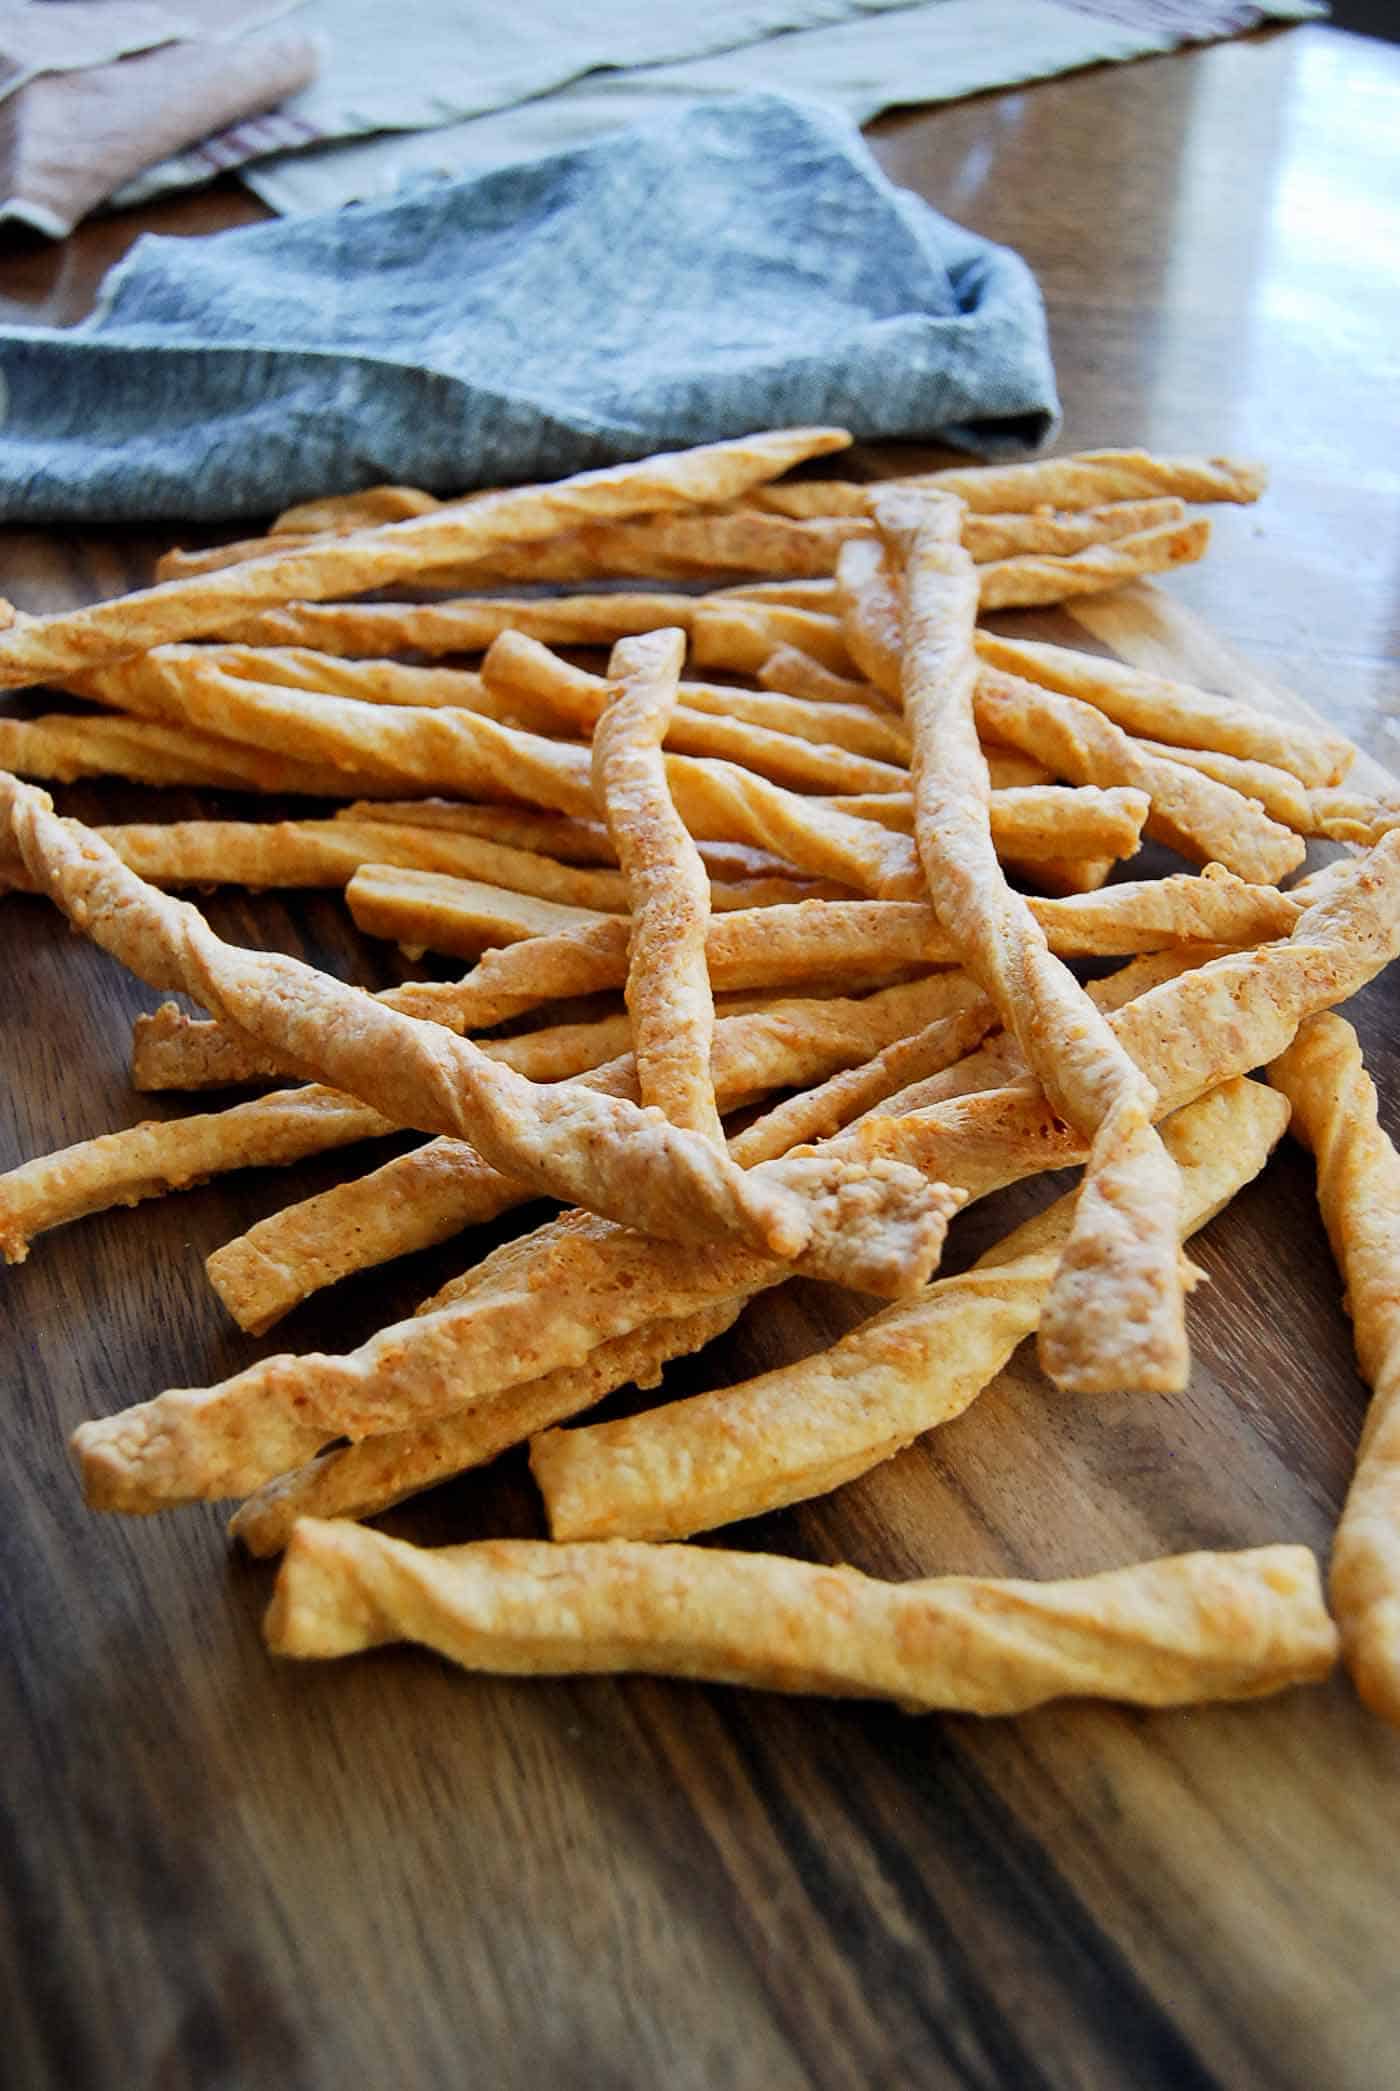
- Bake the cheese straws for about 20-25 minutes, or until they are a nice golden color. Cooking time may vary slightly depending on how thick the straws are. Watch them carefully so they don't burn.
How To Store Cheese Straws
These cheese straws can be stored in an airtight container for up to 3 days.
Can you freeze them?
These cheese straws are best within a few days of making, but you can freeze them if you wish. Just allow them to cool completely and carefully layer them with parchment paper in an airtight container or large freezer bag.
These straws are fairly delicate, so just be careful how you arrange them in your freezer. They'll break easily if jostled too much.
Do I Need A Cookie Press To Make These?
NO! You can easily make cheese straws without a cookie press by rolling the dough out into a thin layer and cutting it into strips using a sharp knife or pizza cutter. You can cook them just like that or twist the strips to make a nicer presentation. Easy, and no extra kitchen appliances needed!
Can I Freeze the Cheesy Dough?
Absolutely, and this is actually what I prefer to do! Make multiple batches of these straws, shape them into thick rectangles, then wrap them with plastic wrap and place them in a freezer bag, and into the freezer they go! These cheddar dough balls will keep for about 3 months, and they're the perfect snack when you need something quickly!
When you're ready to bake them, just take them out of the freezer and allow the dough to thaw until it's manageable and you're able to roll it out. Then slice into straws, bake, and serve!
Variations
As they are, these cheese straws have a rich and tangy sharp cheddar flavor and a hint of spice to give them just a little kick. But you can change these up in lots of ways to suit your preference:
- Use a different kind of cheese. I love the taste of sharp cheddar for these classic cheese straws, but you could try a different type of cheese, or even a combination of different cheeses to mix things up.
I'd stick to hard cheeses, though, with a sharp flavor. Soft cheeses will be a bit too melty and may not combine with the dough as well as a hard-grated cheese. - Add some fresh herbs. I love the spice of the cayenne pepper and paprika in this cheese straws recipe, but you could absolutely take these in a different direction by adding chopped fresh rosemary, thyme, or any other herb you'd like.
- Make them into cheese crackers! You don't have to leave these as straws. Roll them thin and cut them into squares to make crackers. Or be creative and make a different shape!
FAQs/Tips For Success
- Make sure you use room-temperature butter! We're not making pie crust here. The dough needs to be well blended. If it's too cold, you'll end up having small lumps of butter in the dough, and it will end up forming air pockets once baked. This is nice for a pie crust to produce those delicious layers of flaky crust, but not really what you want in a cheese straw or cheese cracker.
- Roll the dough thin. You want these to come out crispy, not doughy. The thinner you roll them, the crispier they will be.
- Allow them to cool completely before serving. This will help prevent them from breaking.
- These are fragile little suckers, so handle them with care! Otherwise, you'll end up with a bowl/bag full of cheese cracker crumbs!
If you make these Easy Cheddar Cheese Straws, let me know what you think in the comments. Then tag me with a post on IG!
More Easy Appetizers
- Wingstop Louisiana Voodoo Fries
- Spicy Caramel Popcorn
- Baked Pasta Nests With Meatballs
- Pear And Cheddar Hand Pies
- Fig Toasts With Cream Cheese And Honey
Recipe
Cheddar Cheese Straws Recipe
Ingredients
- 8 tablespoon unsalted butter
- 8 oz shredded extra sharp cheddar cheese
- ½ tsp salt
- 1 teaspoon cayenne pepper
- ½ teaspoon smoked paprika
- 1 ½ cups all purpose flour
Instructions
- Preheat the oven to 355 degrees and line two baking sheets with parchment paper.
- In a large bowl, mix the butter, cheese, salt, cayenne pepper and smoked paprika together until combined. Add the flour and knead the dough until the dough is well formed and smooth, about 3-4 minutes.
- Roll the dough out onto a well-floured surface and, using a pizza cutter, slice the dough into strips.
- Twist each dough strip and position on a baking sheet
- Bake the cheese straws until they are a nice golden brown color, about 20-25 minutes. (Watch carefully so they don't burn!)
- Remove from the oven and allow to cool on a cooling rack. Serve immediately, or store in an air-tight container.
Notes
- Use room-temperature butter to ensure it's evenly distributed throughout the dough. This will produce a more uniform cheese straw or cheese cracker.
- Roll the dough thin. You want these to come out crispy, not doughy. The thinner you roll them, the crispier they will be.
- Allow them to cool completely before serving to prevent them from breaking.
- These cheese straws are fragile little suckers so handle them with care! Don't overstuff your storage or serving containers unless you want a bowl full of crumbs!
Explore More with AI


Mary Penzer says
one stick of butter is 4 oz
and it worked out fine with just 4 oz
a pound is a pound the world around
therefore 16 oz is 4 4 oz sticks
Sarah Jenkins says
Thanks Mary for that catch! I've updated the recipe.
Harold says
Good when guest's come
Sarah Jenkins says
Yes - it's such a fun and easy appetizer! These cheese straws are always one of the first things to go!