
This Fresh Peach Pie Recipe is the best way to use up those summer peaches. A crisp, buttery pie crust filled with a juicy and flavorful peach pie filling makes this pie unbeatable.
We had guests in town this past weekend, which made it the perfect time to whip up a fruit pie in advance. Lucky for me, it's peach season here in Colorado, so the peaches are literally EVERYWHERE. So, a peach pie recipe with fresh peaches it is today.
There's no shortage of great peach pie recipes out there, but one I come back to over and over is the New York Times Perfect Peach Pie. The crust is buttery and delicious, the pie filling has a good consistency, and it comes together pretty easily. (Also, did I mention your house will smell AMAZING when this baby is cooking? Prepare yourself!) IMHO, this is seriously THE BEST peach pie recipe out there.
The only adjustments I made to this peach pie recipe were to add a bit of cinnamon to the flour, which gave the crust a nice warm flavor, and to reduce the sugar to ½ cup from 1 cup, which makes the filling just a bit less runny.
(Want more fruity desserts? Try my Fresh Rhubarb Pie Recipe, this Easy Blueberry Crisp, this easy Peach Ice Cream, or my Simple Peach Cobbler Made With Cake Mix for some other ideas!)
In This Post
Here's Why This Recipe Is The Best!!
This is a from-scratch pie, which does take a bit of time, but it's so worth it. I love this peach pie for so many reasons:
- Fresh and delicious. It uses fresh peaches, so the pie filling is incredibly juicy and delicious. This pie seriously tastes like summer.
- The buttery, flaky crust. This crust is made with butter (not shortening!) and comes out perfect every time. It's a hearty crust that is light and airy but holds up well for a wet filling.
- It's the perfect pie for any season. Of course, peach season is a no-brainer (this peach pie seriously tastes like summer!), but the addition of cinnamon and nutmeg gives it a nice warming flavor that's also great for fall, winter, or spring.
Ingredients
- Fresh peaches. While you can use canned peaches, nothing really compares to fresh peaches in this pie. They're just so much more flavorful than canned peaches, and the texture and consistency are much better. Canned peaches will leave you with a mushy filling.
When choosing your peaches, make sure you're choosing slightly firm (but not hard) peaches that have no bruising or soft spots. These peaches are generally past their prime and will result in a stringy and mushy pie. If you think your peaches are not ripe enough yet for a pie, place them in a paper bag with a banana for a day or two to help them ripen up. - Flour. This acts as a great thickener for the pie filling. If you prefer, you can also use cornstarch to help thicken it.
- Lemon juice. Just a small amount of this will help brighten the pie tremendously.
- Sugar. Use granulated sugar here, not brown sugar. I reduced the amount of sugar called for in the original NYT Peach Pie recipe from 1 cup to ½ cup and found that this was more than enough for my juicy peaches.
- A pinch of nutmeg. The nutmeg here adds a bit of spice and a bit of extra depth of flavor to this peach pie filling.
- Flour, salt, cinnamon, and butter. These are the main ingredients for your delicious buttery pie crust.
How To Make This Fresh Peach Pie
Making The Butter Pie Crust
Are you intimidated by pies? I sure used to be. The best ones really are from scratch, but making your own dough, rolling it out, creating the filling….and the fancy designs or lattice work on the top? Forget about it. It all seemed to be too much hassle.
Until I actually made one. And then I realized that the hardest thing about making a pie is making the dough. And the hardest thing about making the dough is that you need to plan a little bit for it in advance (it needs to chill). You can use almost any filling you want (even savory ones!), and there's no need to get all Martha Stewart on the top - a full-on double pie crust with slits is just fine and tastes exactly the same as one with fancy cut-outs or latticework. I promise.
Of course, if you must use a ready-made pie crust, that is totally fine. (And trust me, I get it - we all only have so much time on our hands.) But you guys, this NYT pie crust is seriously to die for. It uses all butter - no shortening here. It's flaky, flavorful, crispy, and bakes up beautifully. This is the pie crust I come back to again and again for all my pies, and it never disappoints. Here's how to make it:
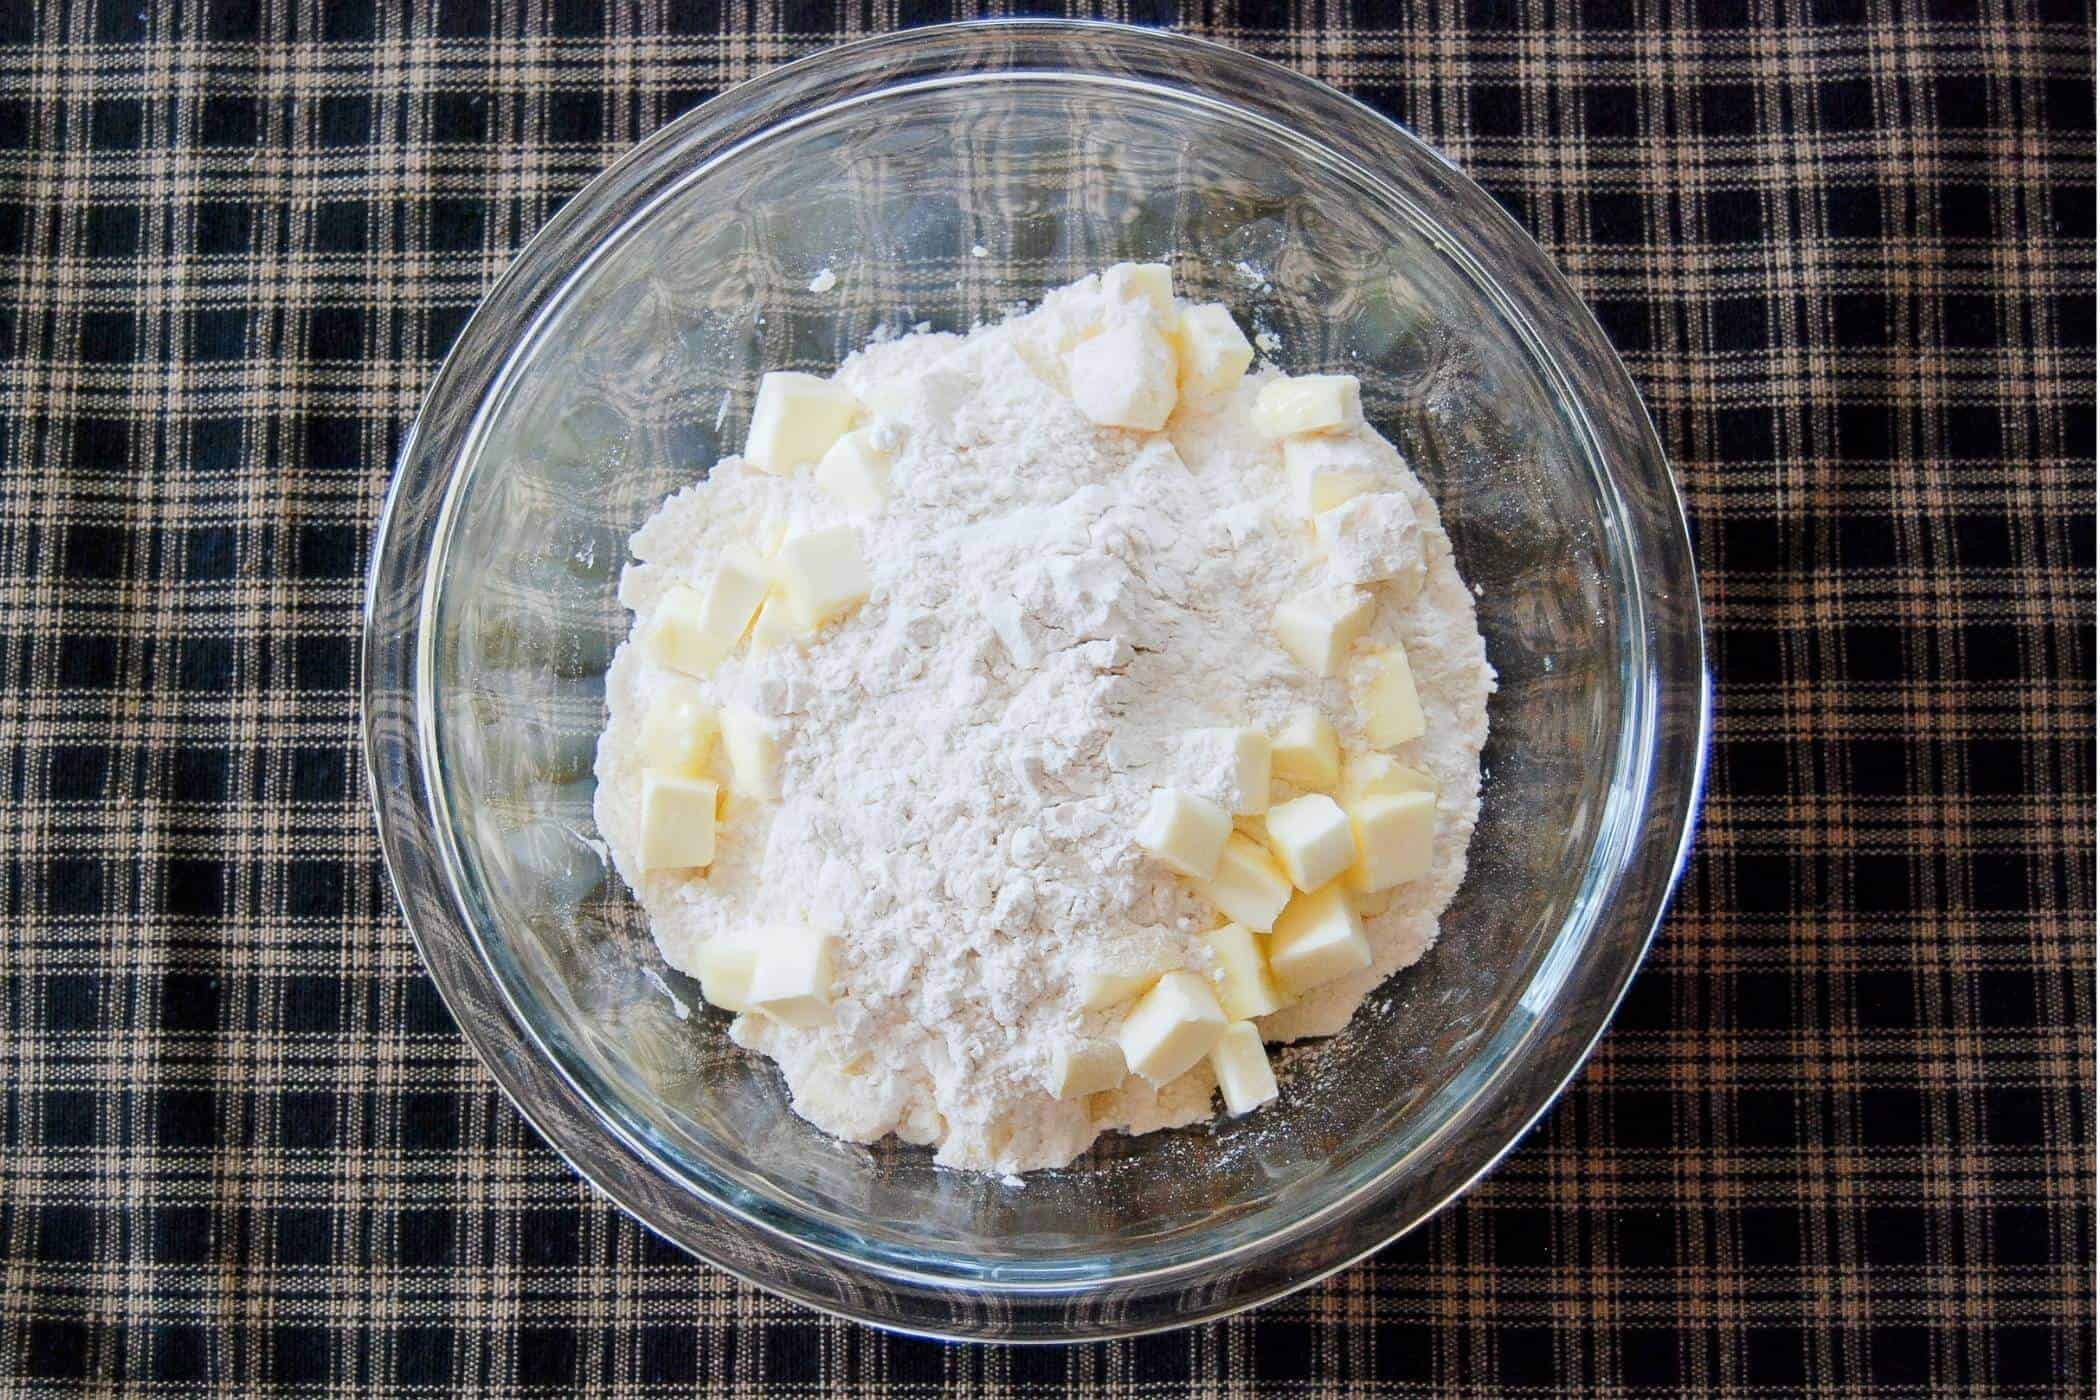
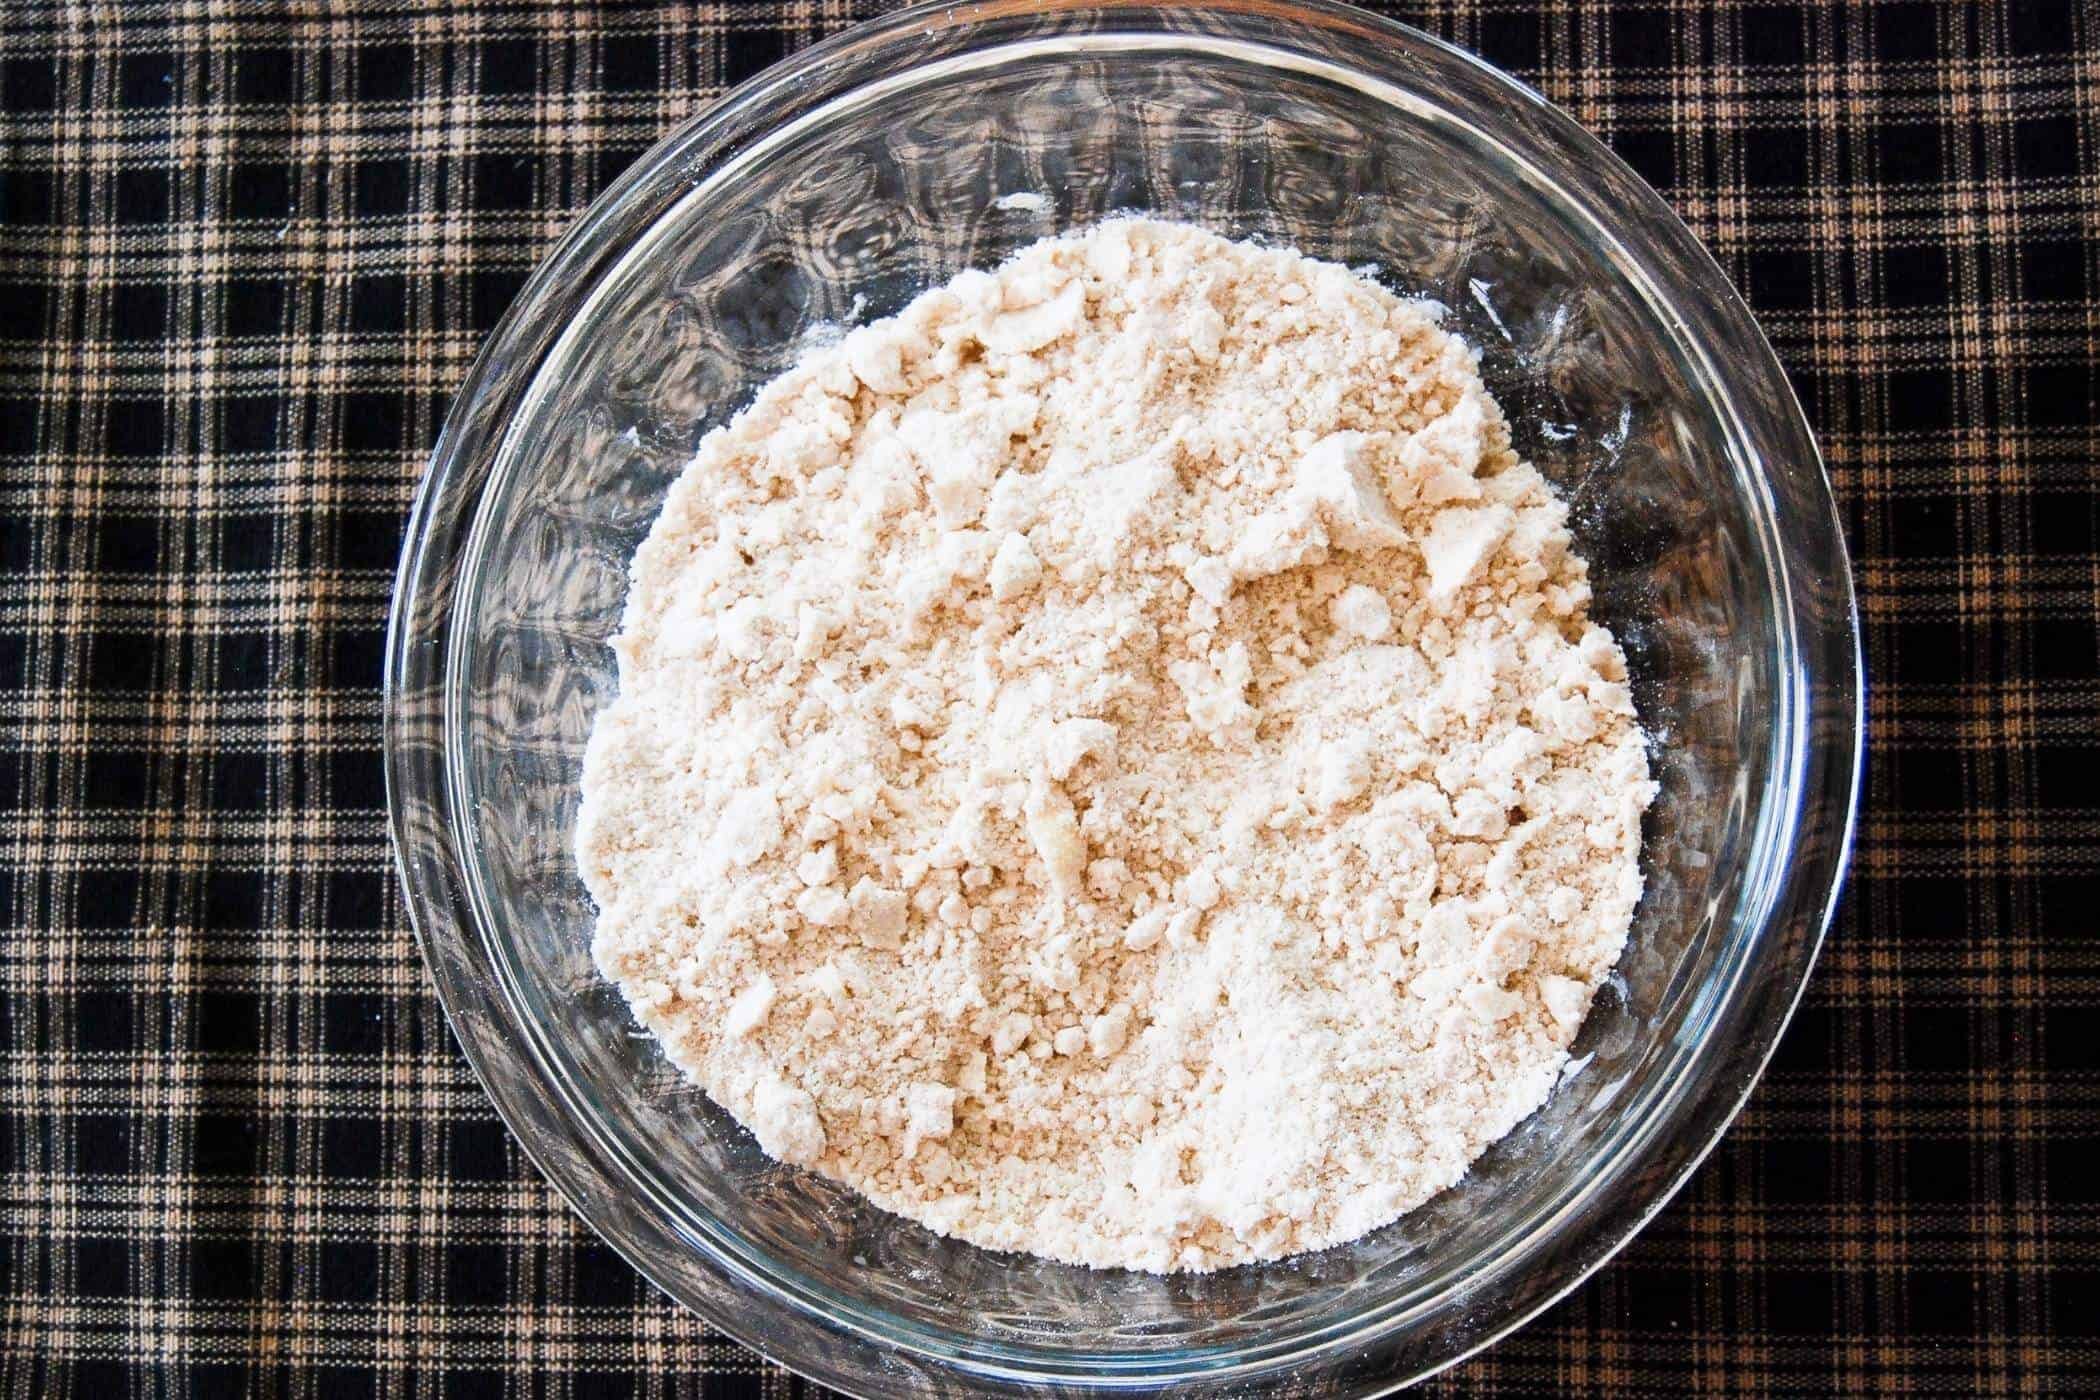
- To start, combine flour, salt, cinnamon, and butter together. A food processor makes this easy, or you can cut or grate the butter into the flour mixture (with knives or a pastry cutter if cutting the butter, a grater if grating it) and then finish it up with your hands.
The mixture will be a bit pebble-like. This is what you want. A tip for your pie crust - the colder your butter, the better. Those little pebbles of butter are what will help to create the layers in your pie crust and make the crust nice and flaky.
I like to keep sticks of butter in the freezer, then use a grater to grate the frozen butter into my flour mixture. This makes it super easy to combine with your hands, and the grated slips of butter create 'pockets' in the dough, causing them to puff up when you bake it. - Next, mix the egg yolk, vinegar, and ¼ cup of ice water together. Drizzle a little bit of the mixture over the dough, and gently stir to combine. Keep adding a little more liquid, a little at a time, until the dough starts sticking together a bit. (Note - I ended up adding some extra cold water to my dough because it wasn't sticky enough.)
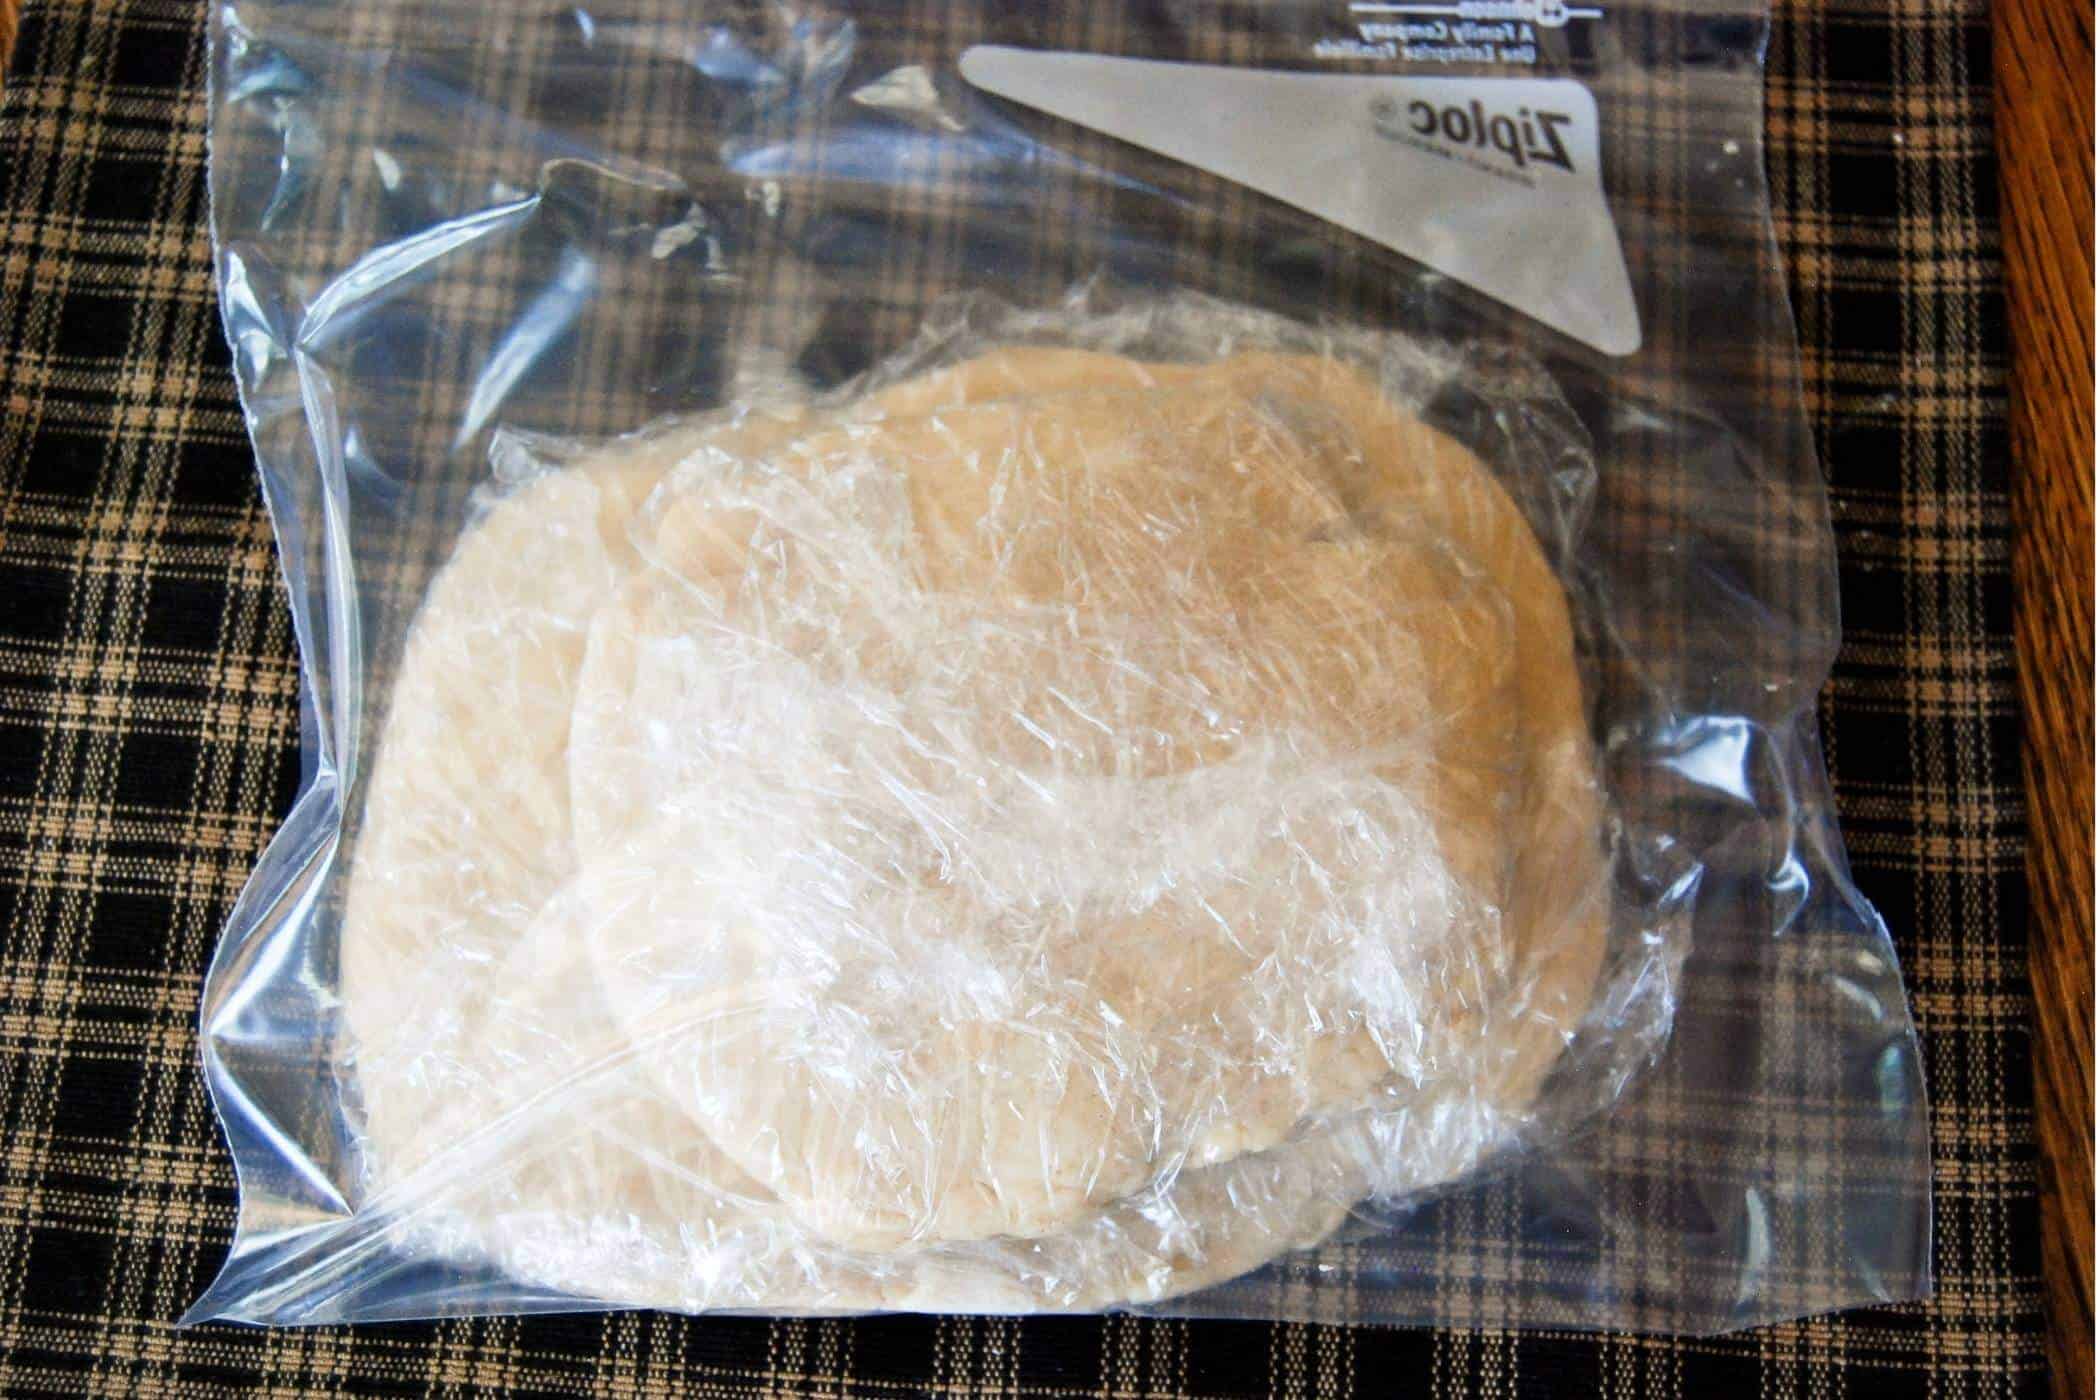
- Turn the dough out onto a lightly floured surface and roll it up into a ball. Divide the ball into four with a knife, then flatten each ball with the palm of your hand to expand the pebbles of butter. (This improves the flakiness of the crust by distributing the butter more evenly throughout the dough!)

- Gather the dough together again and then divide it into two pieces - one of these will be for the bottom portion of the crust, and the other for the top, so make one slightly larger than the other. Flatten each ball into a disc and wrap it in plastic wrap. Place in the refrigerator for at least 60 minutes. (I refrigerated mine for about 24 hours since I wasn't using it until the next day.)
Tip: I often make the dough for the pie crust a day ahead so that when it's time to cook the pie, it's easy to pull together quickly. You can also make a double batch of this dough and freeze it to use later when the mood strikes you.
Making The Filling
This pie filling is super juicy and is really easy to make since you only need 5 ingredients.
- To make the filling, first, peel and cut your peaches. This may feel intimidating, but it actually isn't hard at all if you know how to peel a peach.
(Note - I find that peeling the peach is actually pretty easy and makes for a nice consistency in the pie. However, many reviewers claimed they didn't even bother with this process, and the pie still turned out fine. You do you.) - Combine the peaches with a couple of tablespoons of granulated sugar, and place them in a colander over the sink for 30 minutes. This helps the peaches release their juices just a bit, and I found it really helps to prevent the filling from becoming too watery.
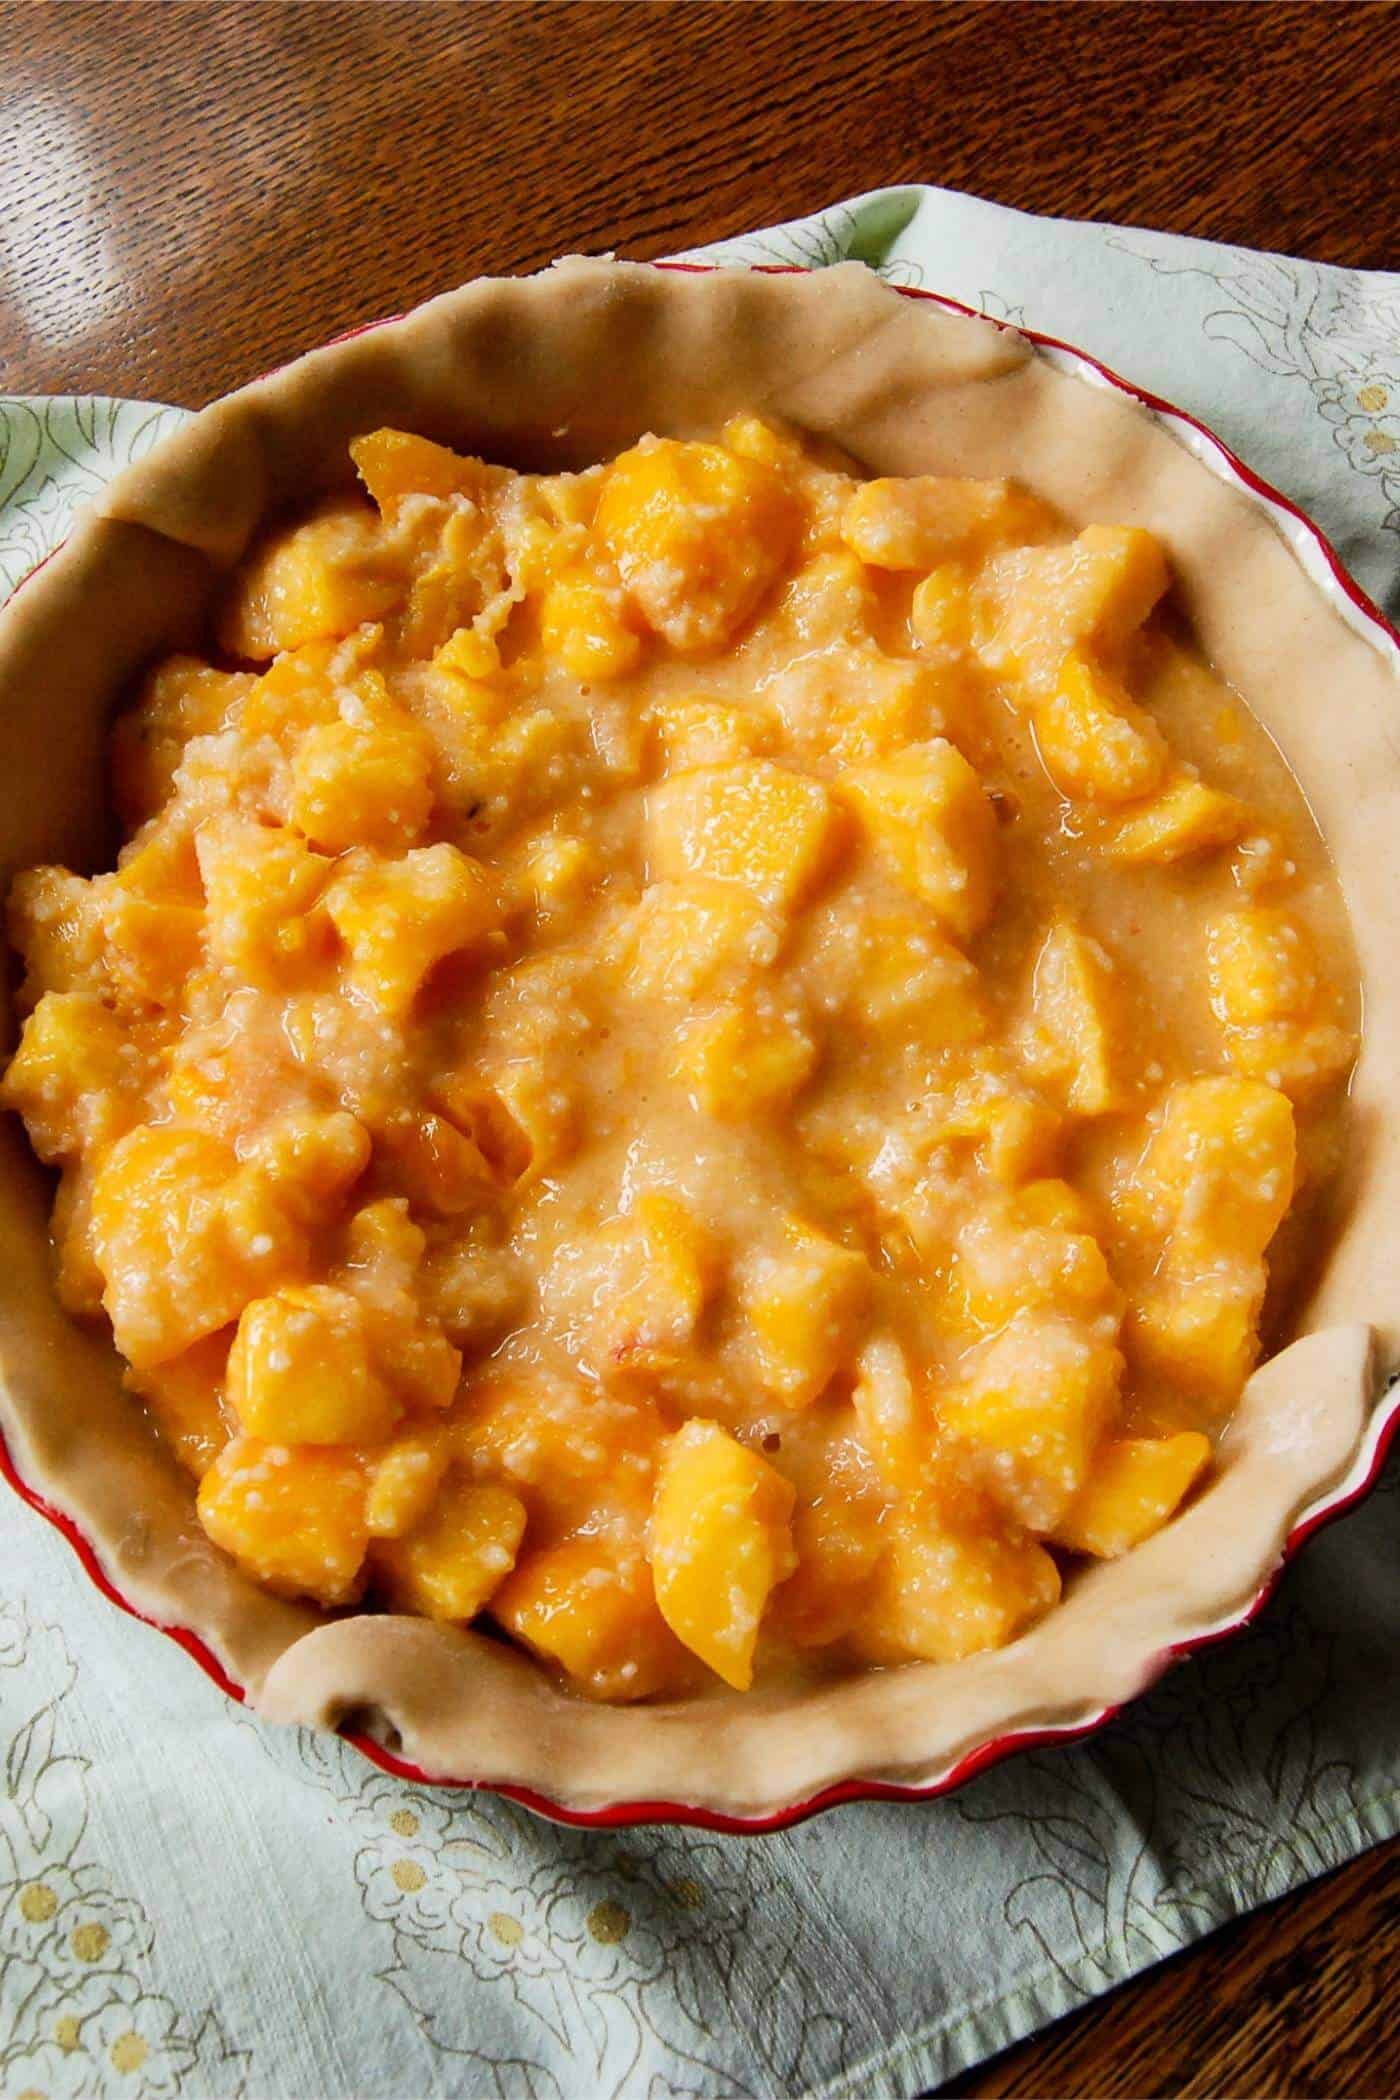
- Once your peaches have released their juices, combine the cut peaches, flour, lemon juice, and sugar, and set the peach pie filling aside.
Assembling The Pie
- Remove your dough from the refrigerator. You may need to let it sit for several minutes if it's too cold to roll out just yet. Once it's easily manageable, roll out your two discs of dough on a lightly floured surface, and place the larger one in a 9-inch pie plate.
- Add an egg white wash to the bottom pie crust before adding your peach pie filling. This helps the crust to remain crisp and creates a seal between the crust and the filling
- Pour the peach pie filling into the prepared crust and then sprinkle the mixture with nutmeg.
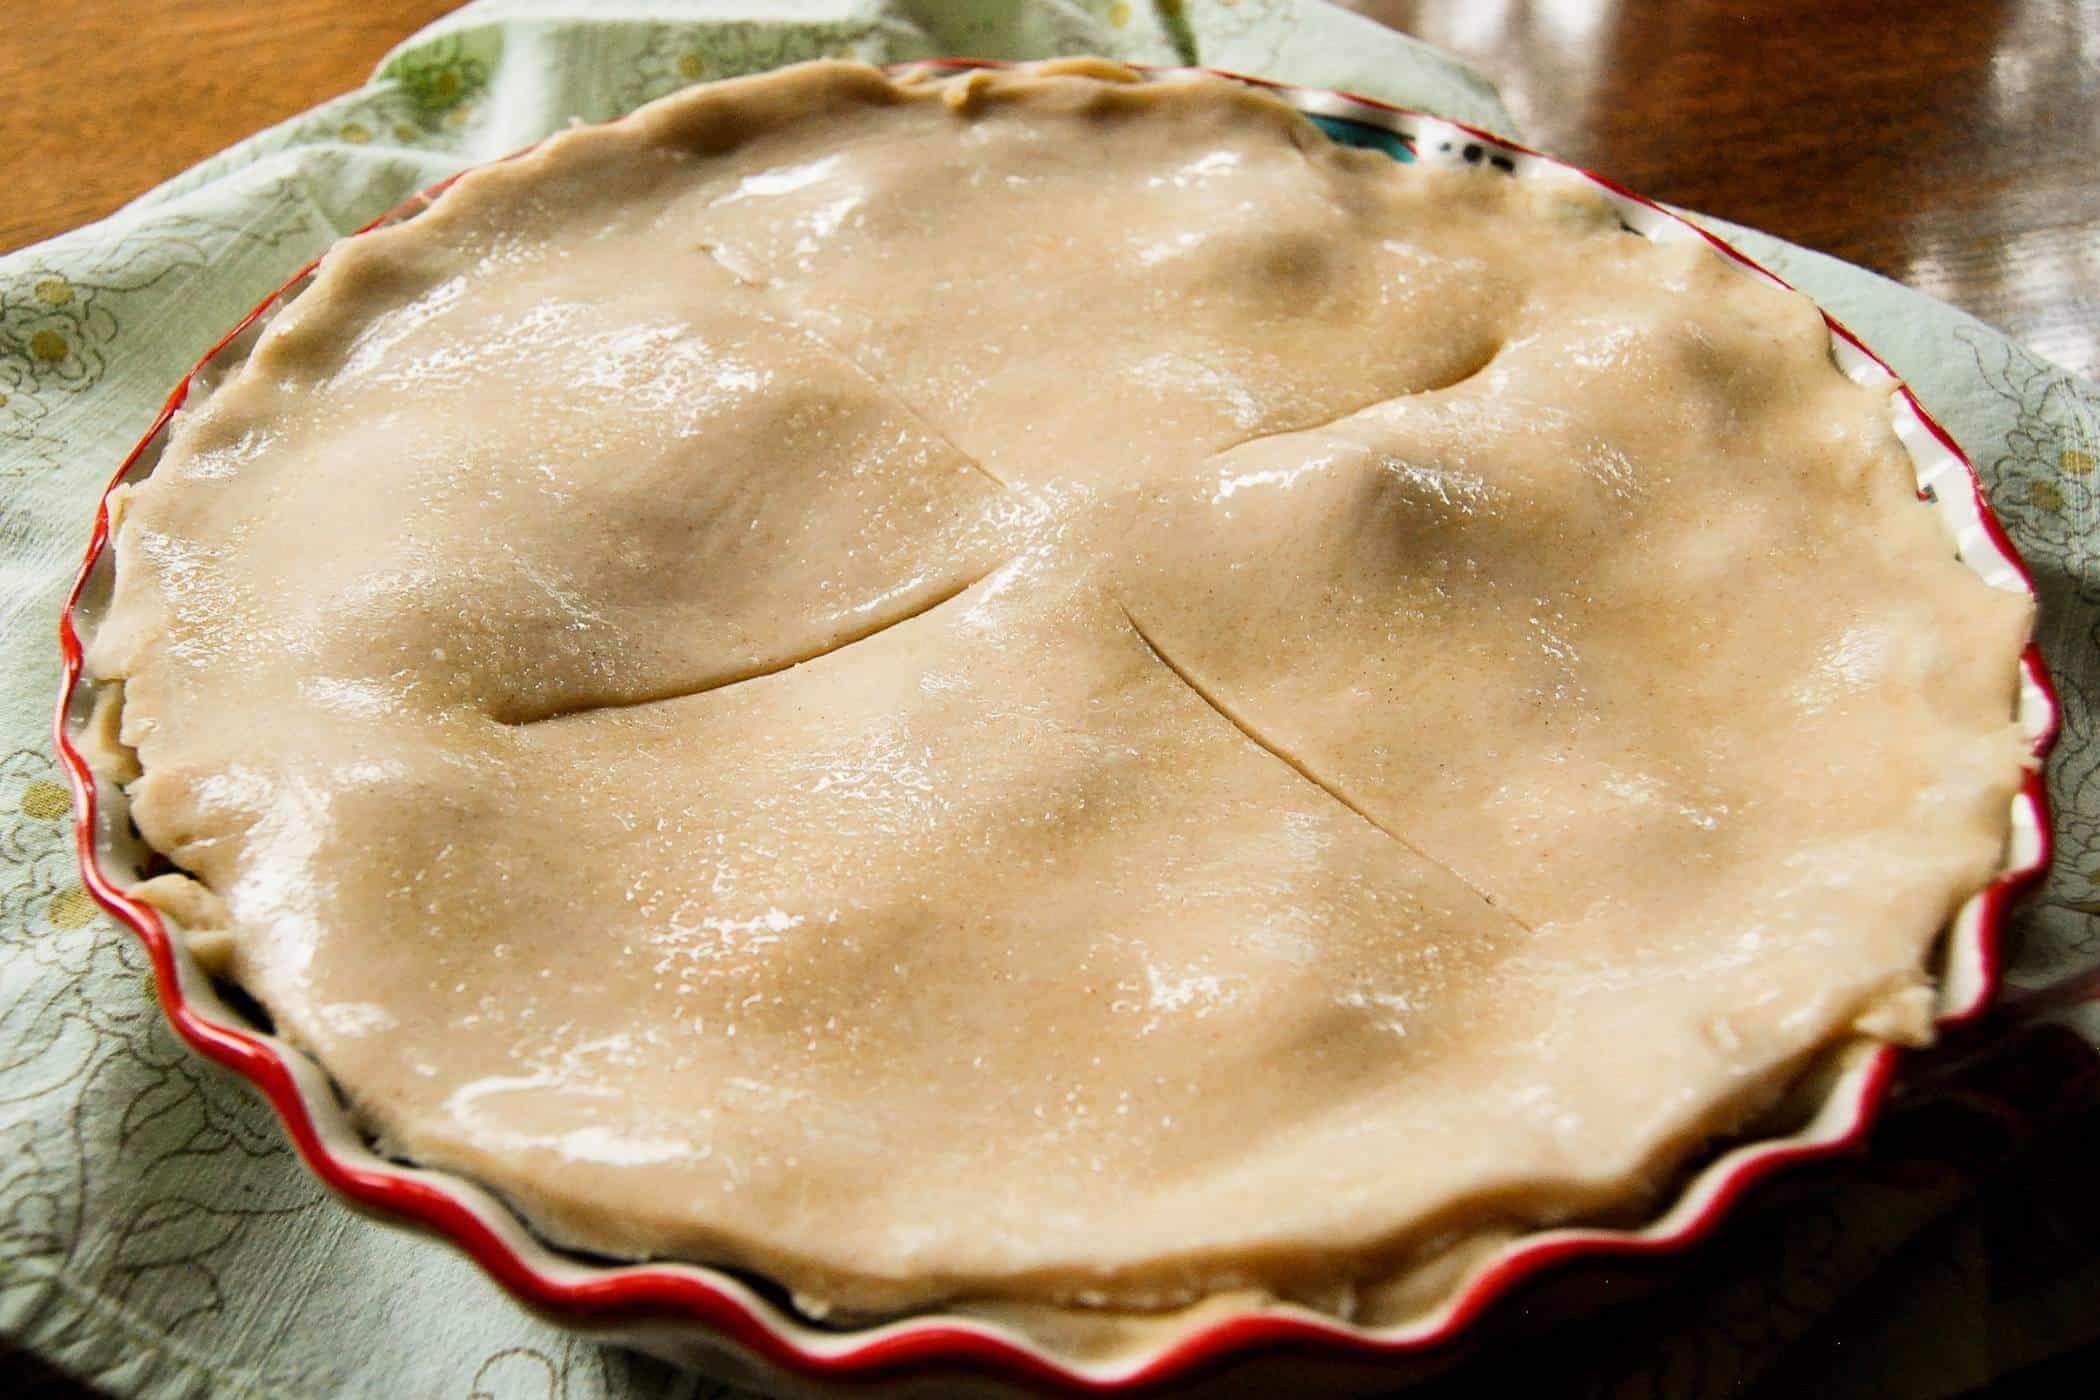
- Prior to placing the top crust on your pie, brush some water around the edges of the bottom of the pie crust. This will help to create a good "seal" for the pie and keep it from separating during baking.
- To finish assembling the pie, place the smaller sheet of dough on top of the peach pie filling and crimp the edges together. You can do this easily with your fingers or a fork. Next, add an egg wash (basically a brush of egg white across the top of the pie), and sprinkle on some granulated sugar.
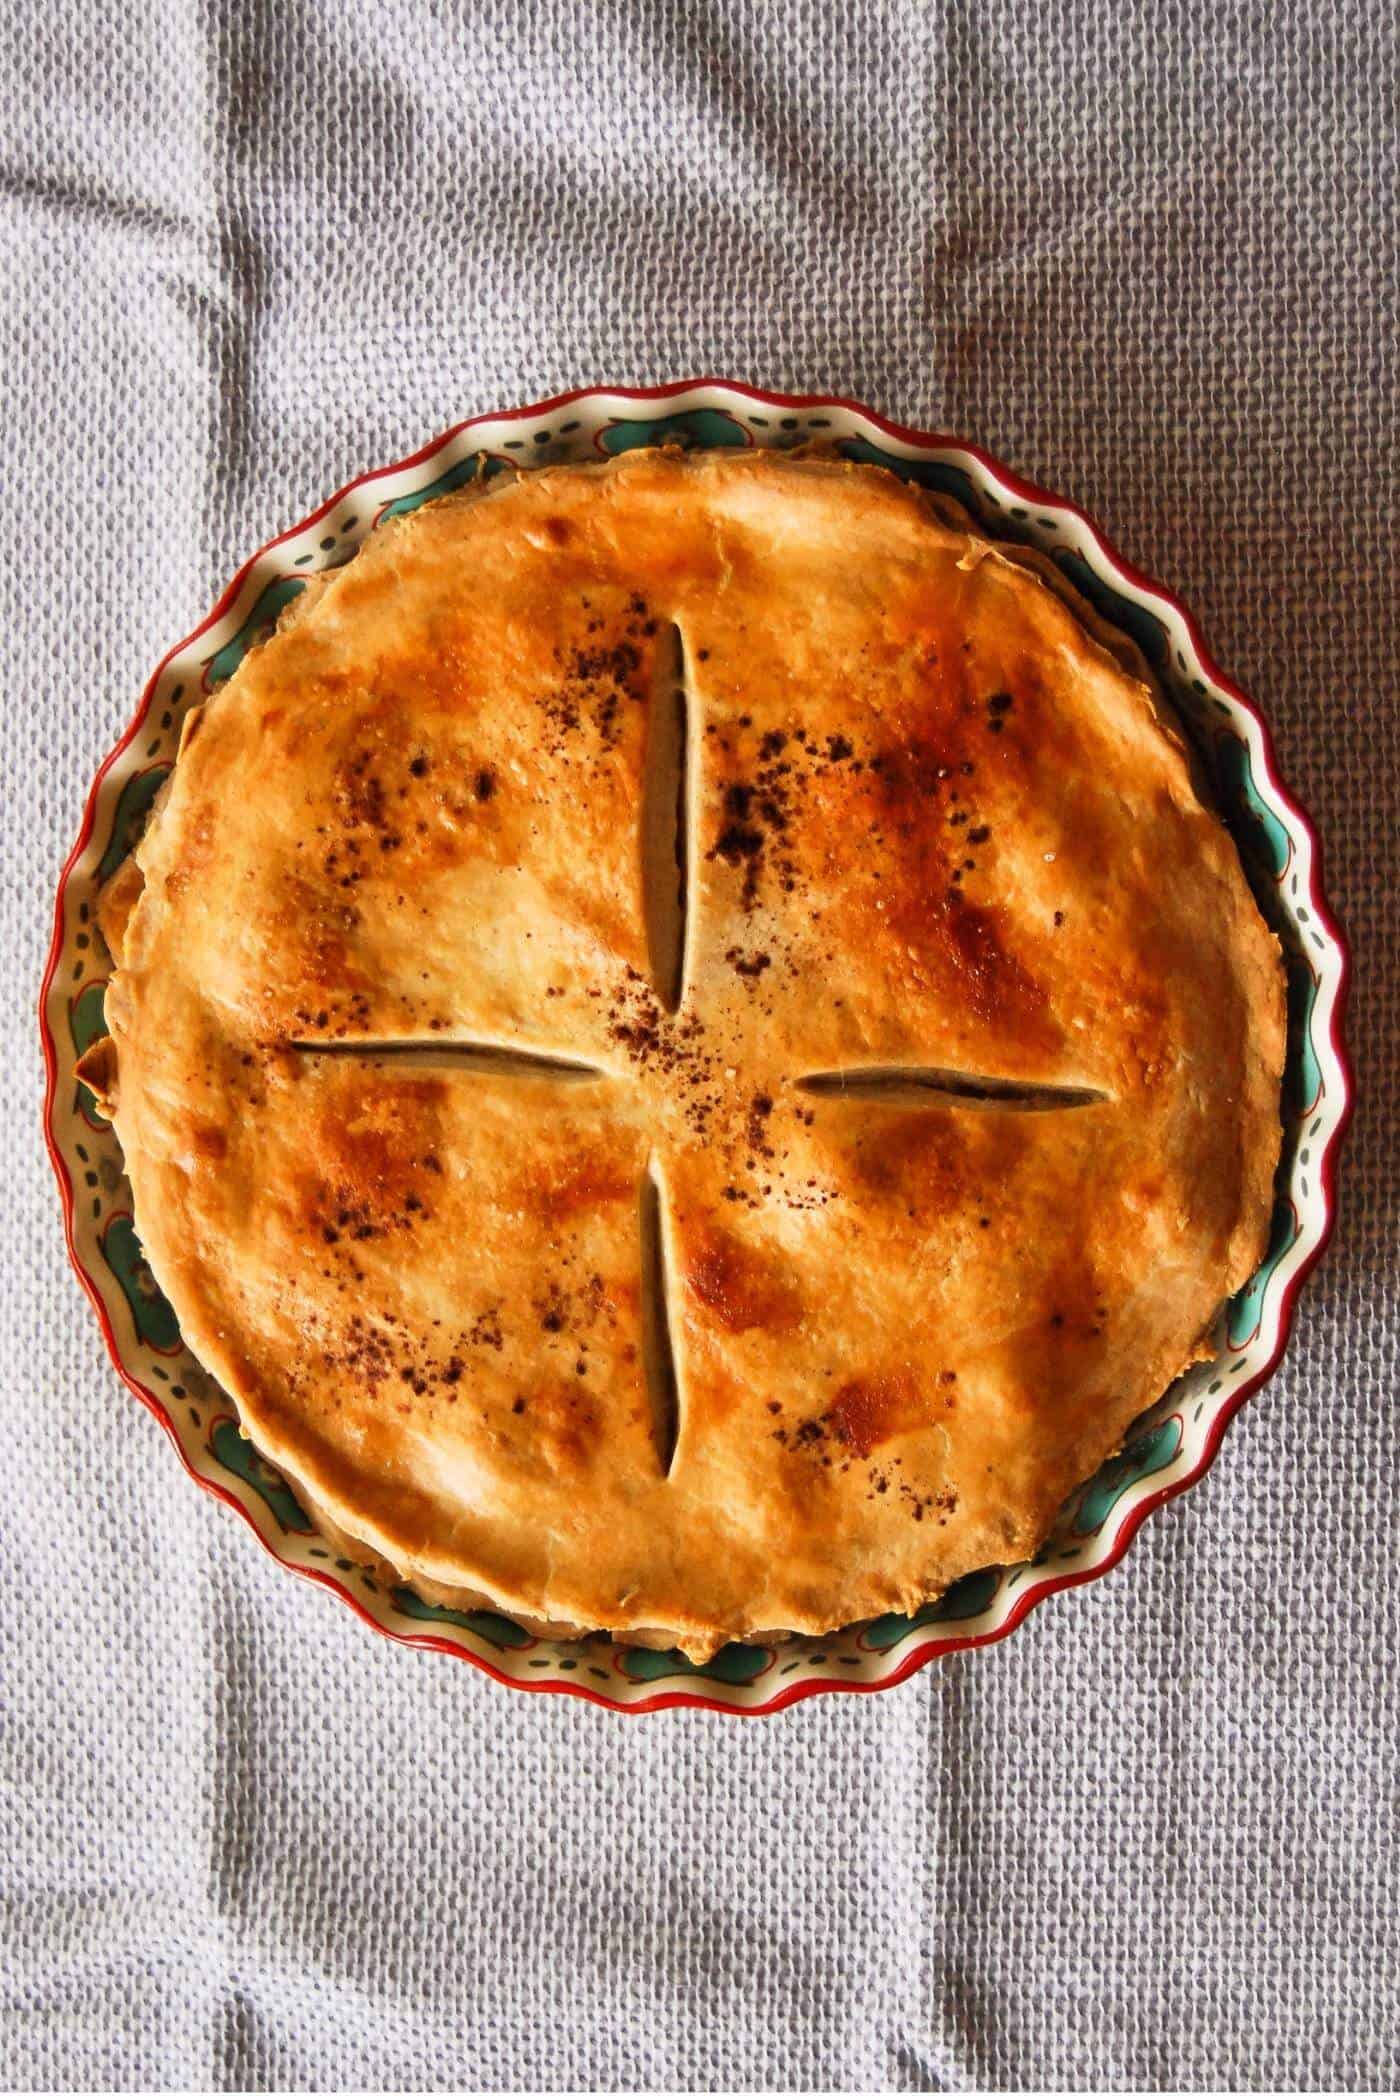
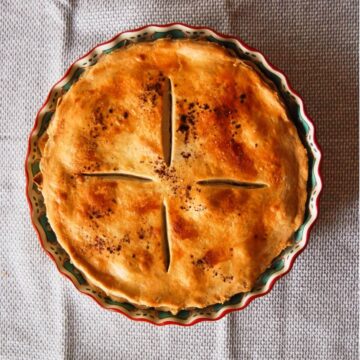
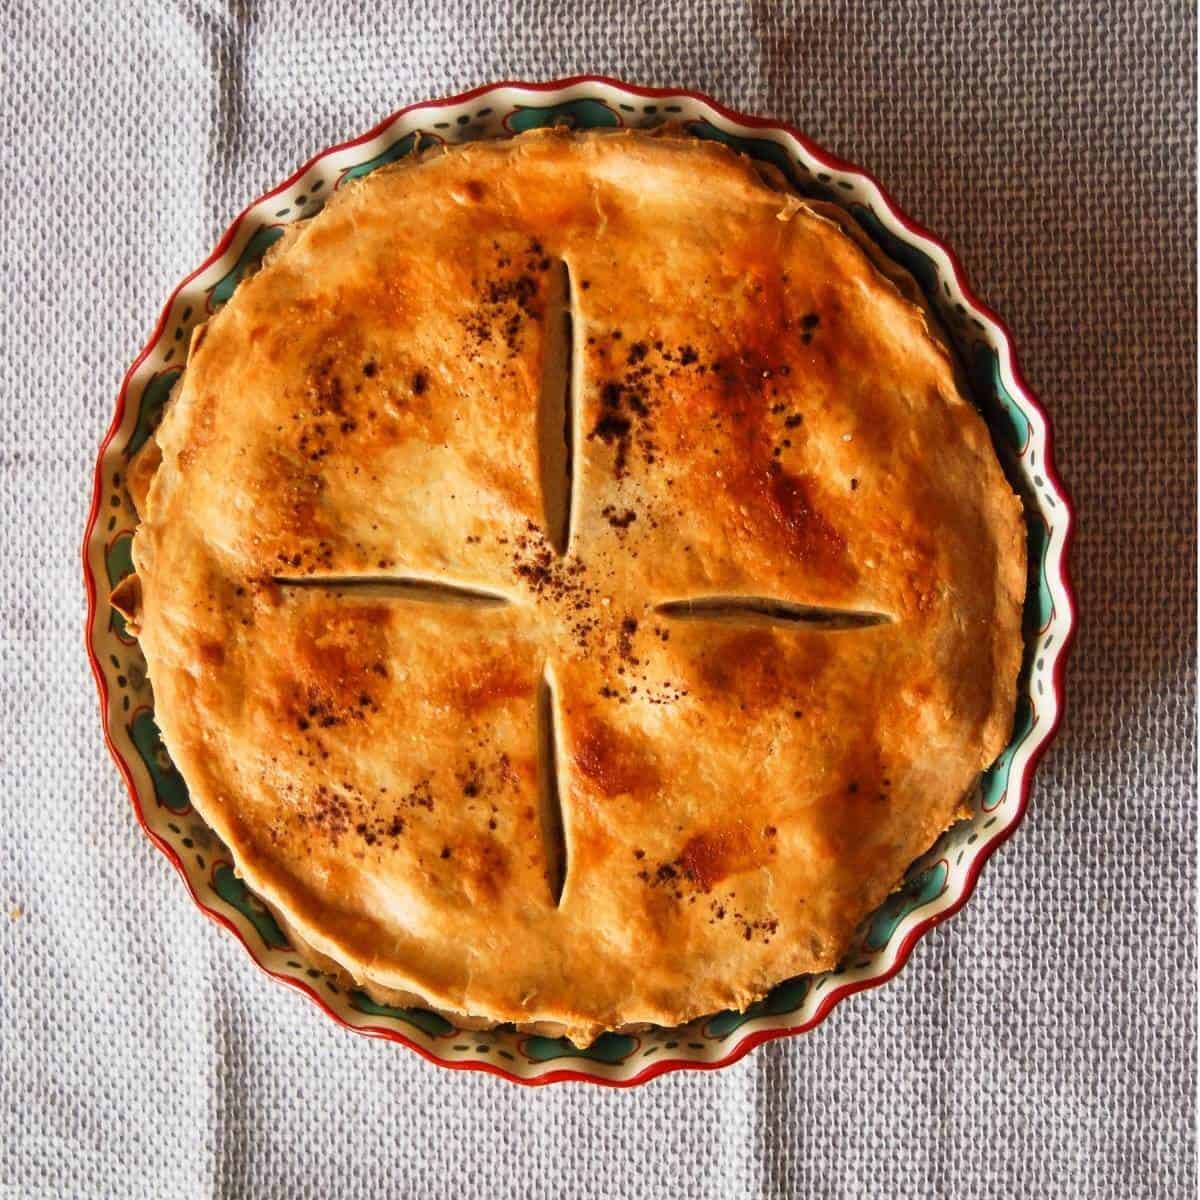
- Finally, cut 4 slits on the top of the peach pie to allow it to vent. Then bake it for about an hour, and you're almost there!
- Let it rest for at least 30 minutes. I know, I know - you've put so much work into this delicious, juicy, fresh peach pie, and now I'm telling you you can't eat it yet? Blasphemy! But the pie filling needs time to rest; otherwise, it will be too runny and will be a big mess when you try to serve it. Give it time, and you will be rewarded with a nice, firm, but juicy (how is it possible?) peach pie slice that will not only taste delicious but will be Instagram-worthy.
Helpful Tips For Making This Fresh Peach Pie Recipe Truly Perfect
- Fresh peaches work best here, although you can also get away with using frozen if you're making this pie off-season.
- If you find your peach pie filling seems a bit too runny (especially if you've made the filling in advance), let the filling sit in a colander for a few minutes to drain some of the juices. Because the sugar brings out the juice in the fruit, it's best to make this filling as close as possible to when you're going to make the pie. This prevents it from becoming too juicy. Using less sugar than the NYT recipe originally called for also helped cut down on some of the extra juice.
- "Seal" your double pie crust with water. When making a double pie crust, brushing the bottom edges of the crust with water before adding the top layer can help seal the pie once you pinch the edges together.
- Add an egg white wash to both layers of the crust. A great trick for pies is to add an egg white wash not only to the top of the pie but to the bottom pie layer as well, prior to adding your filling. Adding the egg white wash to the top of the pie will give the pie crust a nice golden color on the top and also help your sugar sprinkles stick to the crust. Adding it to the bottom layer of the pie helps to create a seal between the crust and the pie filling and helps to prevent a soggy pie bottom.
- Don't forget the vents! When you bake a pie with a double crust, the filling produces a ton of steam. Not adding vents may cause your pie to rupture (the steam has to go somewhere, right?) and can make the crust a soggy disaster. Four simple slits made with a sharp knife are enough to prevent this from happening. Or, you can get really fancy and use a pastry cutter to cut shapes into the top of the pie.
- Start your temperature off high for the first 15 minutes (425 degrees), then reduce it to 375 for the remainder of the cooking time. This will help set your crust and prevent it from becoming too soggy on the bottom. It also helps your filling to thicken.
- Bake the pie near the bottom of the oven to help make the bottom crust crisp.
- Give the pie time to set. If you make this pie and complain of a runny filling (even when taking the precautions above), it could be because you haven't given it enough time to cool. The filling needs some time out of the oven to set. So don't cut into it for at least 30 minutes once it's done baking.
- Watch the top crust. It will turn a nice golden brown. But, if you find your oven is cooking the top too quickly, throw some foil over the top (just to cover the pie, not to seal it) to prevent it from burning.
This fresh peach pie recipe does take a little bit of work, but it's totally worth it in the end. And, it's a wonderful way to make the most of all those delicious summer peaches! (Also amazing - this Salted Caramel Apple Pie - perfect for moving into fall weather!)
Serve it hot, preferably with a large scoop of vanilla ice cream, and enjoy!
If you make this Fresh Peach Pie, let me know what you think in the comments below! And don't forget to tag me on Instagram - you can't make a homemade peach pie and not show it off after all that hard work! Plus, I love to see your creations!
More Delicious Peach Recipes
- Peach Ice Cream
- Spicy Peach Chutney
- Peach Caprese Salad
- Easy Peach Cobbler
- How To Peel Peaches
- Easy Dump And Bake Peach Cobbler (Using Cake Mix!)
Recipe
Fresh Peach Pie Recipe
Ingredients
For the Pie Dough
- 2 ½ cups all purpose flour
- ½ teaspoon cinnamon
- 12 tablespoon unsalted butter frozen and then grated, or cut into small cubes
- 1 teaspoon salt
- 1 egg yolk, beaten
- 1 teaspoon cider vinegar
- ¼-3/4 cup water Note - I used the entire ¾ cup since my dough was a tad dry upon mixing.
- 2 egg white, beaten
- 1 pinch granulated sugar
For The Peach Pie Filling
- 6-7 fresh, ripe peaches, peeled and sliced
- 2 tablespoon lemon juice
- ½ cup granulated sugar
- ¼ cup all purpose flour
- 1 pinch ground nutmeg
Instructions
To Make The Pie Crust
- To start, blend your flour, cinnamon (if using), butter and salt until the mixture becomes coarse and pebble like. You can use a food processor for this, but I typically just cut the butter into the flour (or grate the flour if using frozen butter, which I recommend) and then use my fingers to combine.
- Mix the egg yolk, vinegar and ¼ cup of ice water together. Drizzle 4 tablespoons of the mixture over the dough at a time, and gently stir to combine. Keep adding a little more liquid at a time until the dough starts sticking together a bit. (Note - I ended up adding the extra ½ cup of cold water to my dough because it wasn't sticky enough.)
- Turn the dough out onto a lightly floured surface and roll up into a ball. Divide the ball into four with a knife, then flatten each ball with the palm of your hand to expand the pebbles of butter. Gather the dough together again and then divide into two pieces - one of these will be for the bottom portion of the crust, and the other for the top, so make one slightly larger than the other.
- Flatten each ball into a disc and wrap them in plastic wrap. Place in the refrigerator for at least 60 minutes. (I refrigerated mine for about 24 hours since I wasn't using it until the next day.)
Peach Pie Filling And Assembly
- Preheat the oven to 425.
- If your dough has been chilling a while, take it out of the refrigerator and let it sit for about 30 minutes. This will make it much easier to roll into your crust later.
- Combine the sliced, peeled peaches, lemon juice, sugar and flour in a large bowl, and mix to combine.
- Roll out your larger pastry disc on a lightly floured surface and place in a 9-inch pie plate. Brush half of the egg-white across the top of the bottom layer of crust.
- Add your peach mixture and sprinkle in the ground nutmeg.
- Roll out the second disc of pastry and place on top of the filling. Wet the top edges of the bottom pastry disc with some cold water, trim any excess pastry off the sides, and pinch the bottom and top edges of the pie together (the water helps hold the crusts together while baking).
- Cut a few slits in the top crust to allow steam to escape from the pie when baking.
- Brush the remaining egg white on top of the pie, especially around the edges, and sprinkle with a pinch of granulated sugar and cinnamon.
- Bake the pie for 15 minutes at 425, then reduce the heat to 375. Cook the pie for an additional 45 minutes to an hour (you'll know your pie is done when the peach mixture is bubbling and the crust is a nice golden color.
- Serve, and don't forget to add ice cream!
Notes
- Fresh peaches work best here, although you can also get away with using frozen if you're making this pie off-season.
- If you find your peach pie filling seems a bit too runny (especially if you've made the filling in advance), let the filling sit in a colander for a few minutes to drain some of the juices. Because the sugar brings out the juice in the fruit, it's best to make this filling as close as possible to when you're going to make the pie. This prevents it from becoming too juicy. Using less sugar than the NYT recipe originally called for also helped cut down on some of the extra juice.
- "Seal" your double pie crust with water. When making a double pie crust, brushing the bottom edges of the crust with water before adding the top layer can help seal the pie once you pinch the edges together.
- Add an egg white wash to both layers of the crust. A great trick for pies is to add an egg white wash not only to the top of the pie but to the bottom pie layer as well, prior to adding your filling. Adding the egg white wash to the top of the pie will give the pie crust a nice golden color on the top and also help your sugar sprinkles stick to the crust. Adding it to the bottom layer of the pie helps to create a seal between the crust and the pie filling, and helps to prevent a soggy pie bottom.
- Don't forget the vents! When you bake a pie with a double crust, the filling produces a ton of steam. Not adding vents may cause your pie to rupture (the steam has to go somewhere, right?) and can make the crust a soggy disaster. Four simple slits made with a sharp knife are enough to prevent this from happening. Or, you can get really fancy and use a pastry cutter to cut shapes into the top of the pie.
- Start your temperature off high for the first 15 minutes (425 degrees), then reduce it to 375 for the remainder of the cooking time. This will help set your crust and prevent it from becoming too soggy on the bottom. It also helps your filling to thicken.
- Bake the pie near the bottom of the oven to help make the bottom crust crisp.
- Give the pie time to set. If you make this pie and complain of a runny filling (even when taking the precautions above), it could be because you haven't given it enough time to cool. The filling needs some time out of the oven to set. So don't cut into it for at least 30 minutes once it's done baking.
- Watch the top crust. It will turn a nice golden brown. But, if you find your oven is cooking the top too quickly, throw some foil over the top (just to cover the pie, not to seal it) to prevent it from burning.
Explore More with AI
Nutrition


Matty S. says
Gorgeous, and hits the spot on a late summer afternoon.
Sarah Jenkins says
Awe - thanks!